Meccano Pro Aramco Aston Martin F1 Set No. 26303
Posted by Kiran Parmar | Oct 2, 2026 | Meccano, Model Cars, Articles

If you are a regular reader of Free Car Mag, you will no doubt know, we love hands on, mechanical toys, none more so than Meccano. In fact, we grew up playing with Meccano and physical toys rather than video games. The beauty of these toys is that you learn at a young age; problem solving, engineering, construction methods, how to use tools, and even complex architecture. After building a Meccano set you end up with a beautiful model you can display and be proud of. Alternatively, you could spend several hours playing a video game and when you switch off your PC or games console you have nothing tangible to show for it, except maybe a headache due to staring at a screen for too long!
Meccano was created in 1898 by Frank Hornby in Liverpool, England. A clerk searching for an engaging way to teach his sons mechanical principles, Hornby devised a modular system using perforated metal strips, plates, gears, and pulleys held together with small nuts and bolts.
He patented the concept in 1901 under the name “Mechanics Made Easy.”
In 1907, Hornby registered the trade name Meccano and established Meccano Ltd, opening a dedicated manufacturing facility at Binns Road in Liverpool.
Because all perforated strips shared standardized hole spacing, builders could assemble everything from working cranes and bridges to complex clockwork devices, sparking a generation’s interest in mechanical engineering.
Throughout the 1920s to 1950s, Meccano grew into a global phenomenon, fuelled by official builder clubs and the widely read ‘Meccano Magazine.’
Facing heavy competition from plastic building bricks like LEGO in the late 20th century, the company underwent several ownership changes, including acquisitions by Lines Bros, Airfix, and eventually Spin Master in 2013.
Modern Meccano sets incorporate robotics, motors, and plastic components while preserving Hornby’s original core design of nut-and-bolt assembly.
Meccano is strong, in fact very strong! Unlike Lego which is made of plastic with pieces fitting together using a push-fit brick system, Meccano is metal and uses old fashioned nuts, bolts and washers to fasten pieces together.
In James May’s famous TV Series, ‘James May’s Toy Stories,’ James and his team of engineering students built a fascinating ‘Bridge of no return’ – Swing bridge, over a canal in Liverpool opposite the Liver building and James walked across his Meccano bridge. In the same program, James used four lengths of Meccano, one piece supporting each wheel, to lift his Porsche 911 ‘G-Series’ into the air using a crane and even popped his head under the vehicle to illustrate the sheer strength of Meccano pieces. In season 2, James and his engineer Sim Oakley, build a motorcycle with side car, powered by a combination of Meccano and milk float motors, and did a lap of the famous Isle of Man TT course. The motorcycle had to go through an MOT for it to be road legal.

Just as a real Formula 1 car needs to be incredibly strong yet lightweight to cope with immense G-Forces and crashes, Meccano is the perfect medium to replicate a F1 car, albeit in 1:8 model scale and that is exactly what Meccano and the Aston Martin Formula One team have created together. Based on the 2025 ‘AMR25’ Aston Martin F1 Race Car, the duo has designed and created a beautiful and realistic model kit that you can build in the comfort of your home.
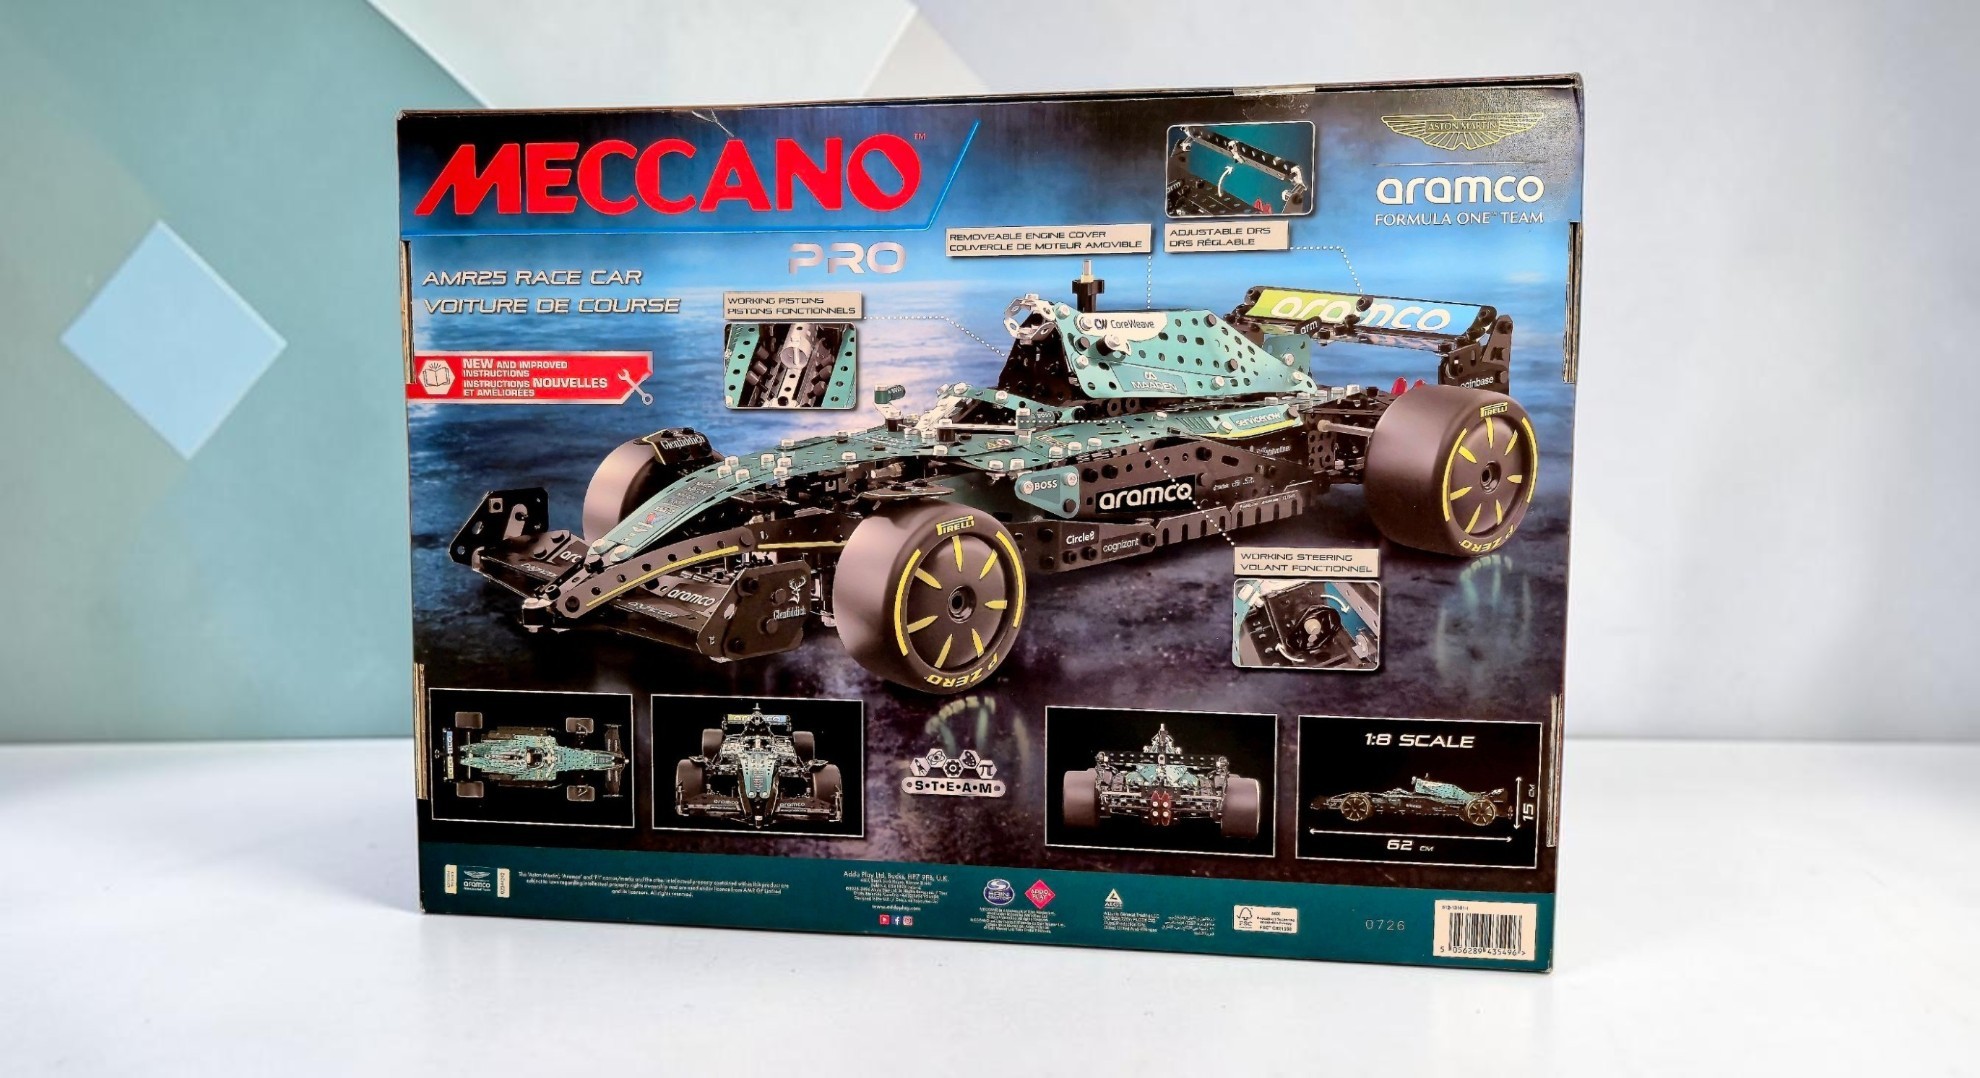
Boasting 1,203 pieces, this 18+ ‘Pro’ kit is the most advanced level of Meccano and gives you a taste of what goes into building a Formula 1 car. With functioning pistons and rotating crankshaft, the V6 Engine comes to life with substance behind the stylish exterior bodywork. You also get a removable engine cover, adjustable DRS flap, and working steering.
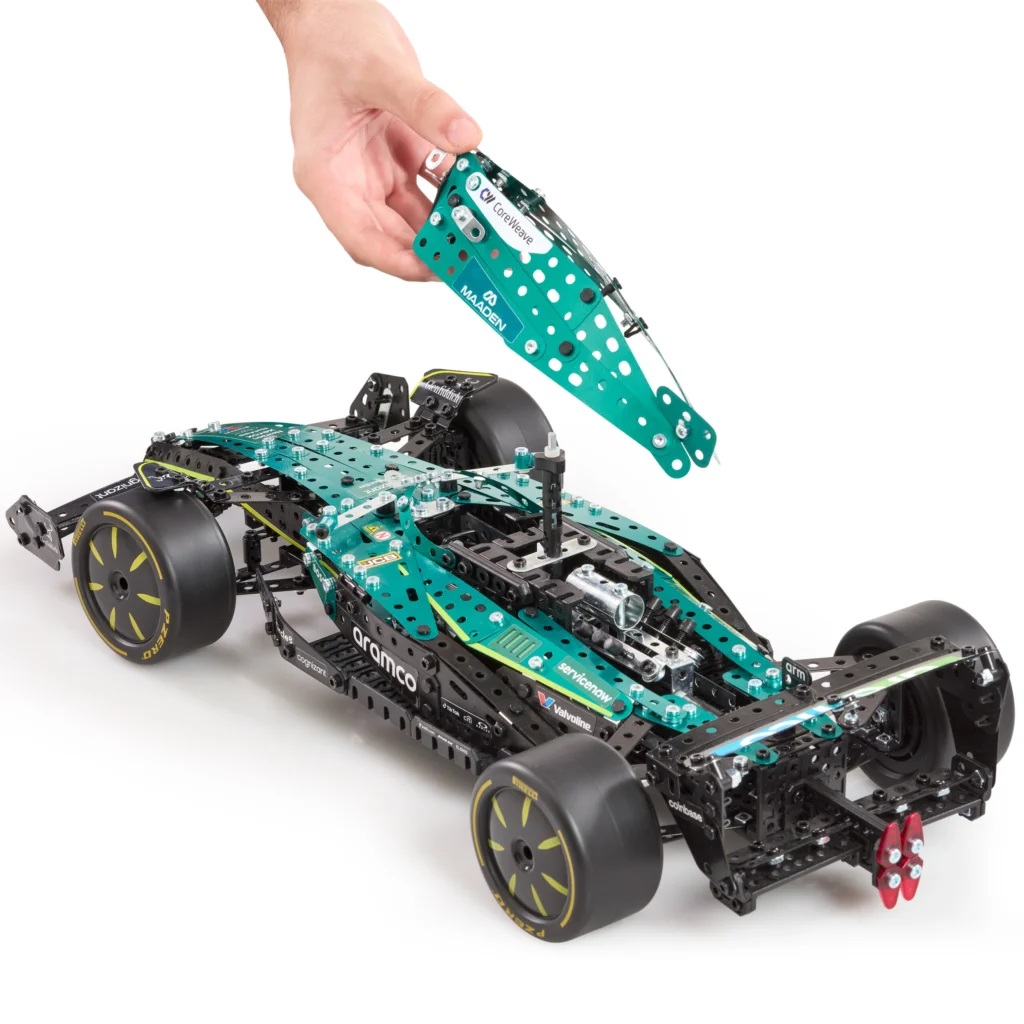
Meccano and Aston Martin have paid strict attention to detail, from the correct sponsorship decals on the bodywork all the way down to the tyres with the correct ‘Pirelli P-Zero’ markings on the tyre walls. The Free Car Mag team have been given one of these limited edition sets and as you can imagine we are super excited to start building.
In the section that follows, we have created our ‘Meccano Workshop Diary’ where we will cover all 10 phases of the build with photos and videos, so stay tuned to this page with regular updates coming soon.
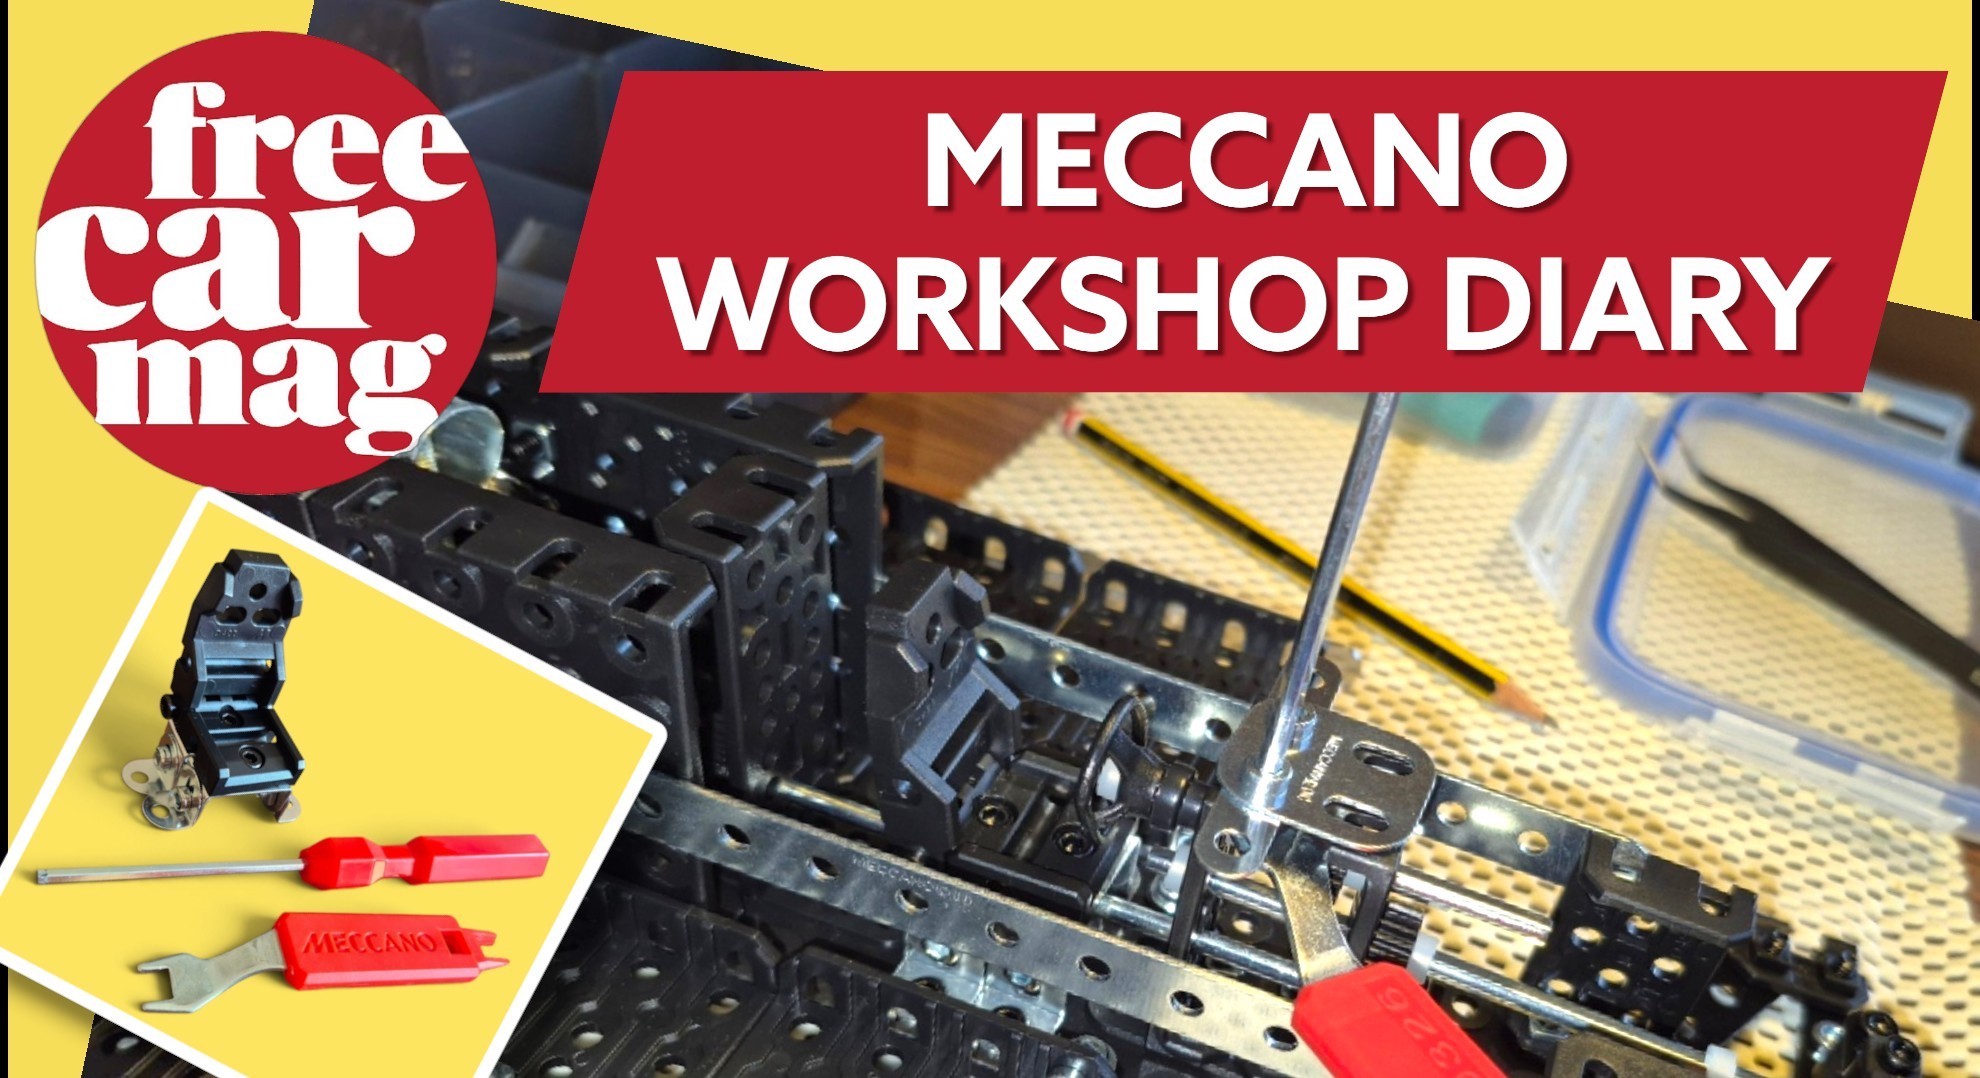
FCM Meccano Workshop Diary
Before we started building, we organised all the pieces into a sorting case and small lockable tubs. You will need a clean, well-lit desk or table. Tweezers are handy especially if you have large fingers. A screwdriver and spanner are provided in the kit. Keep small children and pets always supervised as the pieces are very small and are an obvious choking hazard. Just like any project, take your time and avoid rushing, don’t attempt to do too much all in one go to avoid frustrations. Take regular breaks and try to enjoy the process. There are several bolts of different sizes so always check you have picked up the correct bolt by comparing it to the 1:1 diagram in the manual shown in each step. Always double check the diagram in the manual to ensure you are fitting the correct bolt to the correct hole.
Phase 1:
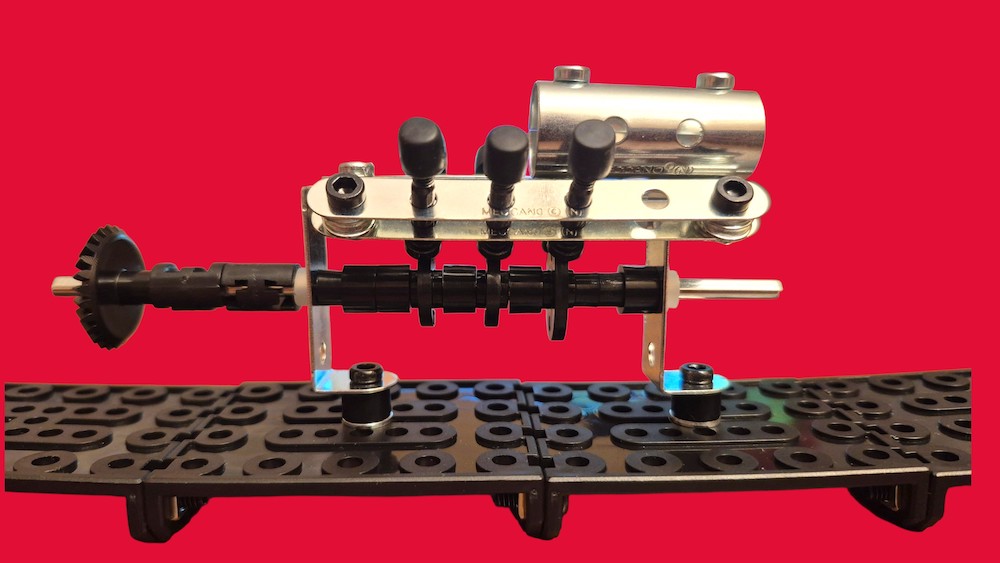
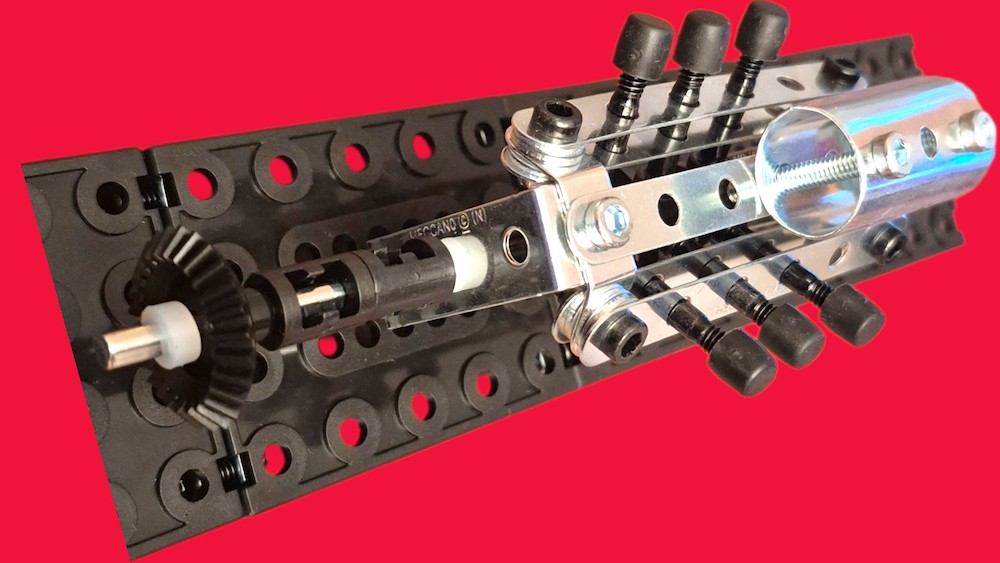
Engine block, pistons, crankshaft and floor pan — This is a fairly simple section and interesting start to the build as you get straight into the building of the engine. It is satisfying to see the engine rotate and see the pistons move up and down in the V6 configuration.
Phase 2:
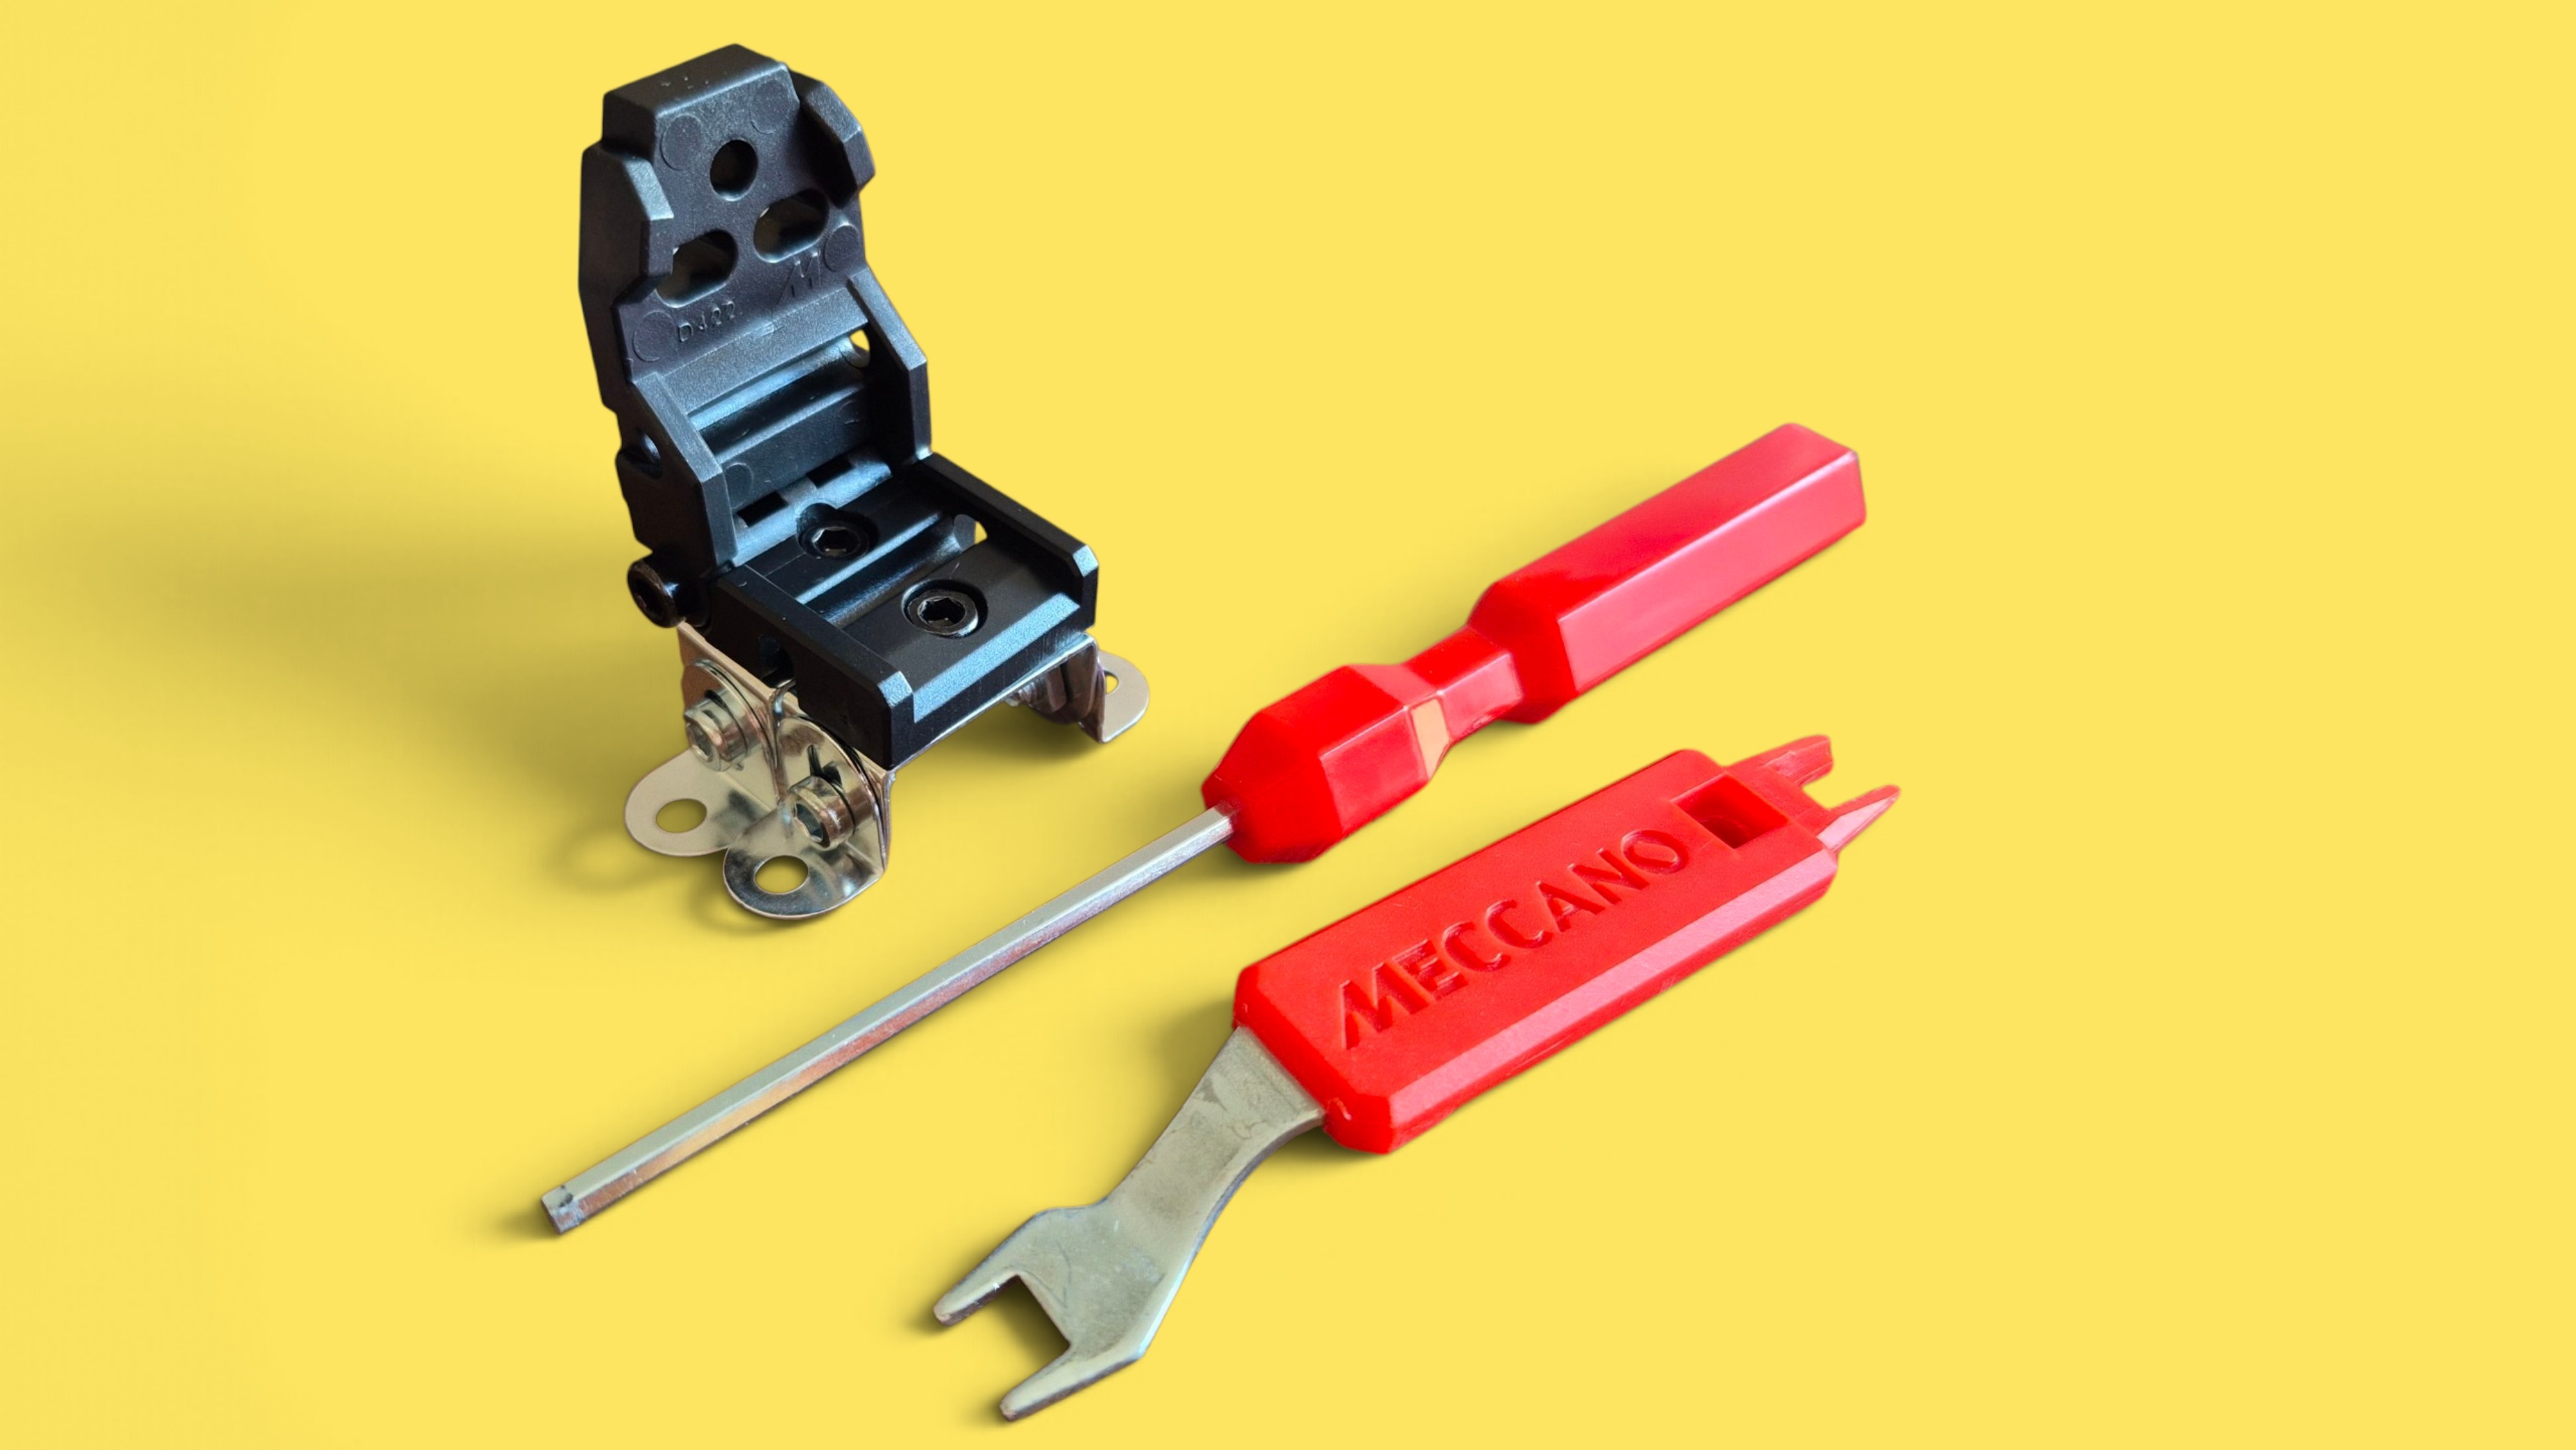
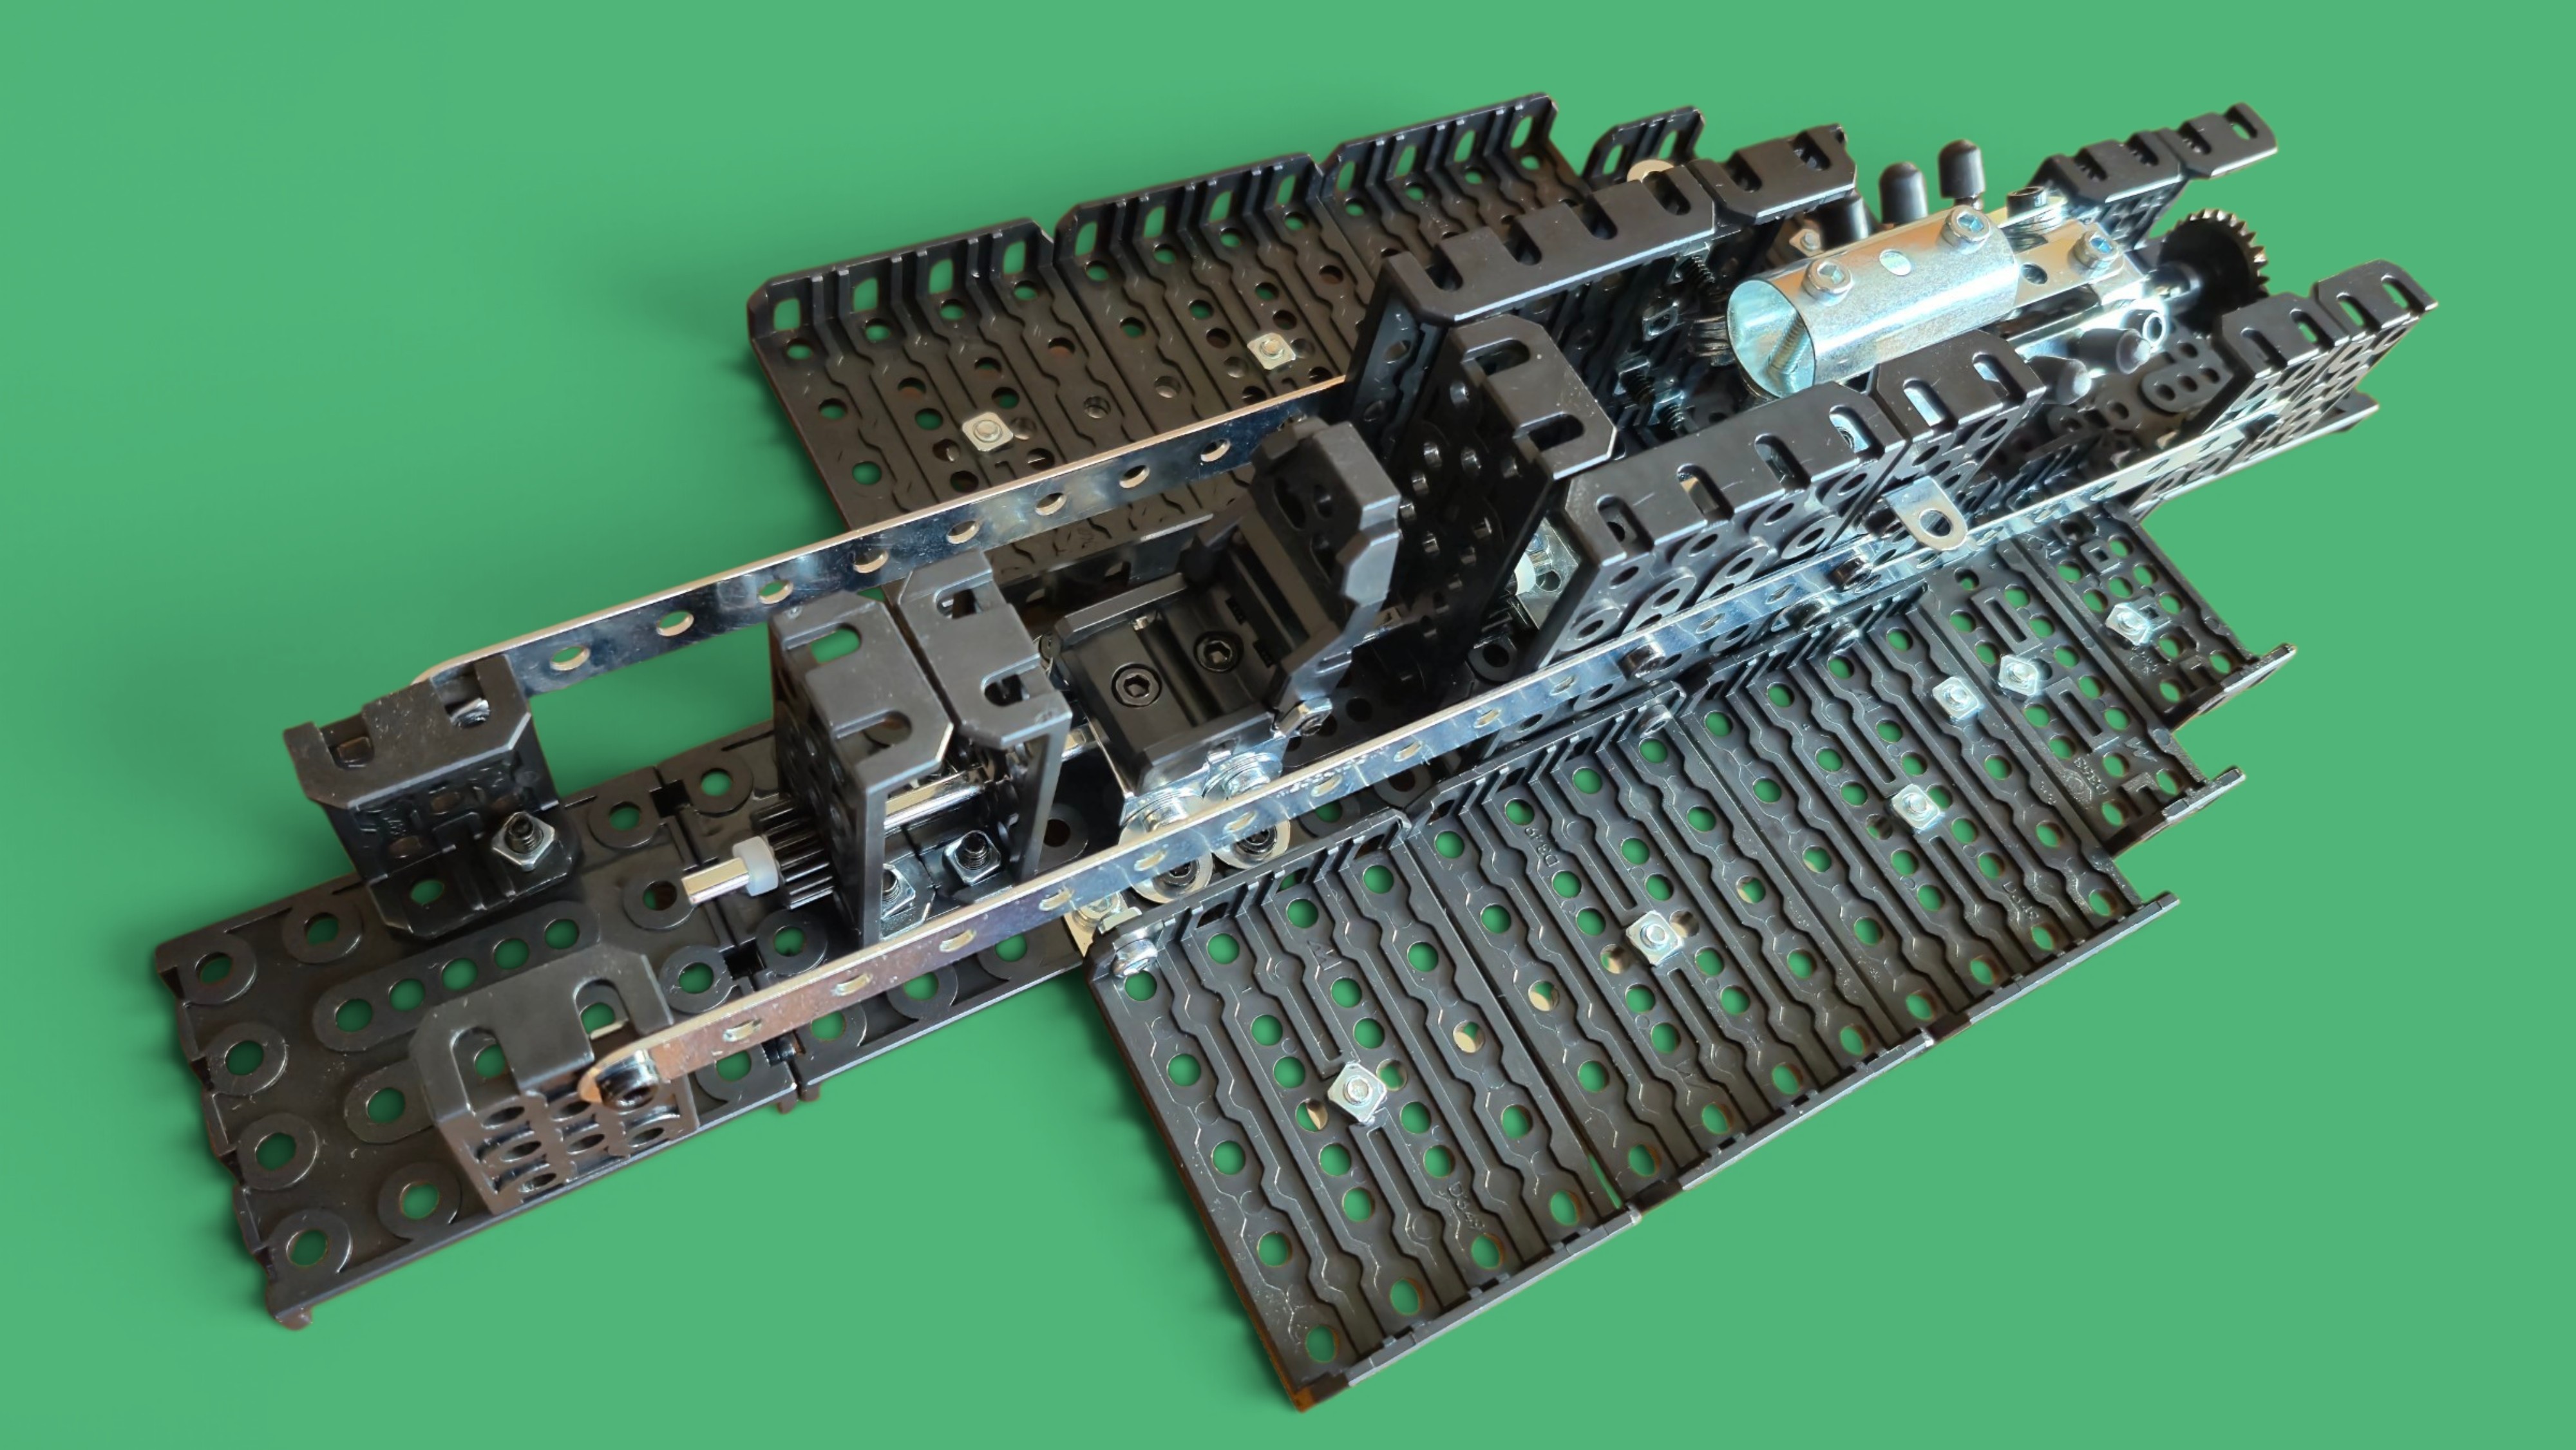
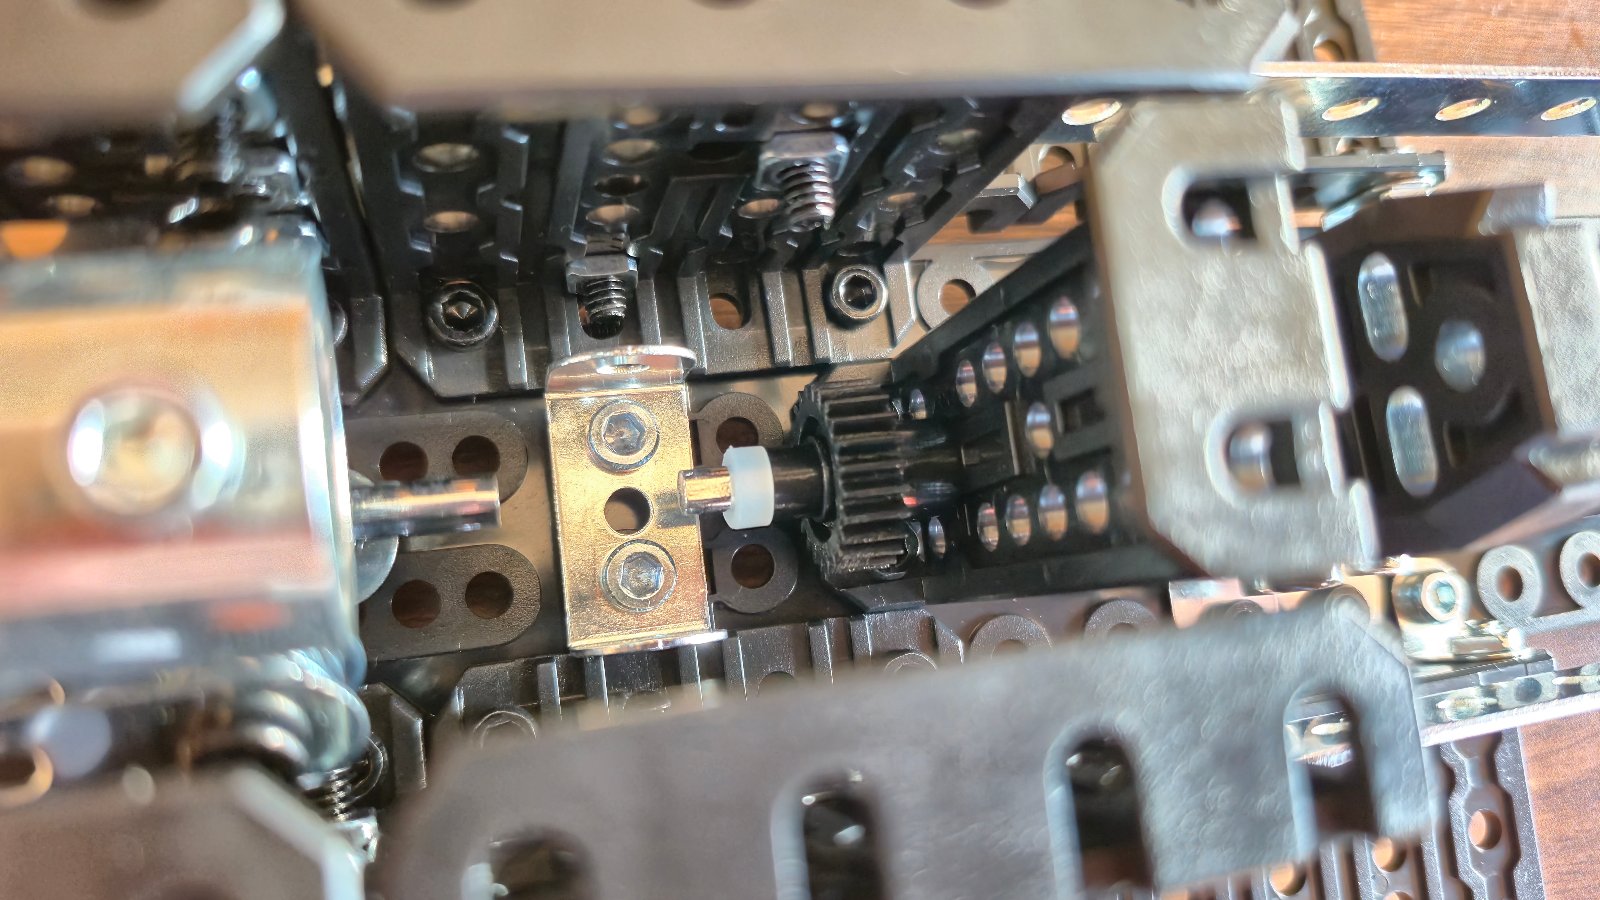
Things start to get serious with the expansion of the car’s floor, engine housing, and strengthening beams to make the chassis rigid. You start to see the build grow in length and get a taste of how big the finished model will be. Assembly of the driver’s seat is a fun part of the construction. There is a tricky bit in part 32 where you need to insert a gear, plastic and rubber washers onto a shaft in a tight space in the engine compartment, we used a set of precision tweezers and a lot of patience to get the parts in! This section took us a couple of afternoons, like we said at the beginning, take your time to avoid making silly mistakes!
Phase 3
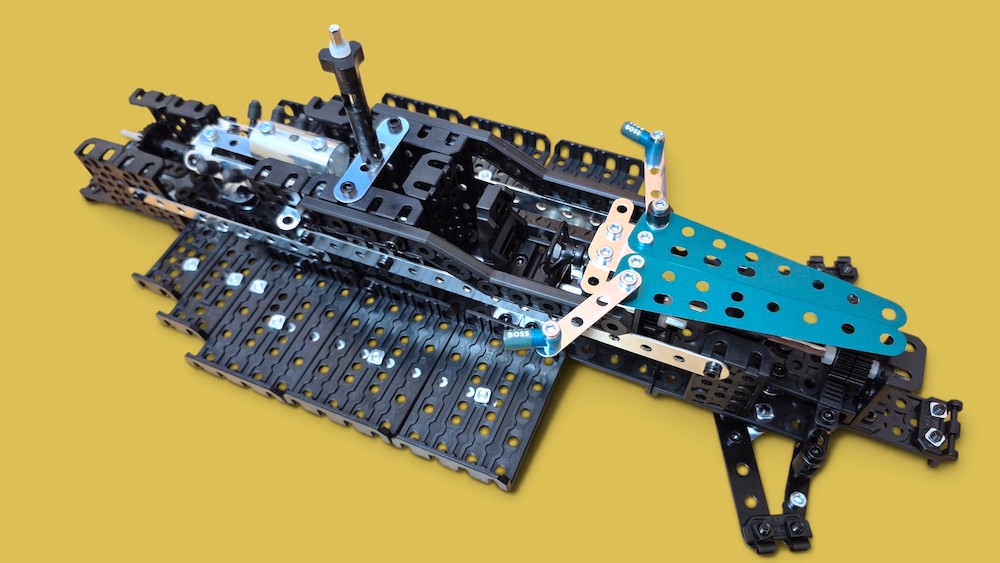
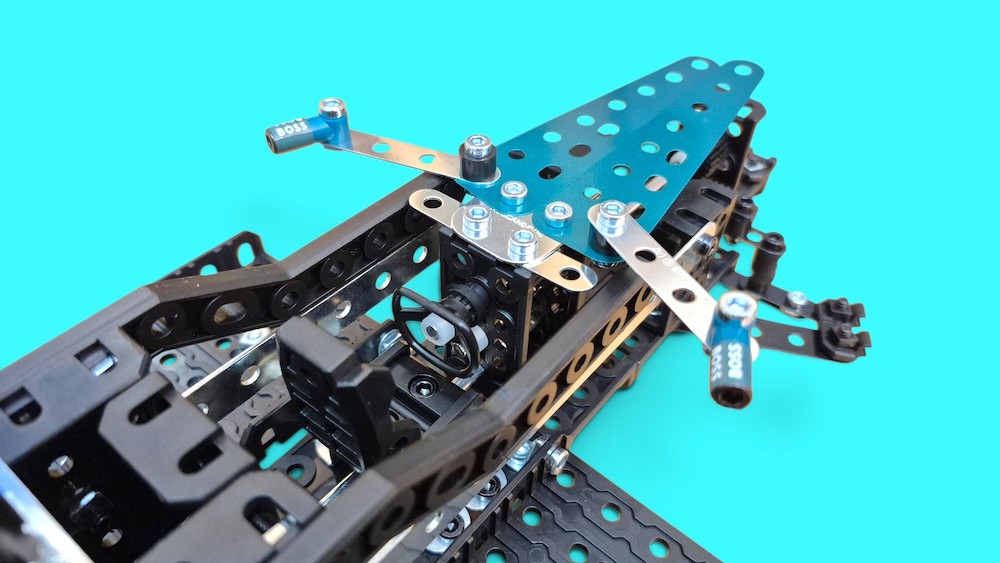
Phase 3 gets technical with gears and shafts as we start building the rack and pinion steering system. We also add the first pieces of the stunning turquoise green bodywork and wing mirrors along with their ‘Boss’ decals.
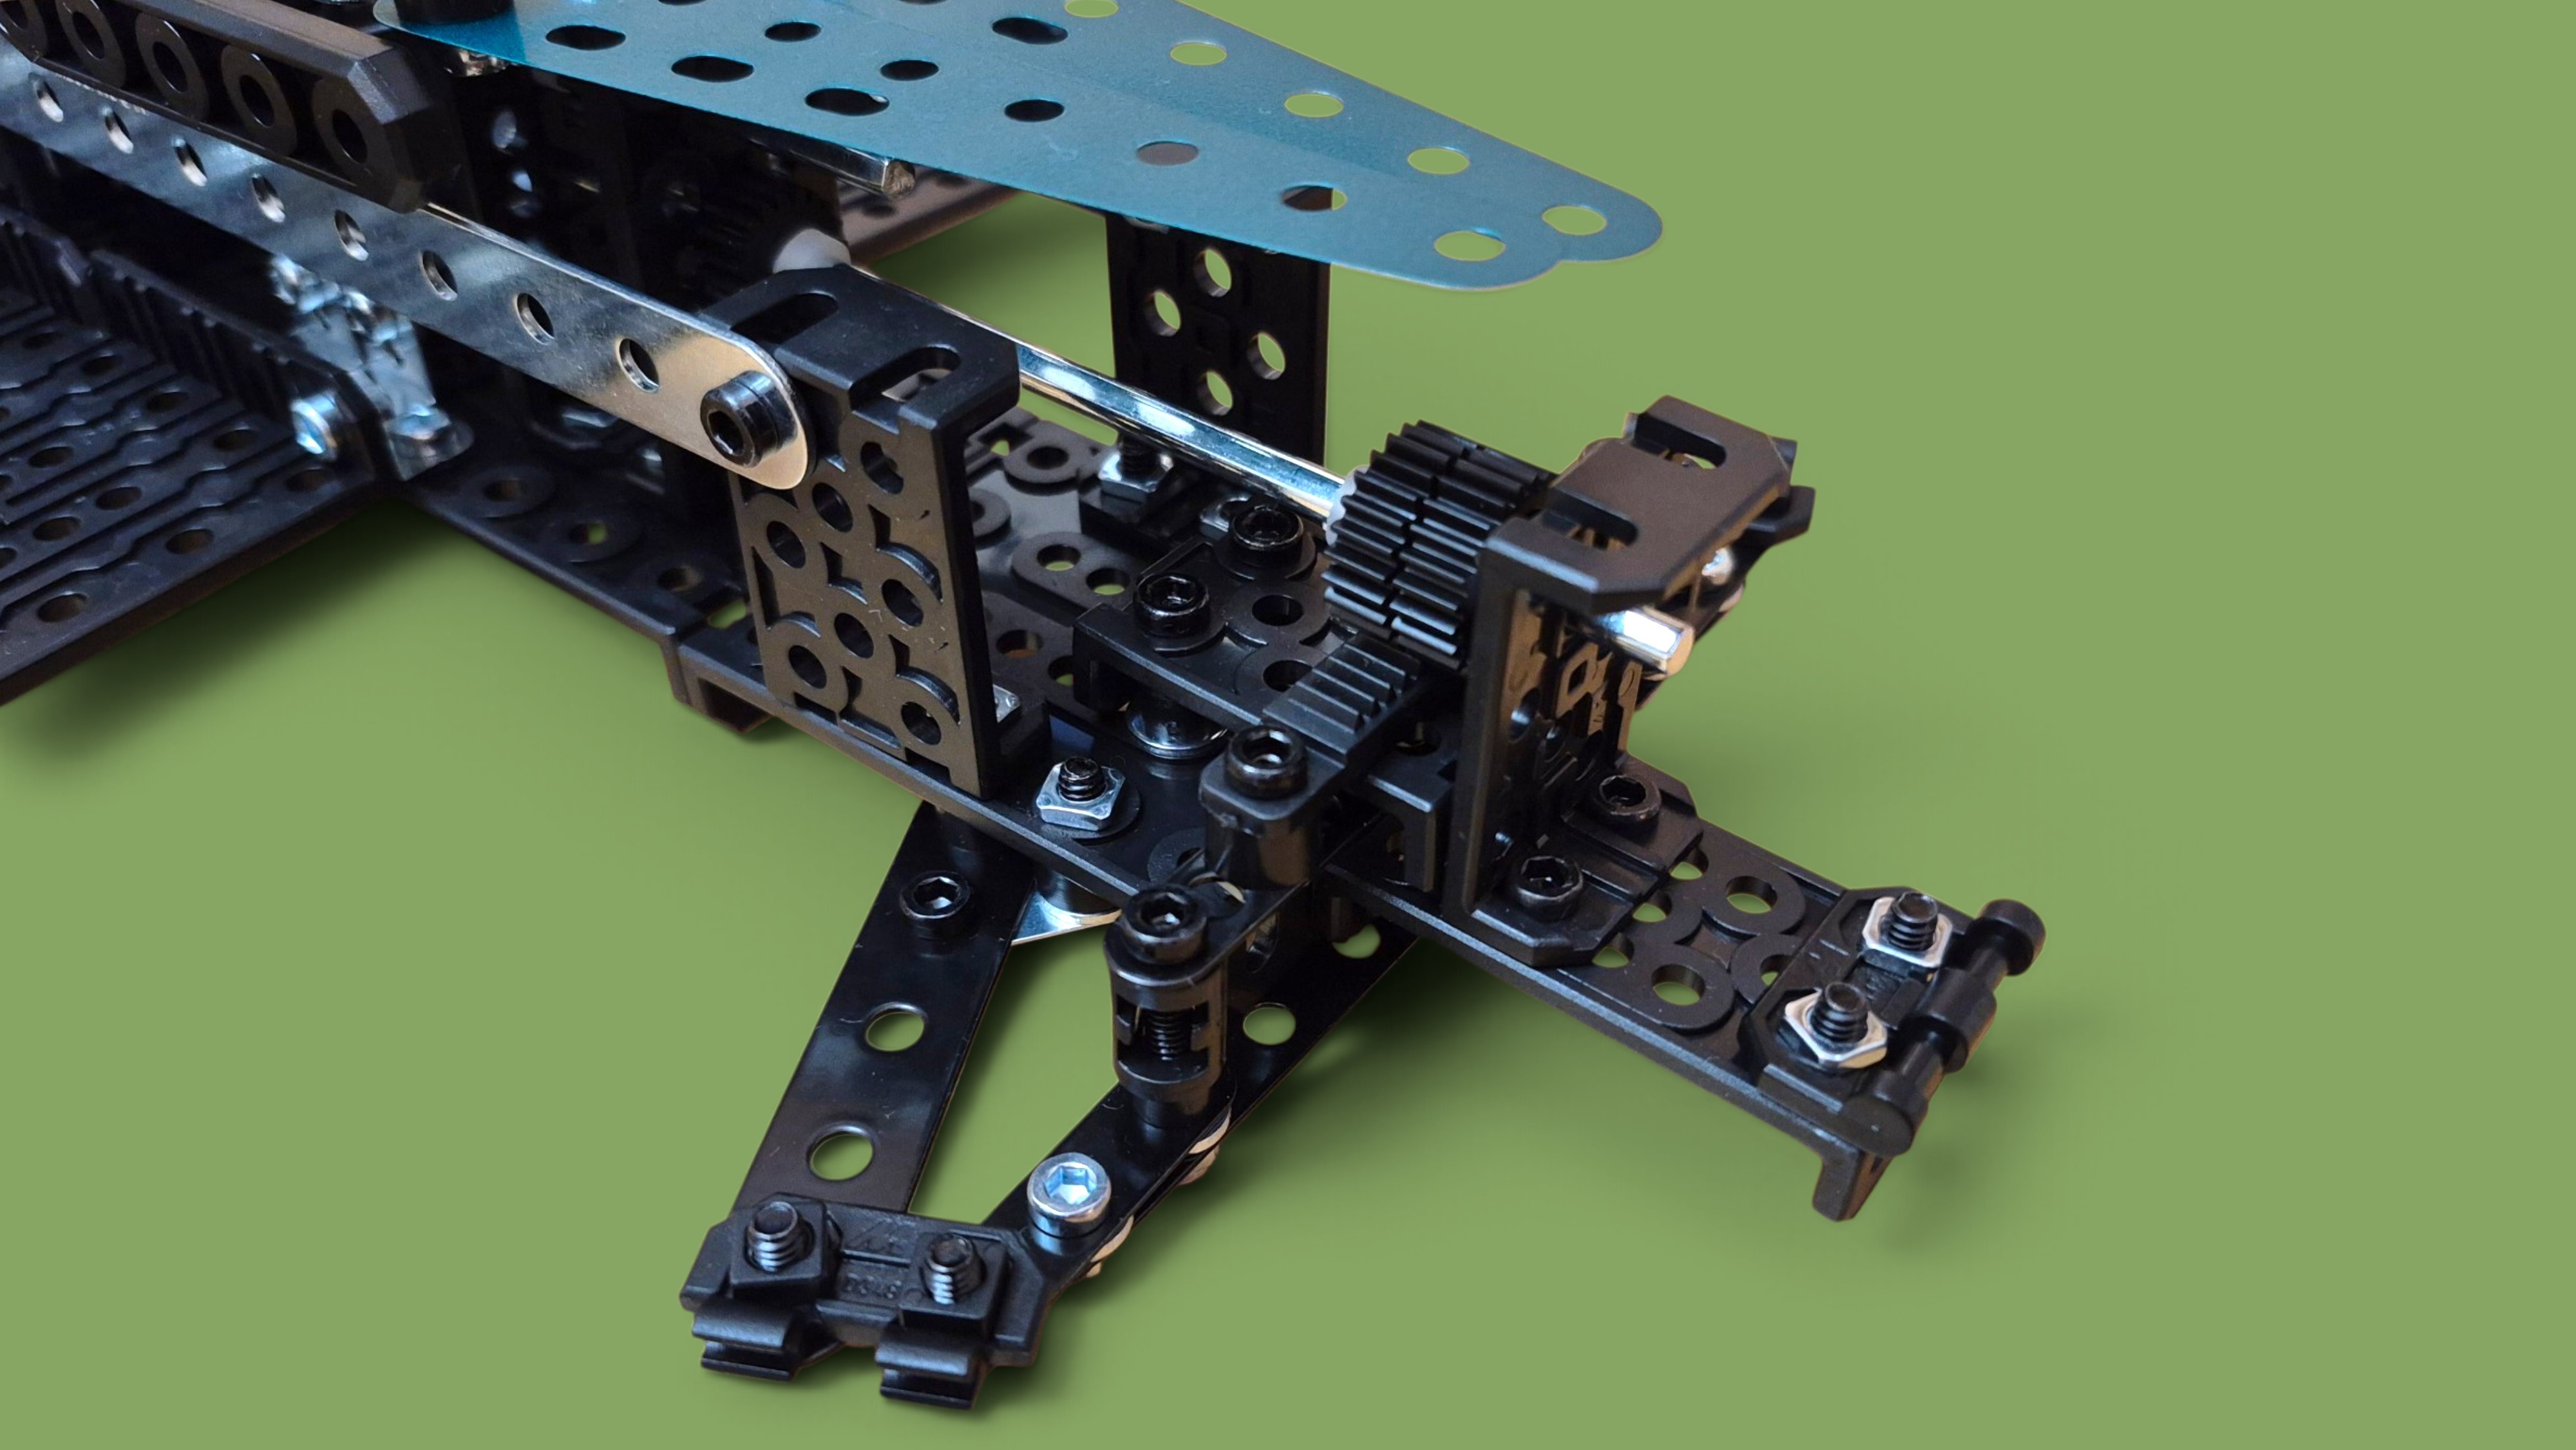
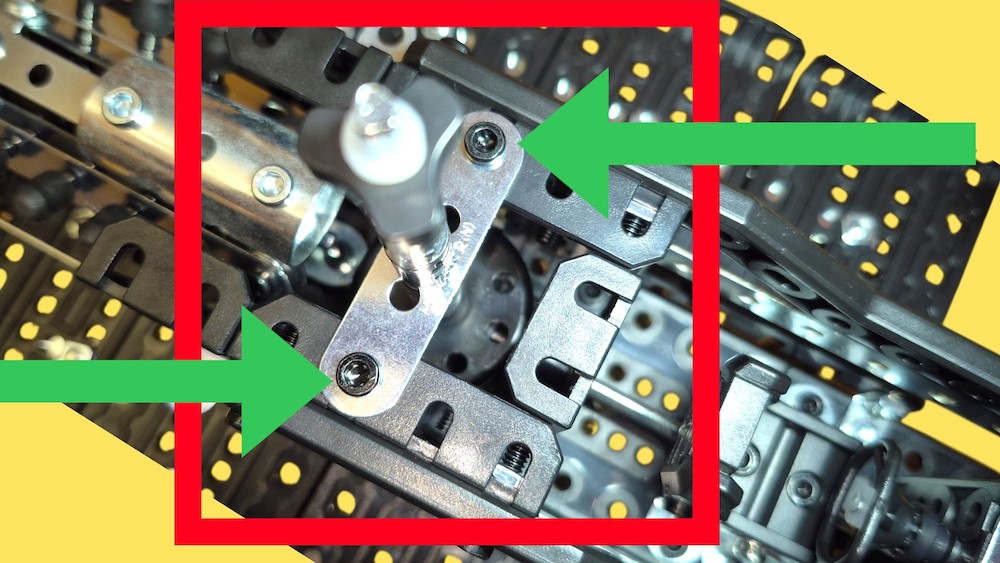
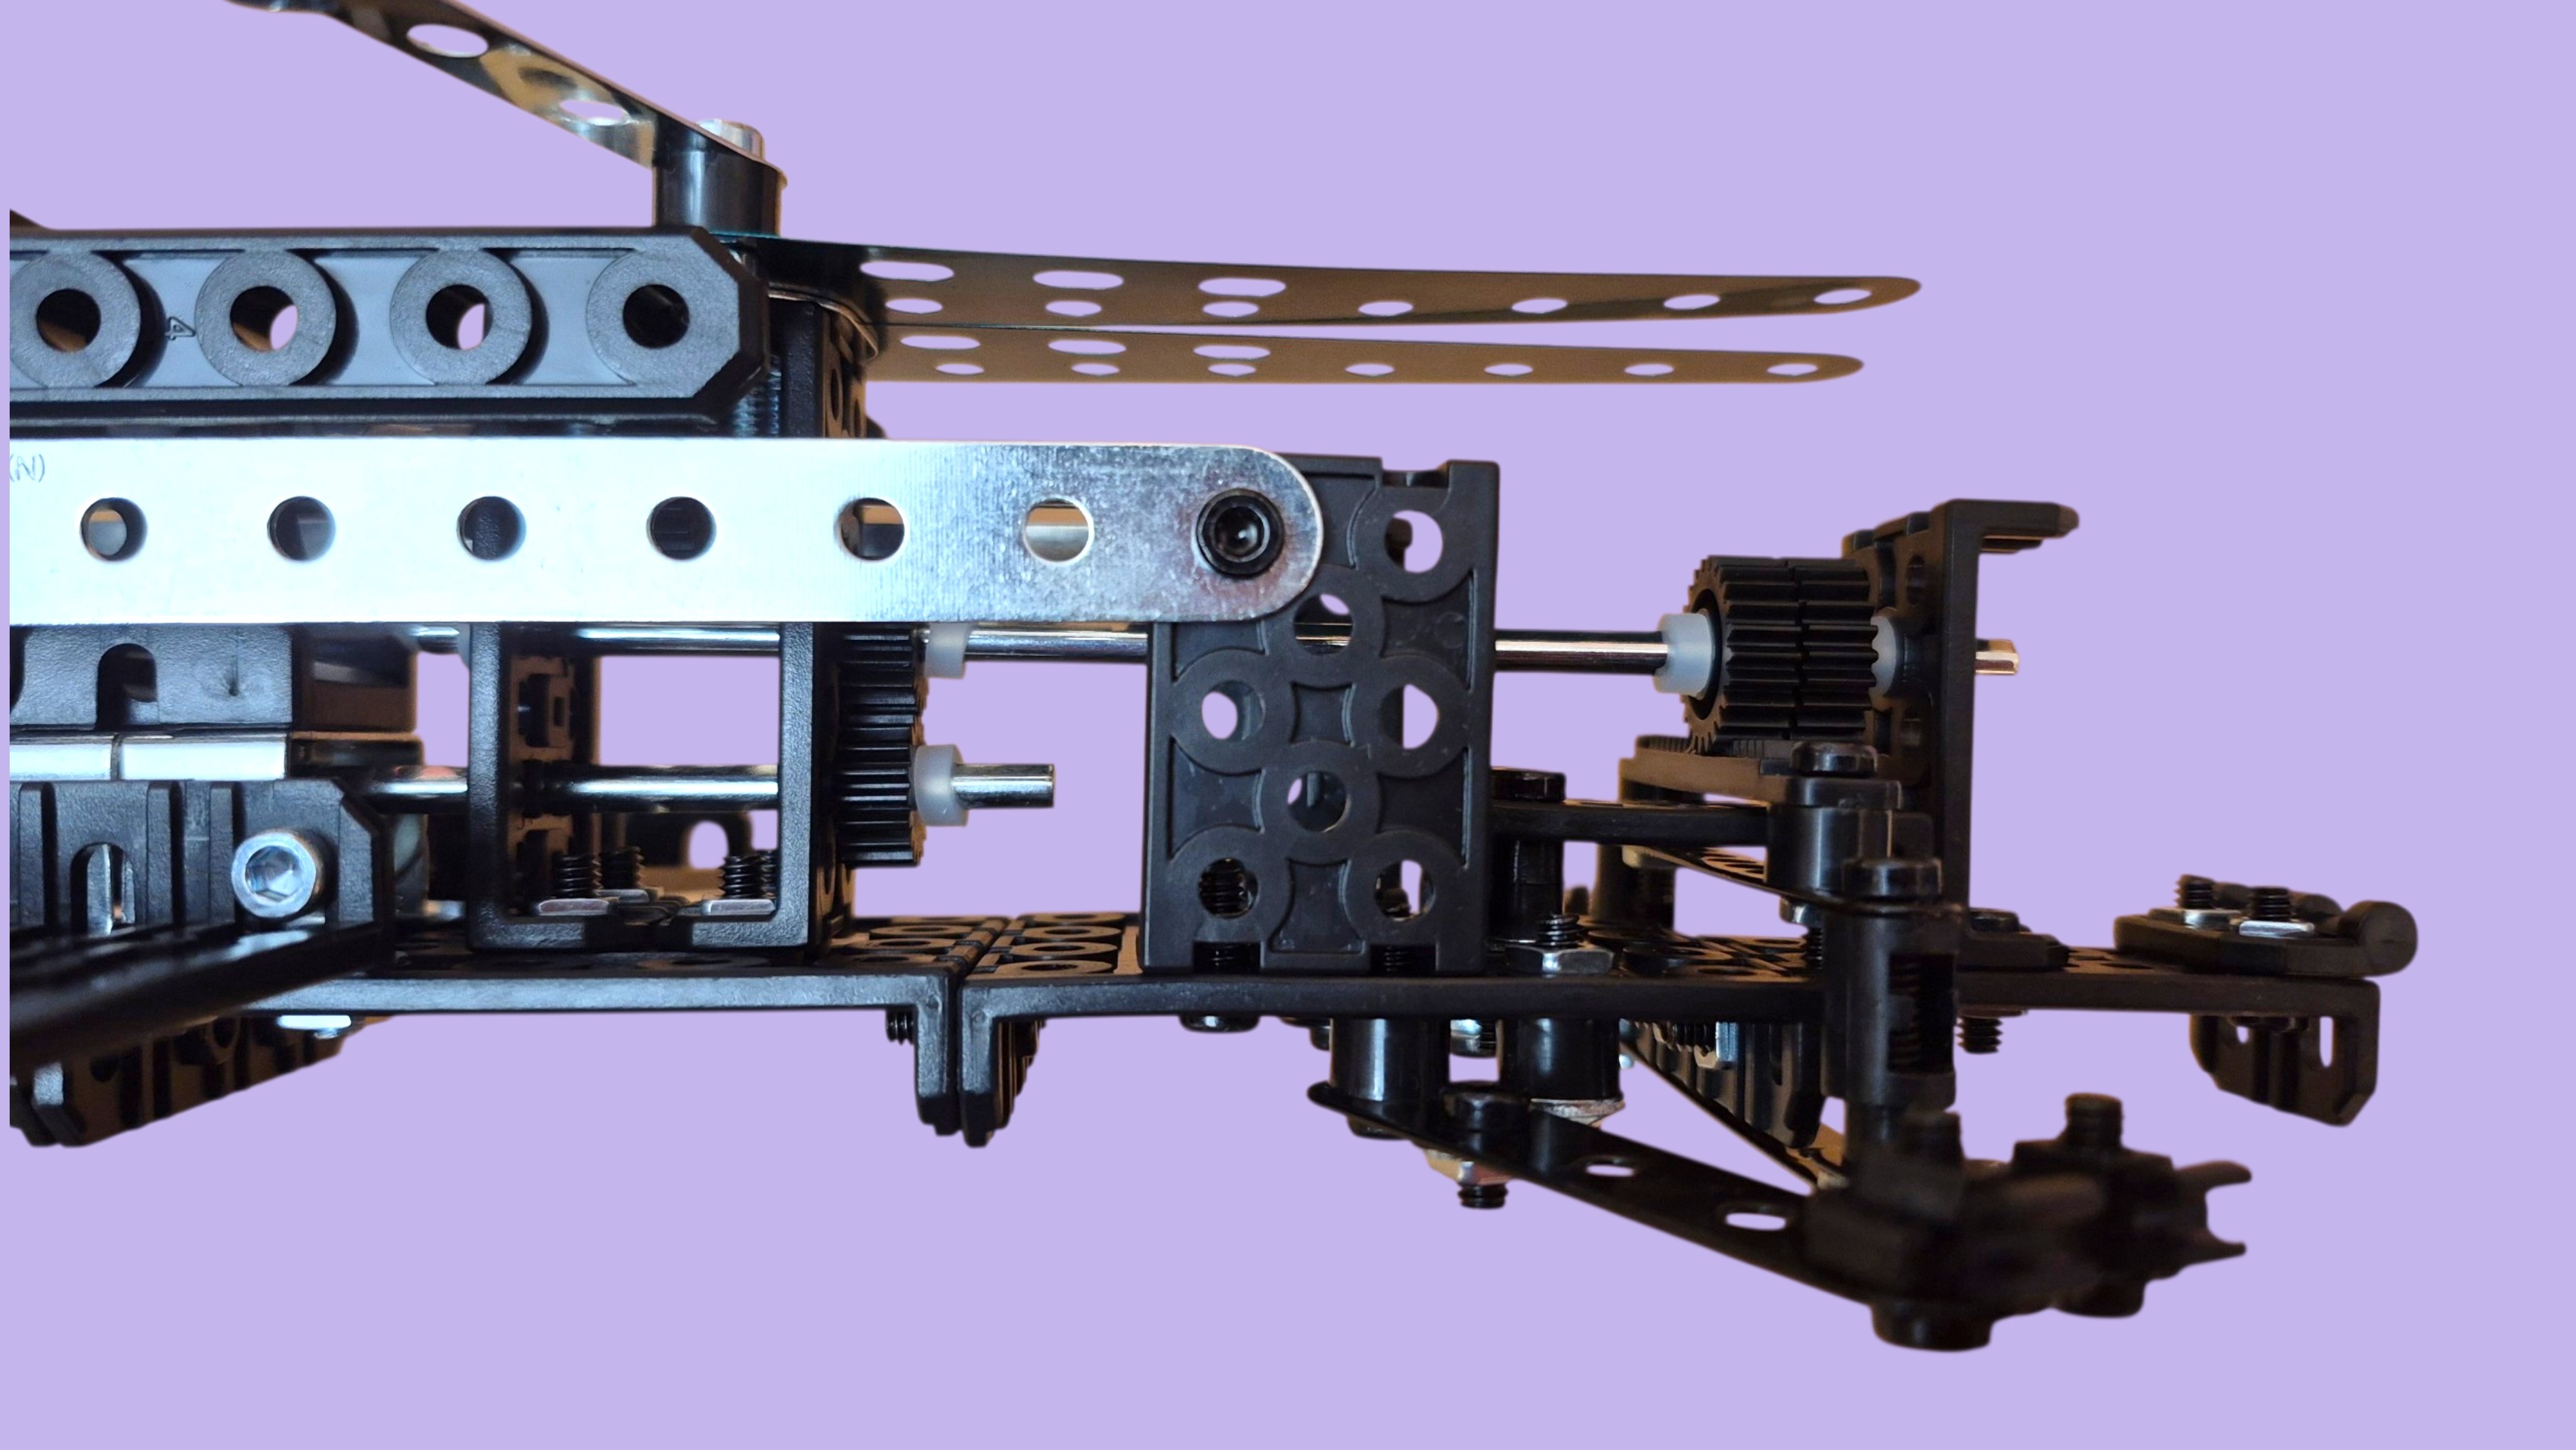
This section was very interesting as you learn the very basics as to how a car’s steering works. It also requires skill and patience as the bolts and nuts highlighted in the green arrows above are not easy to install. Our top tip is to attach some Scotch Magic tape to the bottom of the Meccano spanner and stick the nut to the tape, then turn the bolt with the screwdriver and allow the bolt to gently ‘catch’ the nut and lift off from the tape. Trying to put your fingers in the steering box is completely impossible as the space is so tight. If you find there is too much friction on the steering rack, loosen the plastic bolts so the system moves more freely.
Phase 4
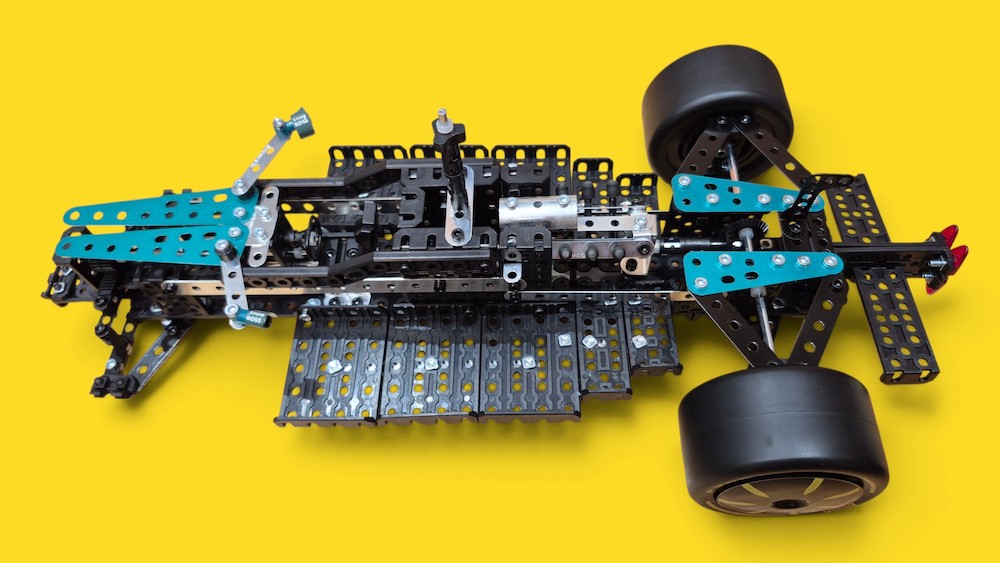
Phase 4 focuses mainly on the rear axle area, one of the most interesting parts of the build so far. The rear wheels of a real Formula 1 car are held and controlled by a multi-component suspension and wheel assembly system connected directly to the car’s structural gearbox.
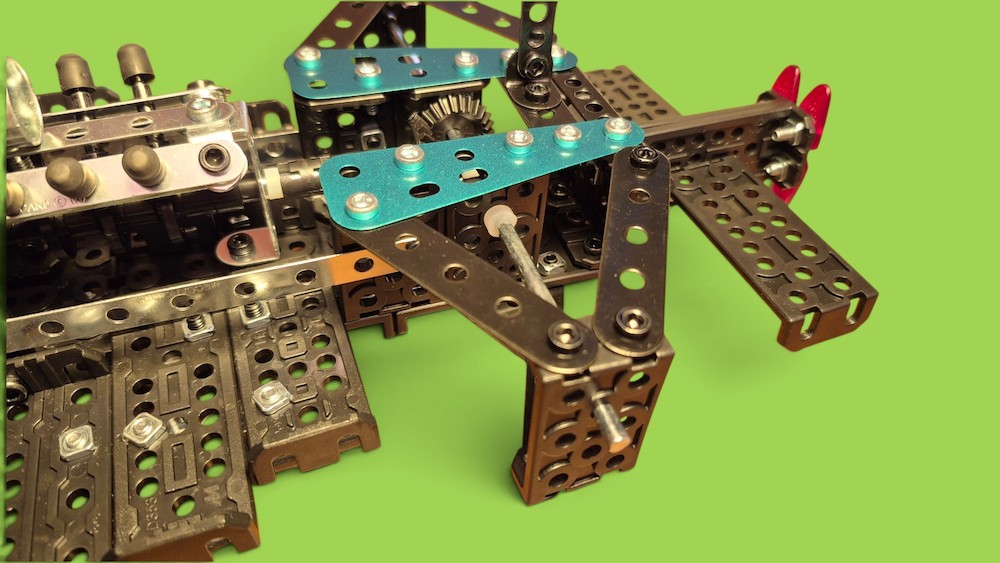
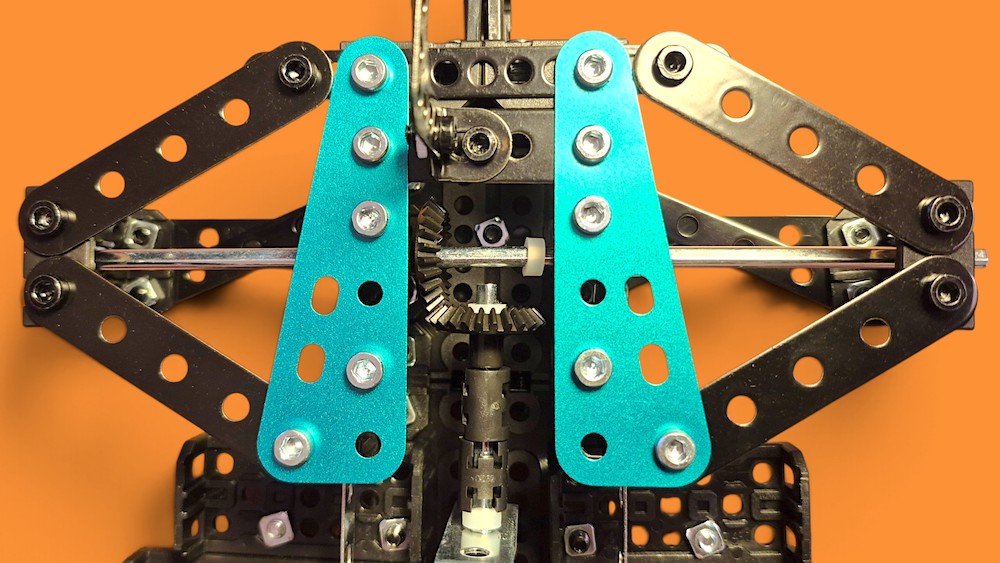
We start with some chassis work that will be the foundation for the rear spoiler and DRS system, the rear light is installed, then a couple of pieces of the metallic turquoise bodywork, followed by the gearbox, then the upper and lower wishbones and finally the best bit; the rear wheels and Pirelli P-Zero tyres are fitted!
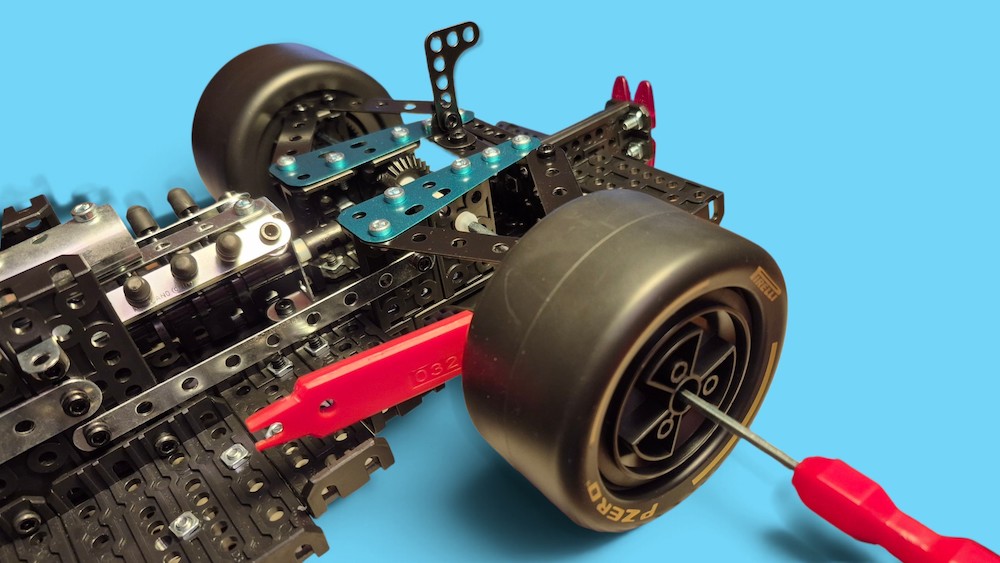
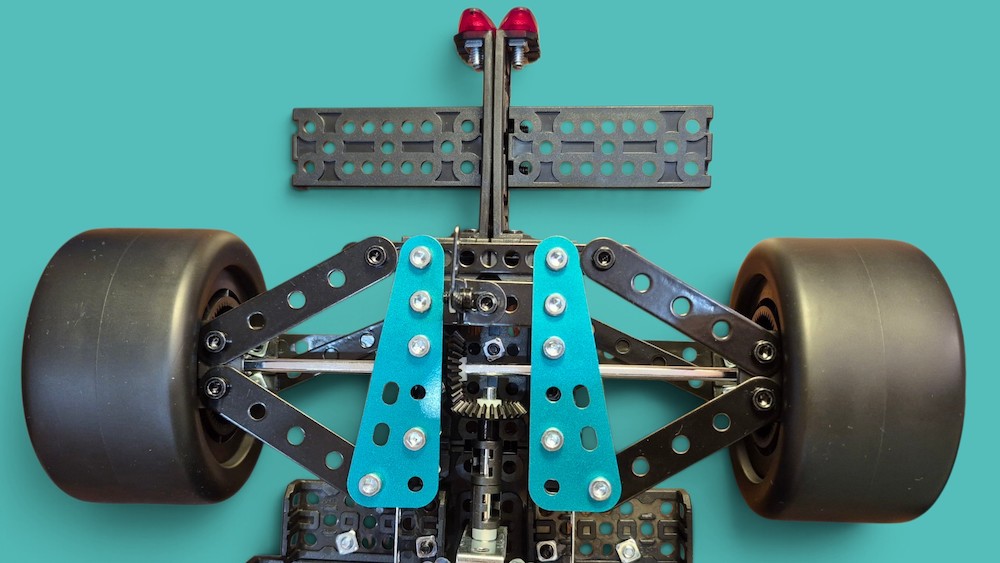
You must mount the tyres onto the wheels and then fit the wheel to the hub with a single wheel nut just like they do in the real F1 pit stops. As you turn the rear wheels, you can see the gearbox spin and the pistons and crankshaft in the V6 engine moving in harmony.
In a real F1 car, the casing of the gearbox acts as the main structural backbone at the rear of the car, providing the direct mounting points for the rear suspension, wishbones, and the rear wing. Modern F1 cars use a hydraulic multi-clutch pack limited-slip differential (LSD) located just behind the gearbox. Because F1 cars are exclusively rear-wheel drive, they do not have a front differential.
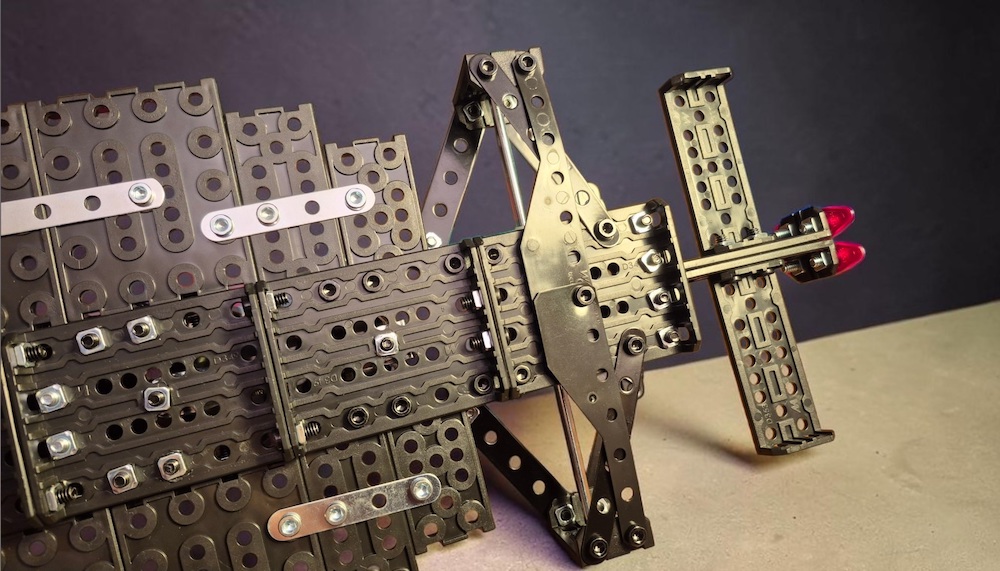
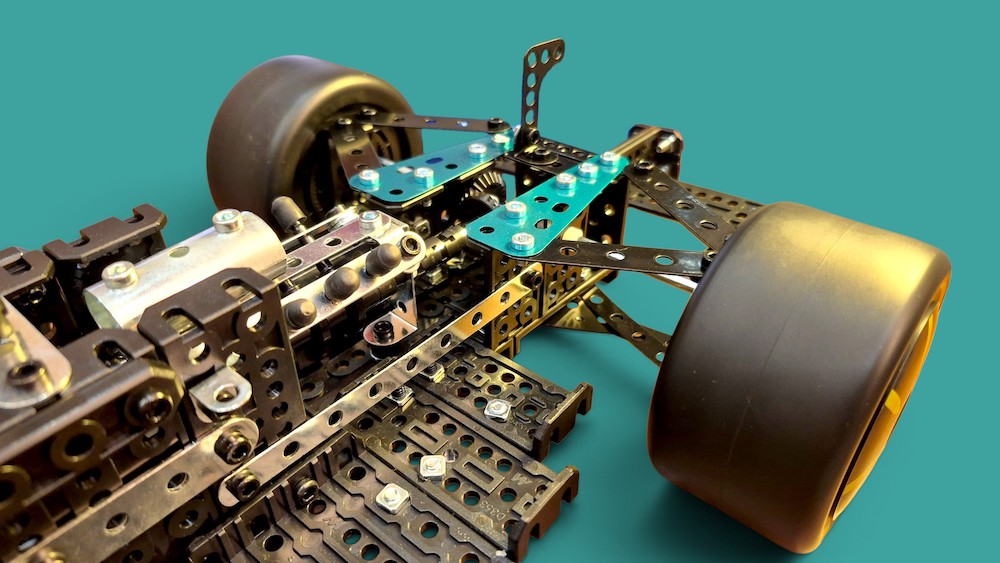
It is certainly impressive how Meccano have kept this model as real to life as possible, bearing in mind space and parts limitations for a 1:8 model.
Phase 5:
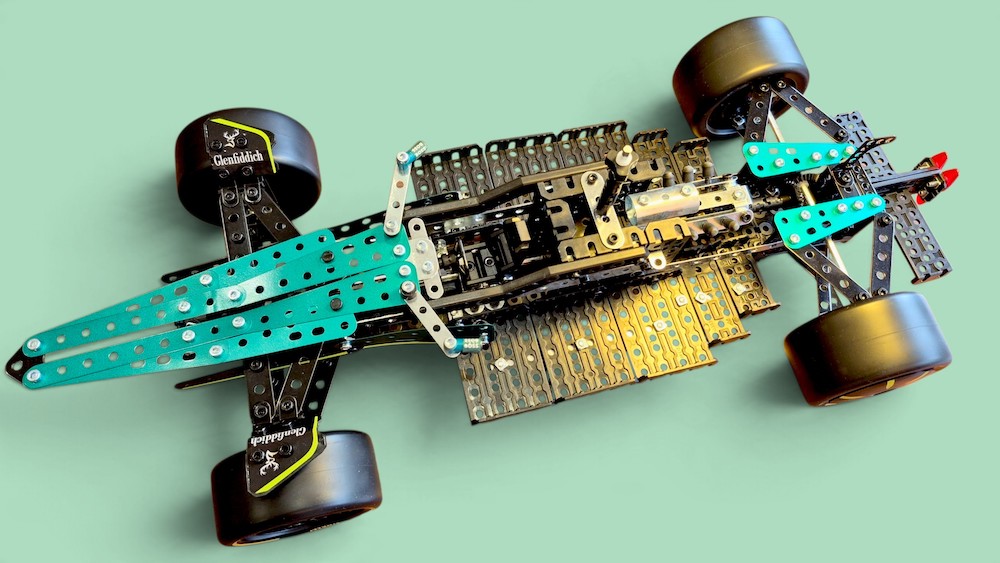
Phase 5 focuses on the front axle area and our first look at aerodynamics.
We tackle some bodywork, the top and bottom wishbones, the wheel hubs, and we fit the front wheels and tyres to the car. We also start work on the nose box which is one of the most critical safety features on a Formula 1 car. While its outward shape dictates aerodynamic performance, its primary engineered purpose is to act as a sacrificial frontal crash structure.
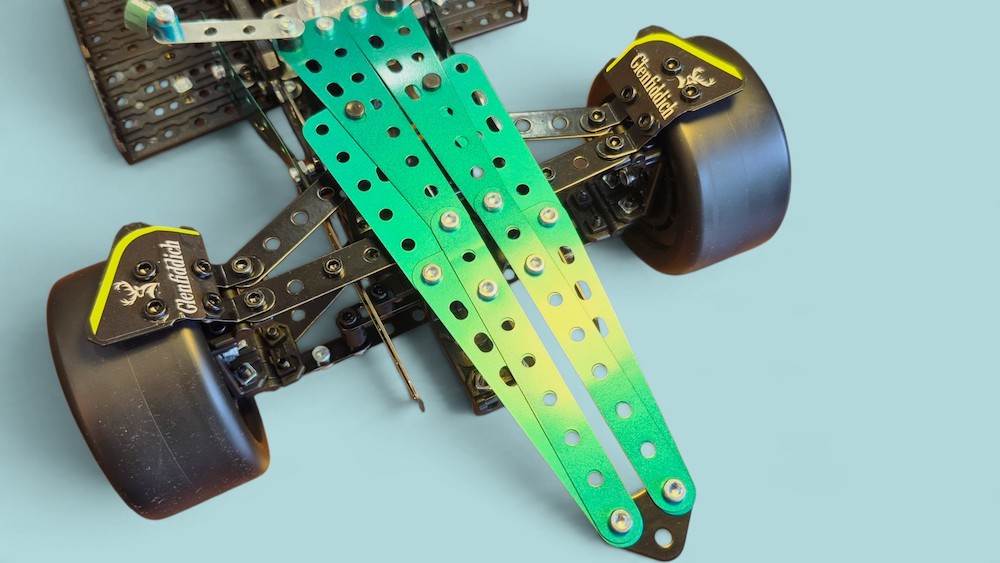
In a real F1 car, the wheel hubs or ‘uprights,’ hold the wheels by connecting them to the main chassis through a network of suspension and steering components.
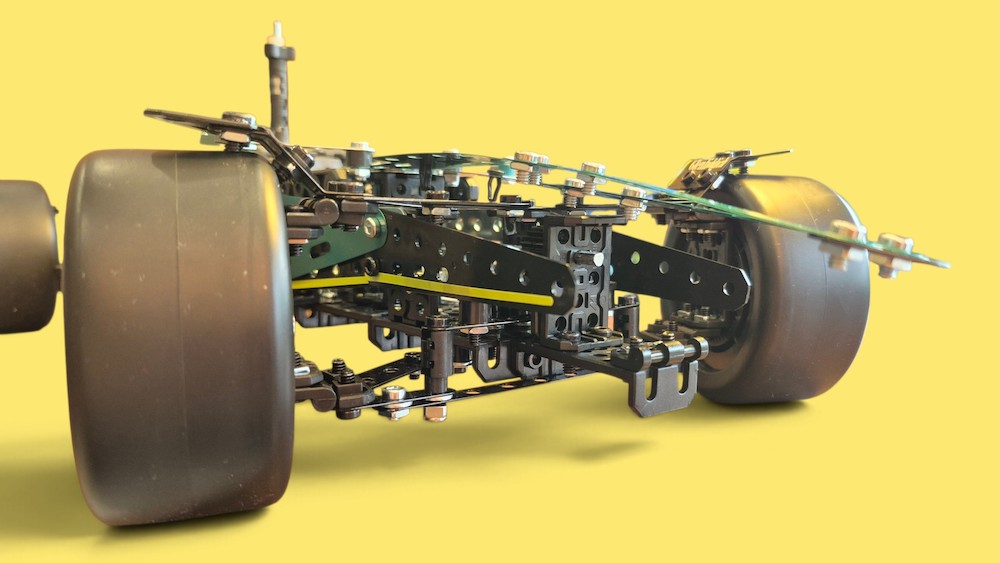
We also attach the ‘wheel wake control vanes’ or ‘wheel-arch/eyebrow’ elements. These interesting devices are small wing-like structures or curved elements mounted directly above or around the front wheels of an open-wheel racing car are aerodynamic deflectors.
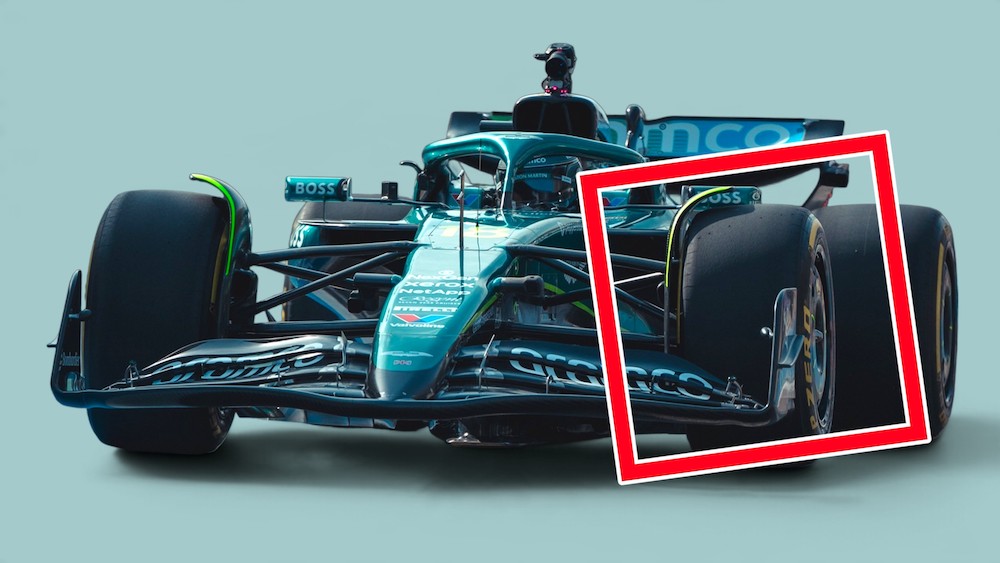
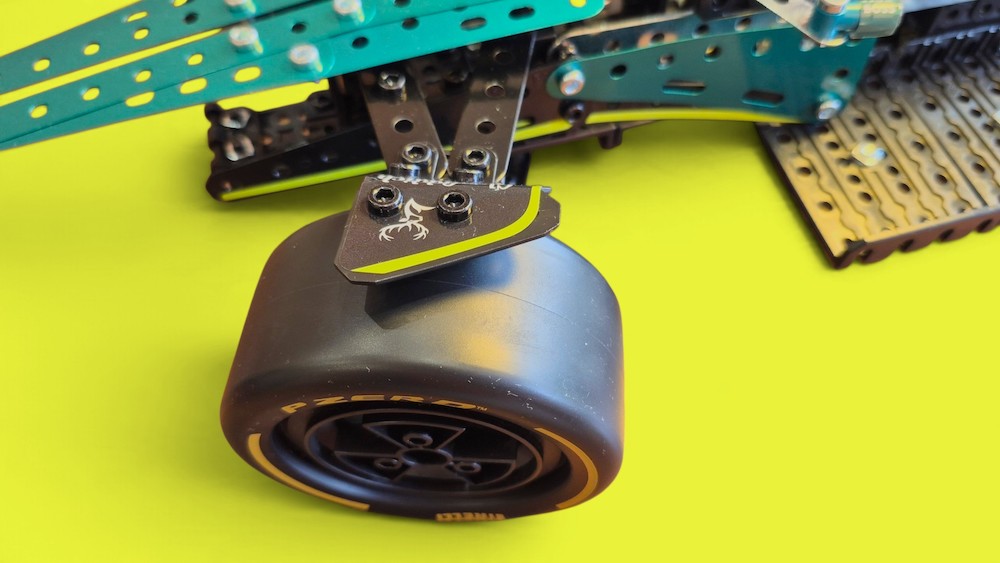
They manage tyre wake; a spinning F1 tyre acts like a paddle wheel, chopping up the air and throwing off a massive, turbulent trail of dirty air known as ‘wheel wake’.
These small elements intercept and redirect that turbulence by Controlling Airflow Direction; they push or ‘downwash’ the turbulent wake downward and inward away from the critical parts of the car (like the sidepods and floor tunnels).
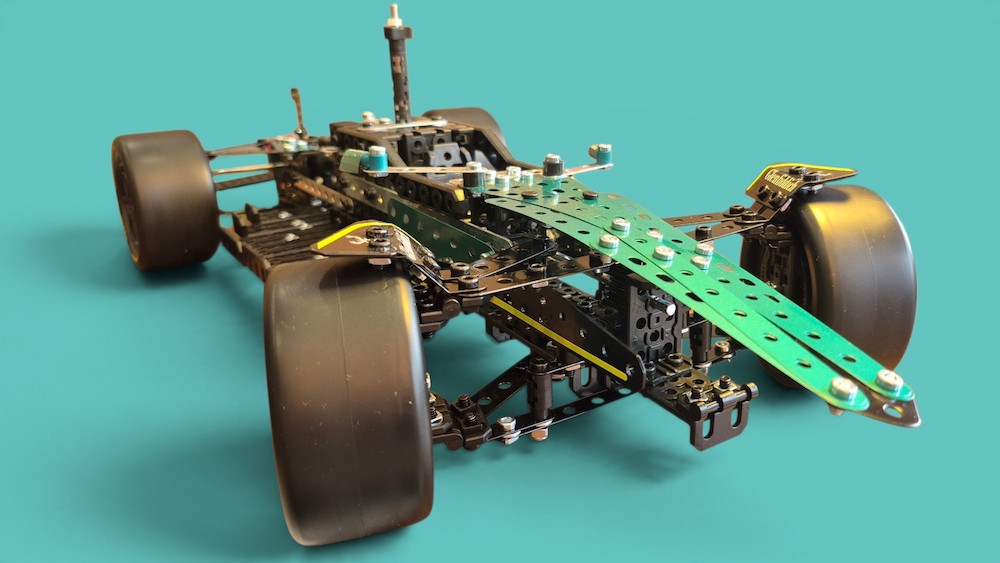
They Reduce Drag; by smoothing out how the air interacts with the spinning rubber, they cut down the aerodynamic drag generated by the front wheels, which account for a huge portion of the car’s total air resistance.
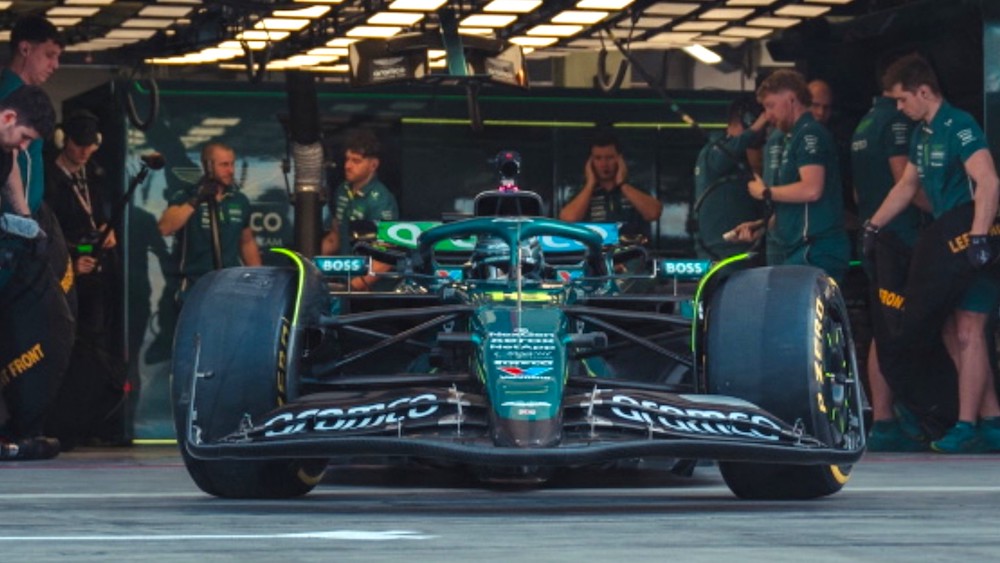
Finally, they Aid Following Cars (or Outwash Control); Depending on the year’s exact rulebook, regulating how the front wheel wake escapes help either keep the air clean for cars trying to follow or helps the ‘home’ car preserve downforce.
Phase 6:
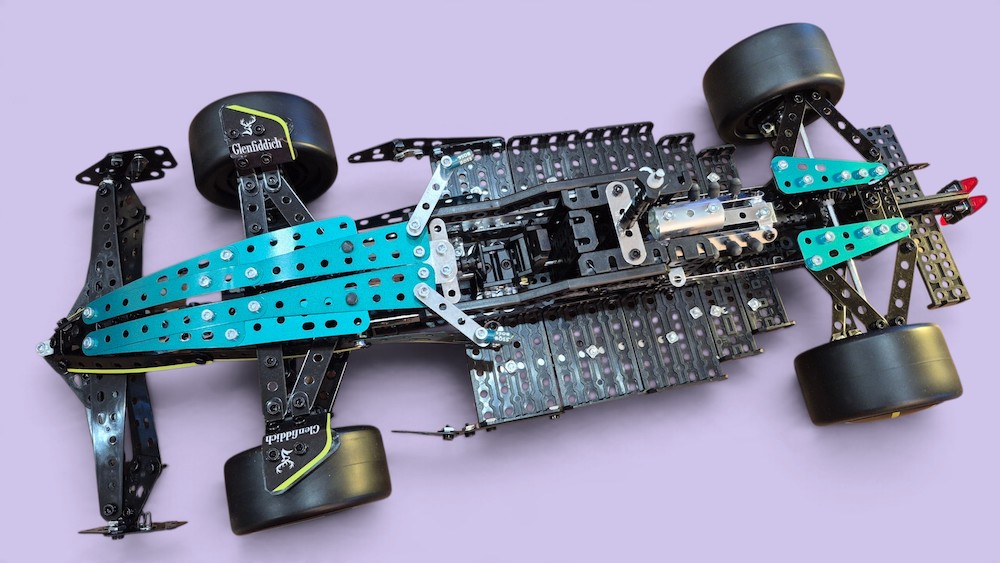
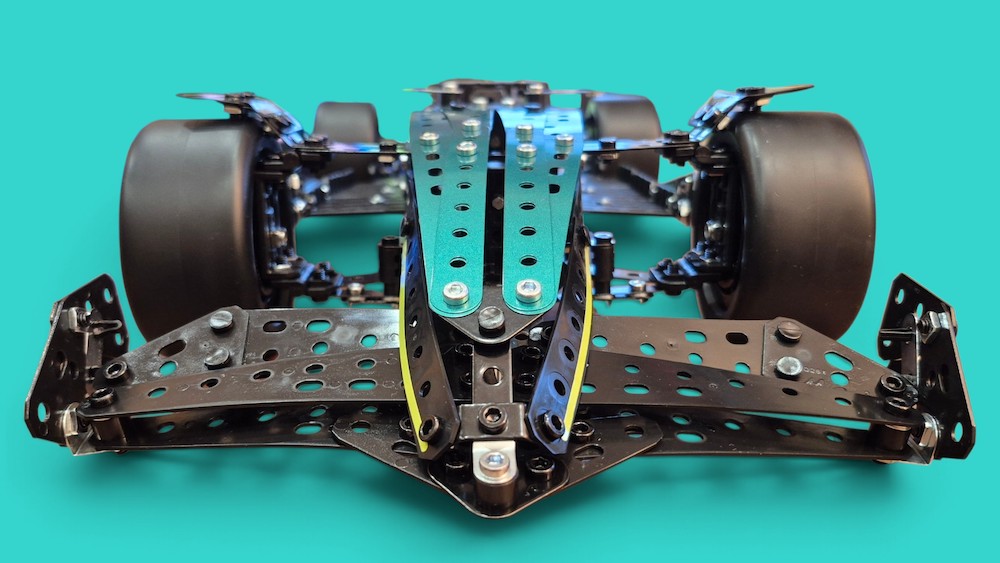
Phase 6 continues with another important aerodynamic structure, the front wing.
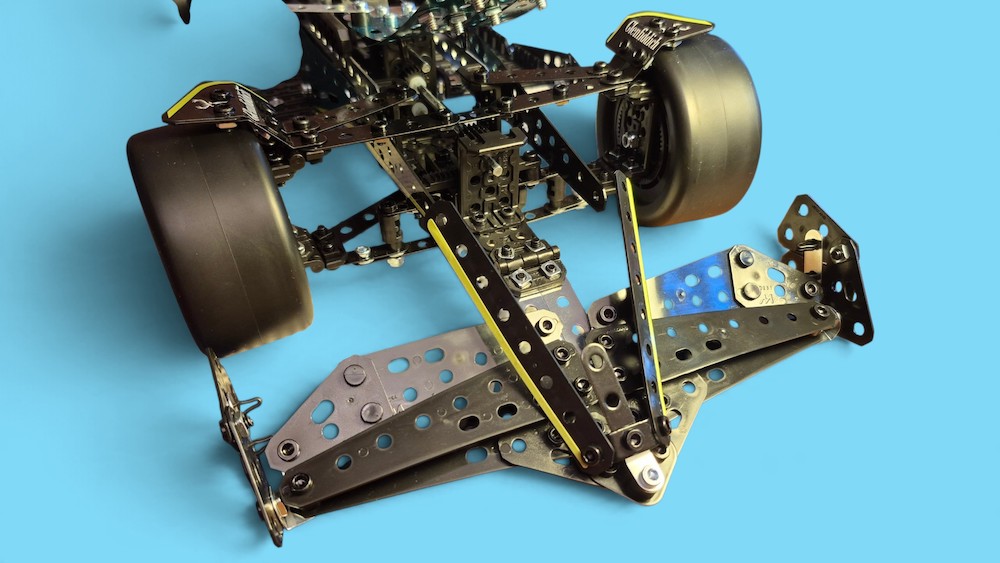
This section is straightforward and very interesting as we start to make bends and curves in various flexible plastic parts to replicate what a real F1 front wing and nose cone look like. You may not realise at first that Meccano has the ability to bend and make amazing, curved shapes but it certainly does!
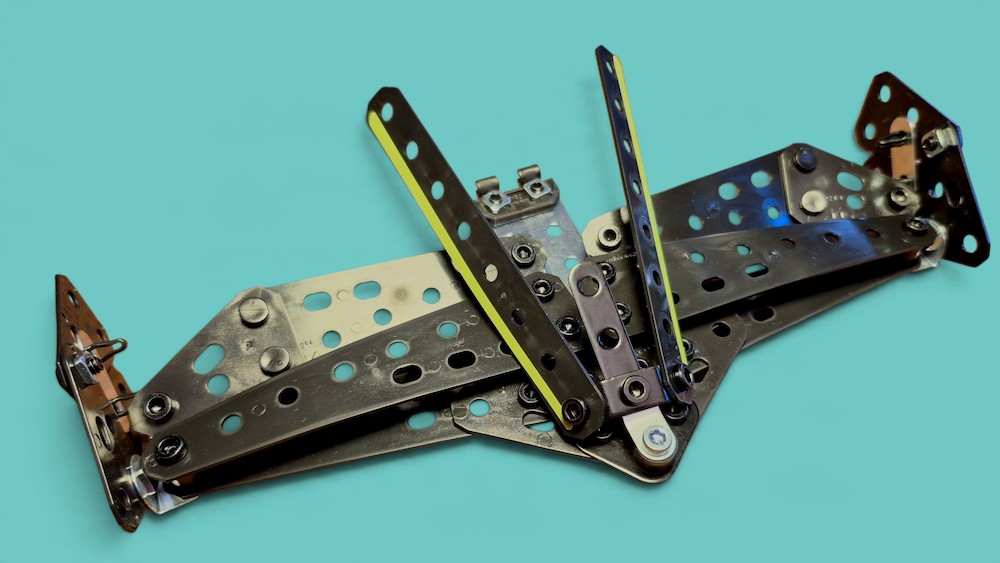
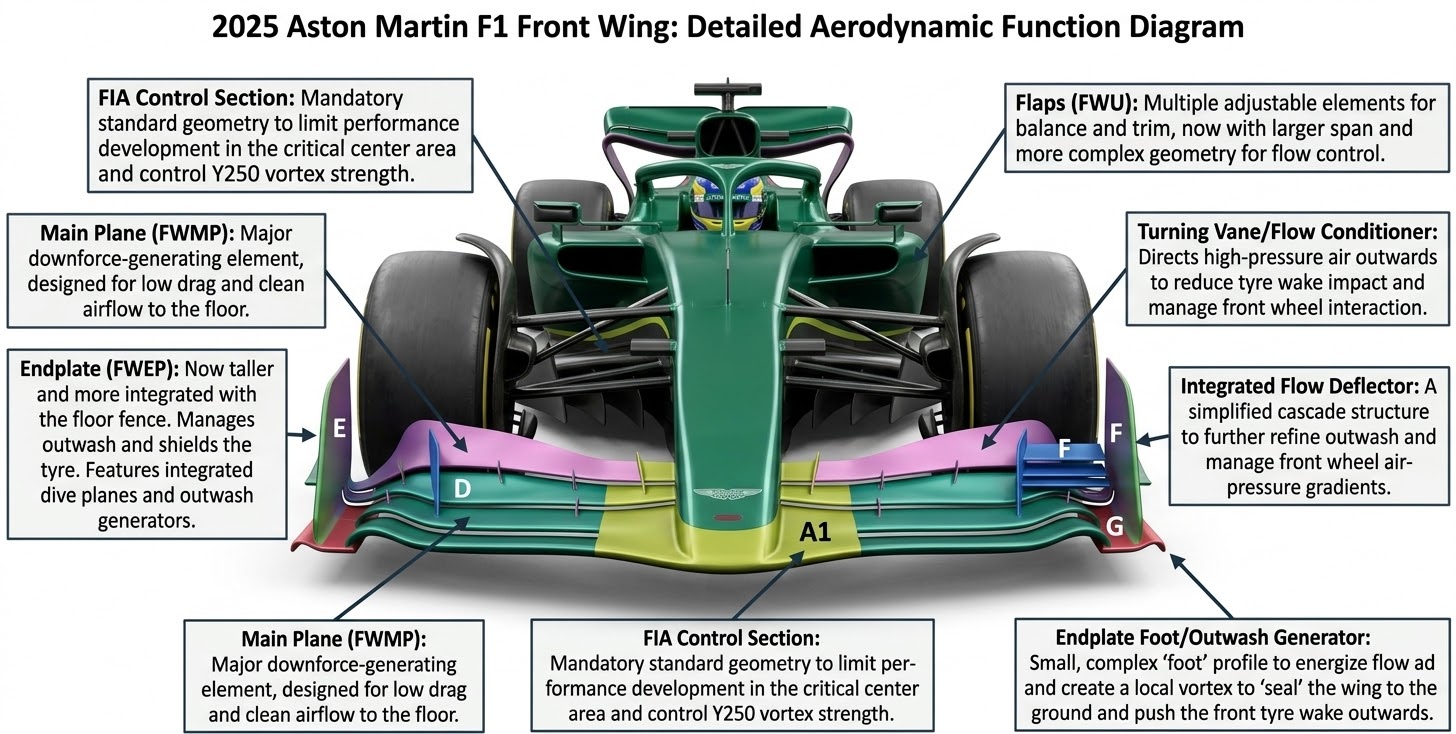
In an actual Formula 1 car, the front wing generates downforce; It acts like an upside-down airplane wing. As air flows over and under the shaped elements, it creates a pressure difference (high pressure on top, low pressure on the bottom) that pushes the front of the car into the track, increasing grip in high-speed corners.
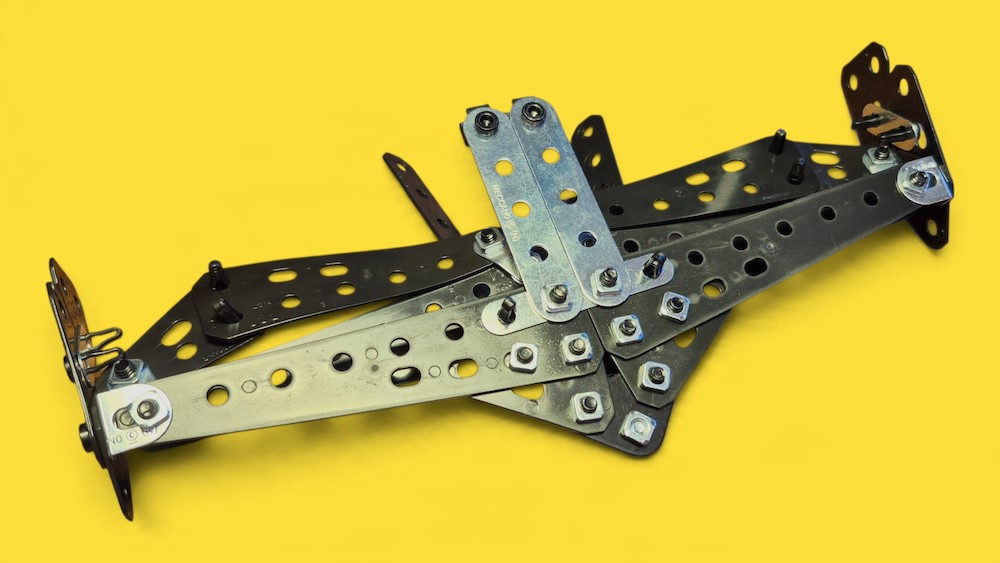
It also manages airflow; It acts as the car’s ‘air traffic controller’. It splits and shapes the oncoming air, directing it cleanly around the front tyres and feeding smooth, controlled airflow back toward the underbody floor, sidepods, and rear diffuser.
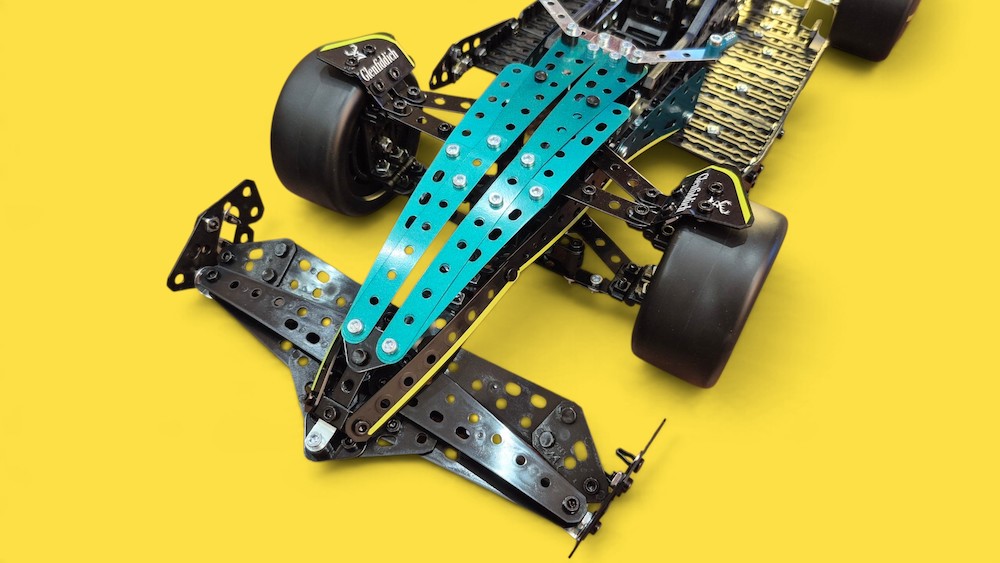
Finally, it tunes car balance; Teams can adjust the flap angles during pit stops (or via active aero mechanisms on newer regulations) to shift the car’s balance and dial out or encourage understeer. If you would like to learn more about the how the air affects your car every time you go for a drive, see our aerodynamics special article here.
Phase 7: Phase 7 focuses on the right-hand side ‘Sidepod’. This is an interesting and fascinating part of the build as we start getting a glimpse of what the finished car will soon look like. Using various flexible triangular pieces and straight beams, the curves and contours of the Sidepod are formed and attached to the car creating the iconic streamlined body of a Formula 1 car. This was a particularly satisfying and enjoyable phase to complete.
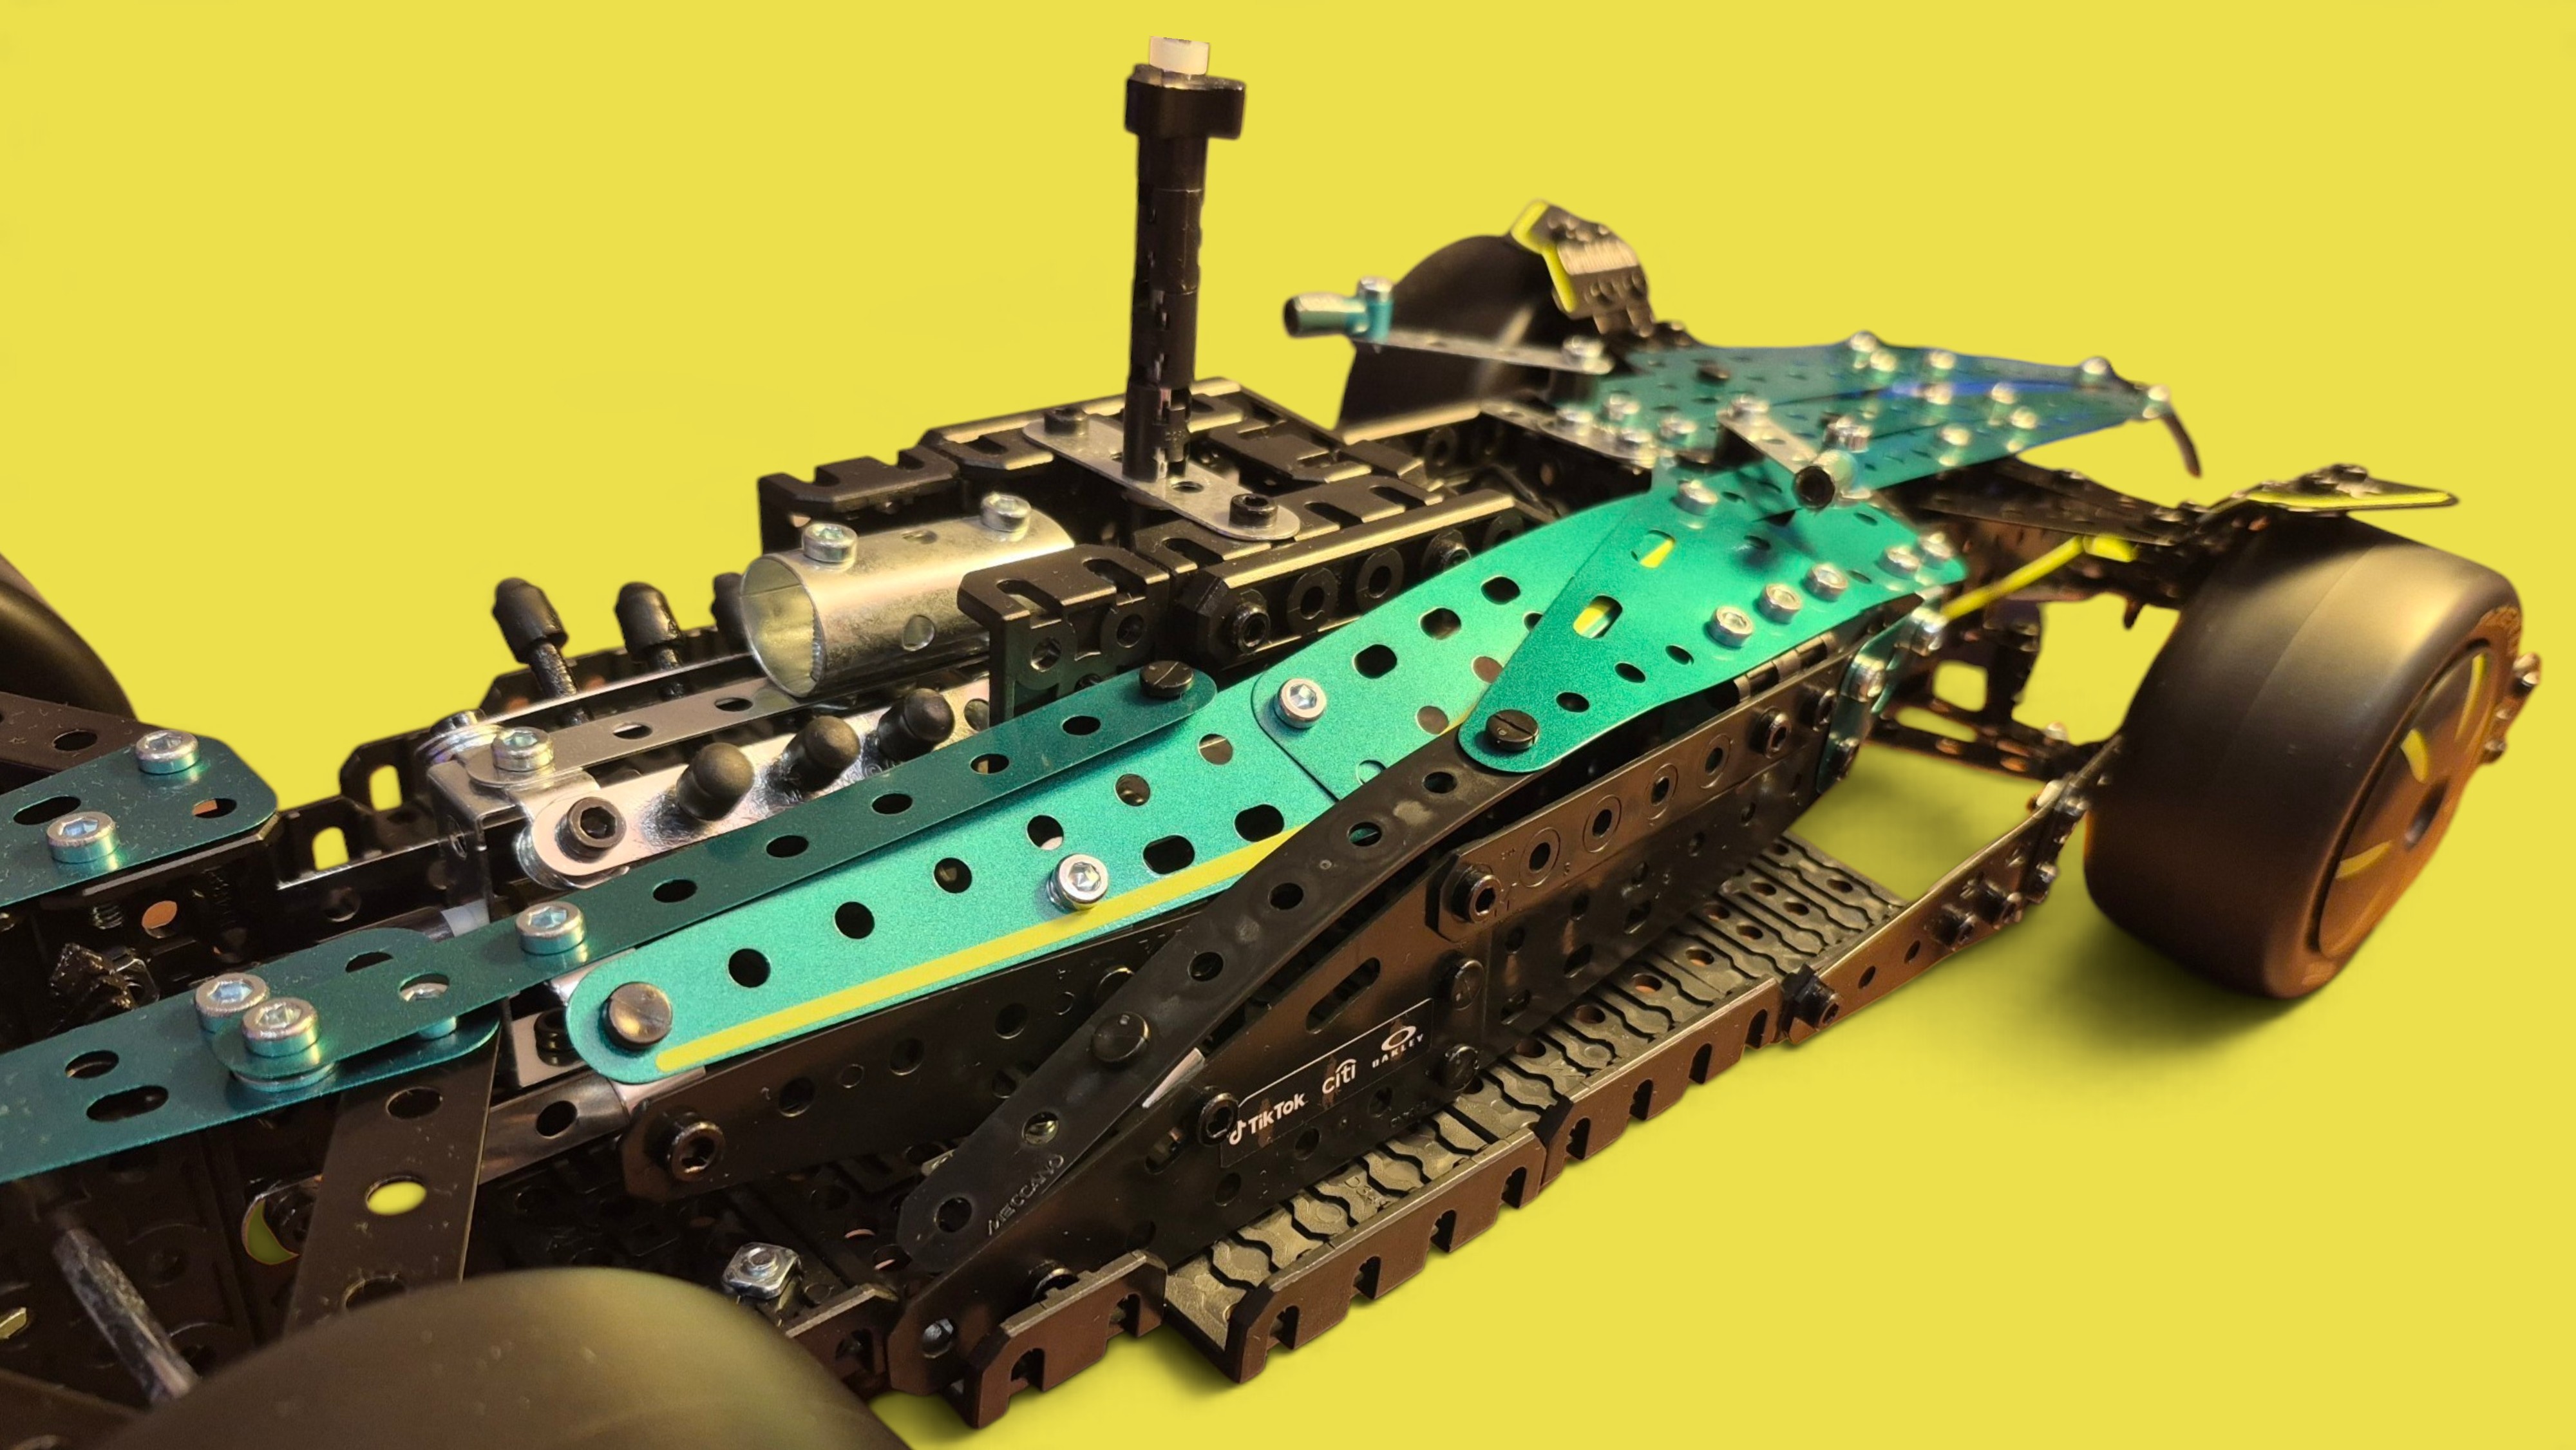
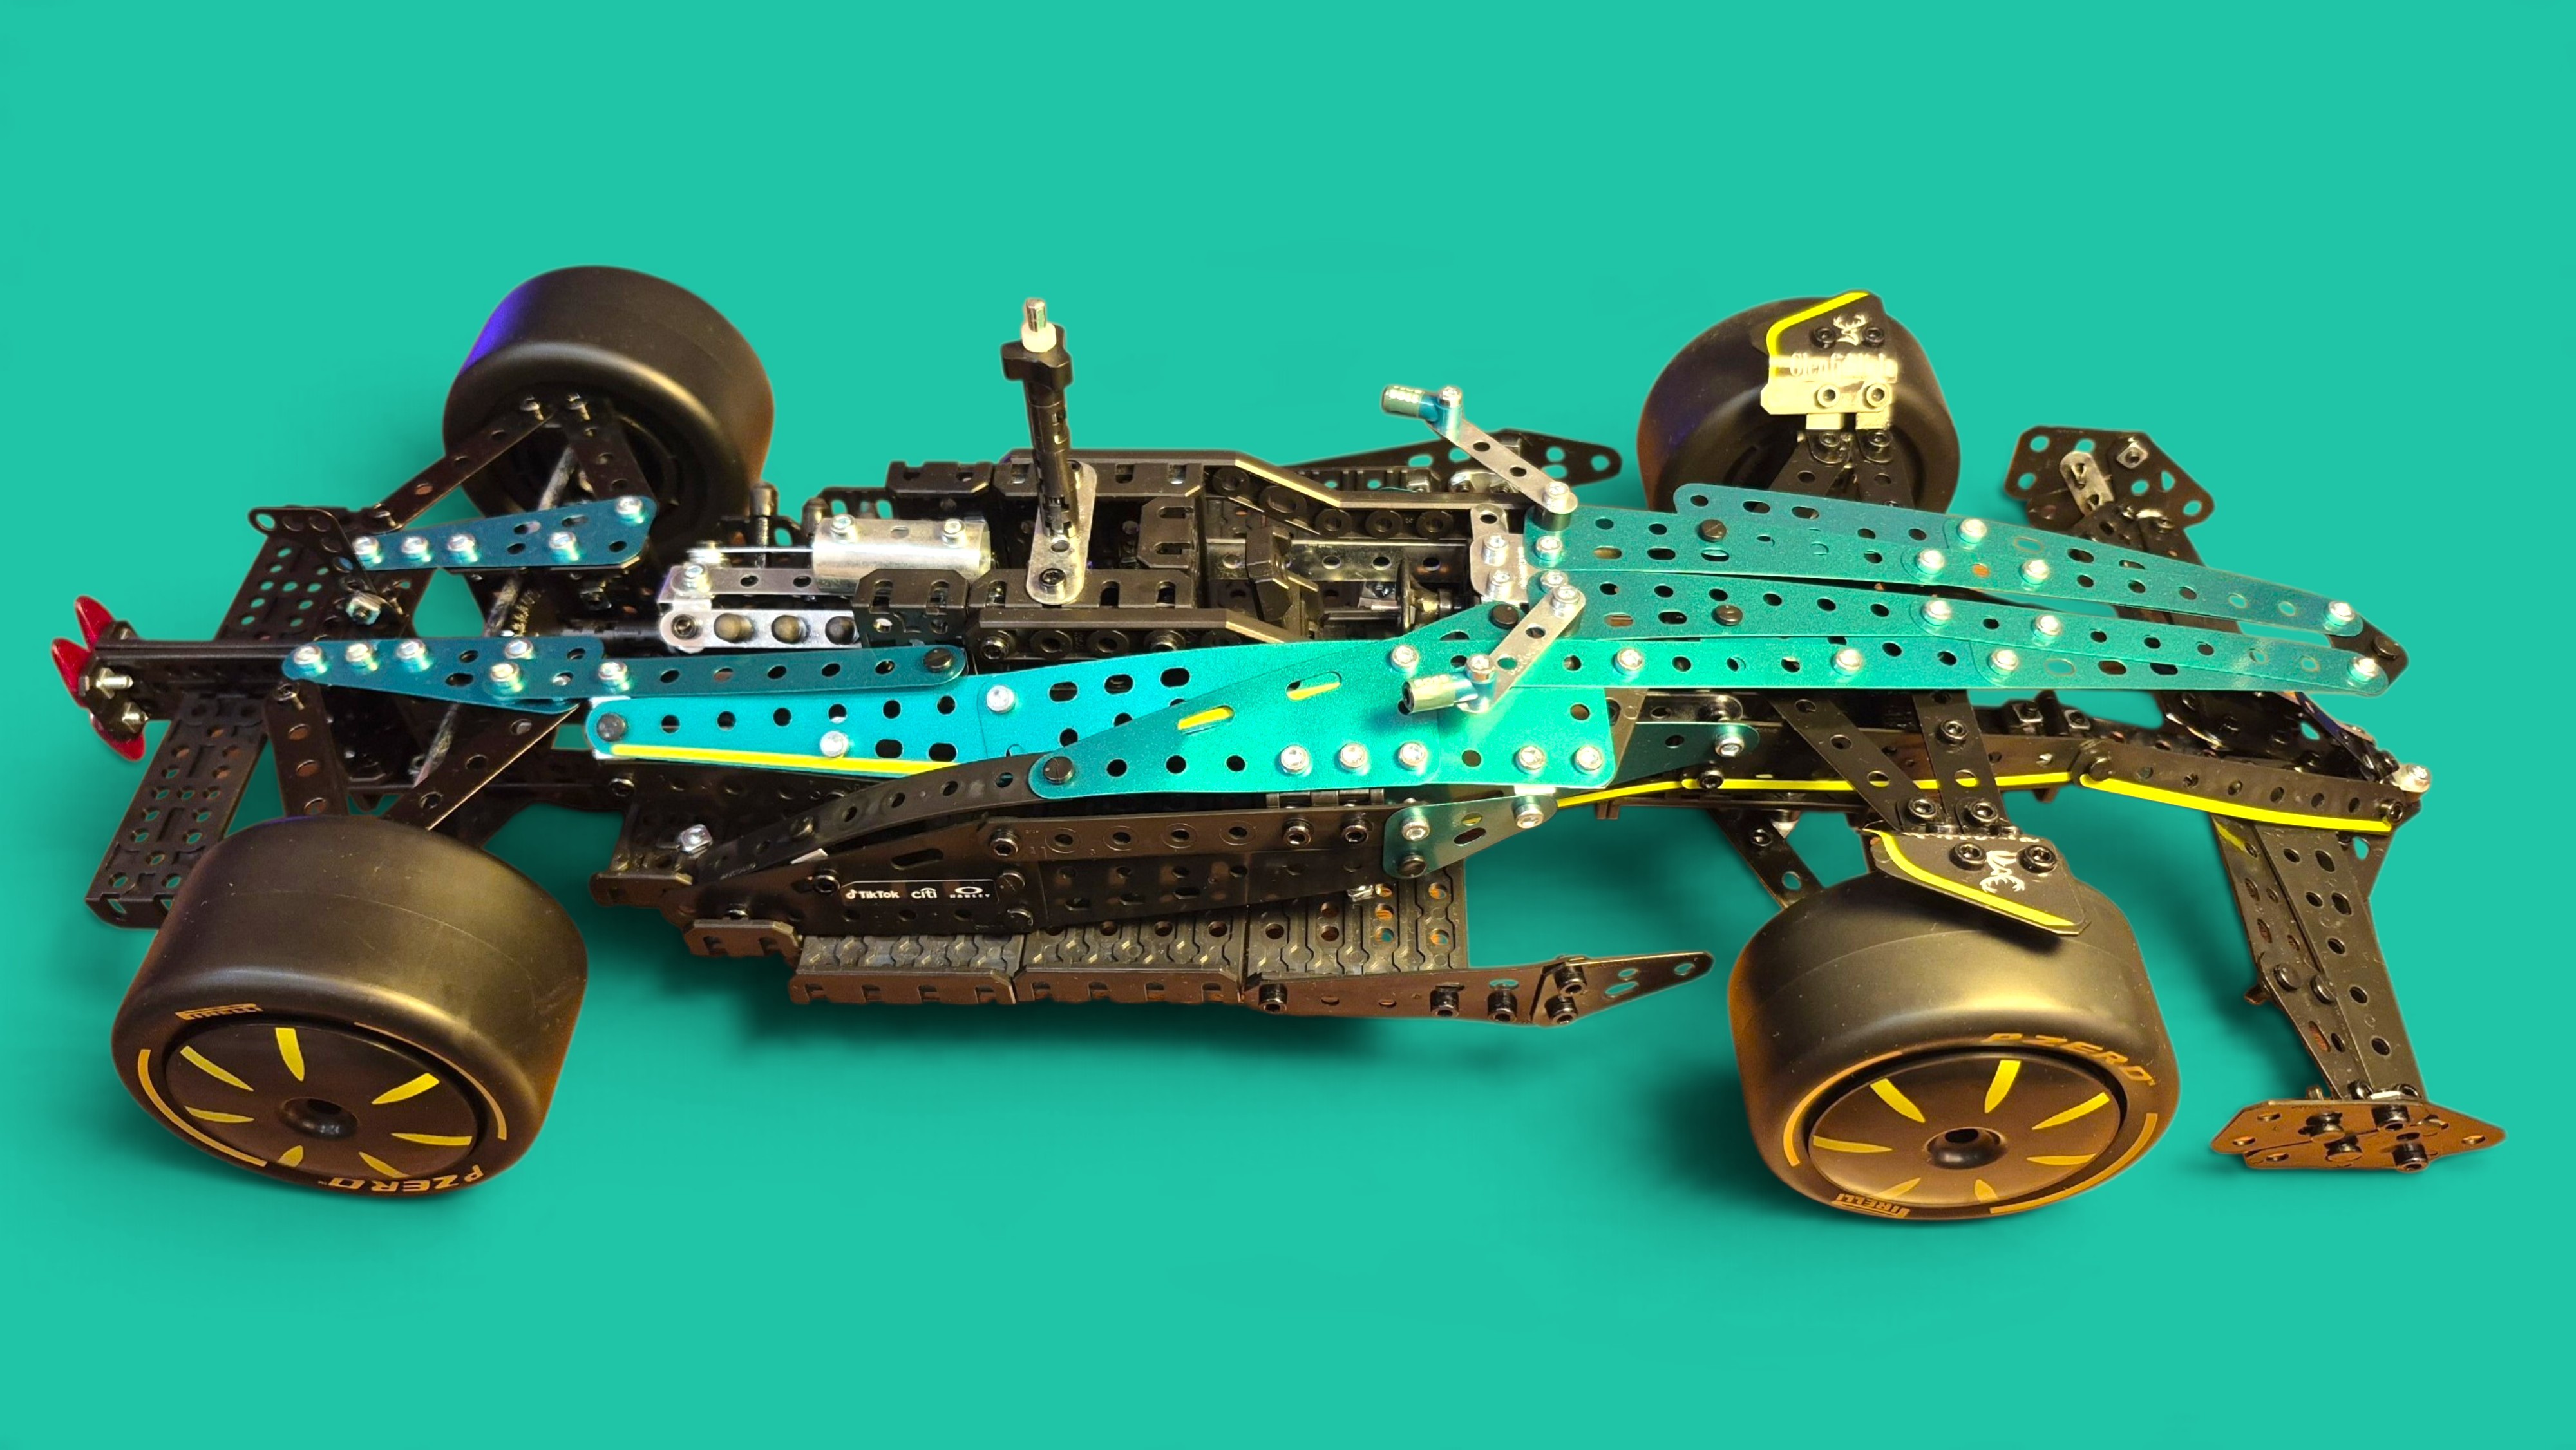
What does the sidepod do on a real F1 car I hear you say?
A sidepod on a Formula 1 car is the bodywork panel located on either side of the cockpit, and it serves three main purposes: cooling the car’s internals, managing aerodynamics to generate downforce, and housing safety crash structures.
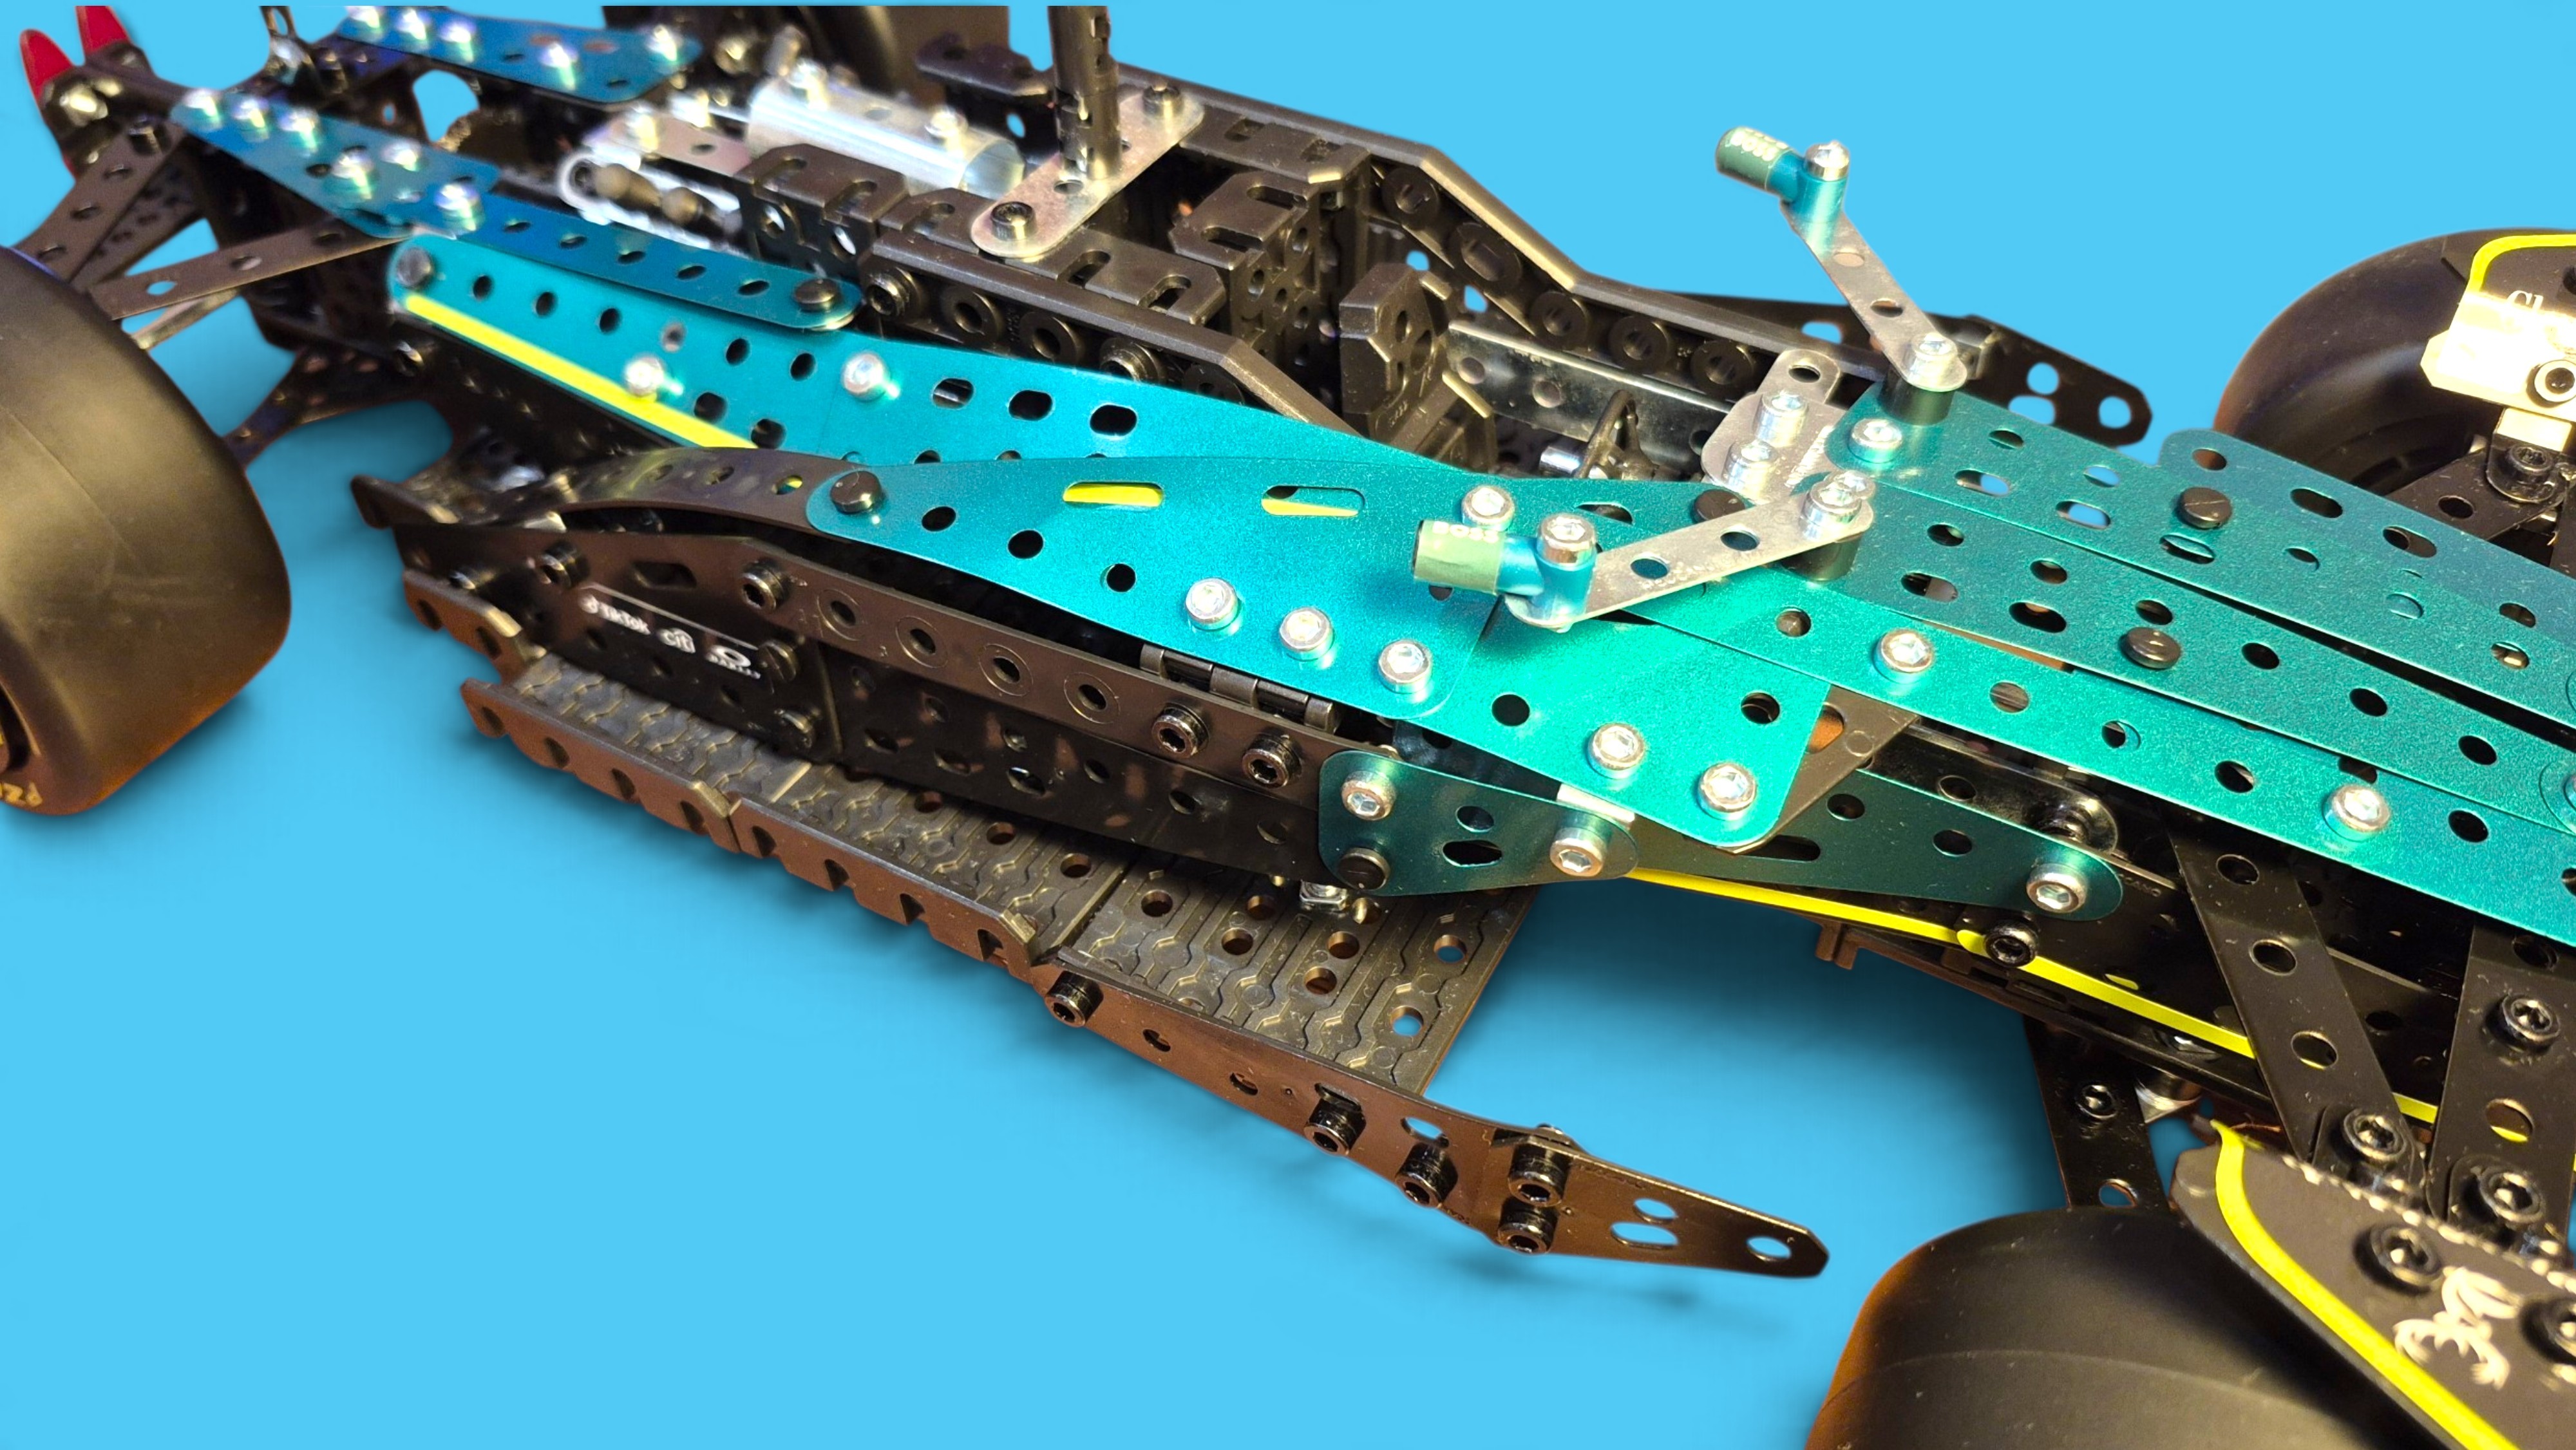
Cooling the Power Unit; Air enters through the front inlets of the sidepods to feed internal water and oil radiators, the MGU-K electronics, and the turbo intercooler. They help reject heat from the V6 hybrid power unit and gearbox hydraulics.
Aerodynamics and Downforce; The outer shape of the sidepods guides airflow around the rear wheels and down toward the floor and diffuser.
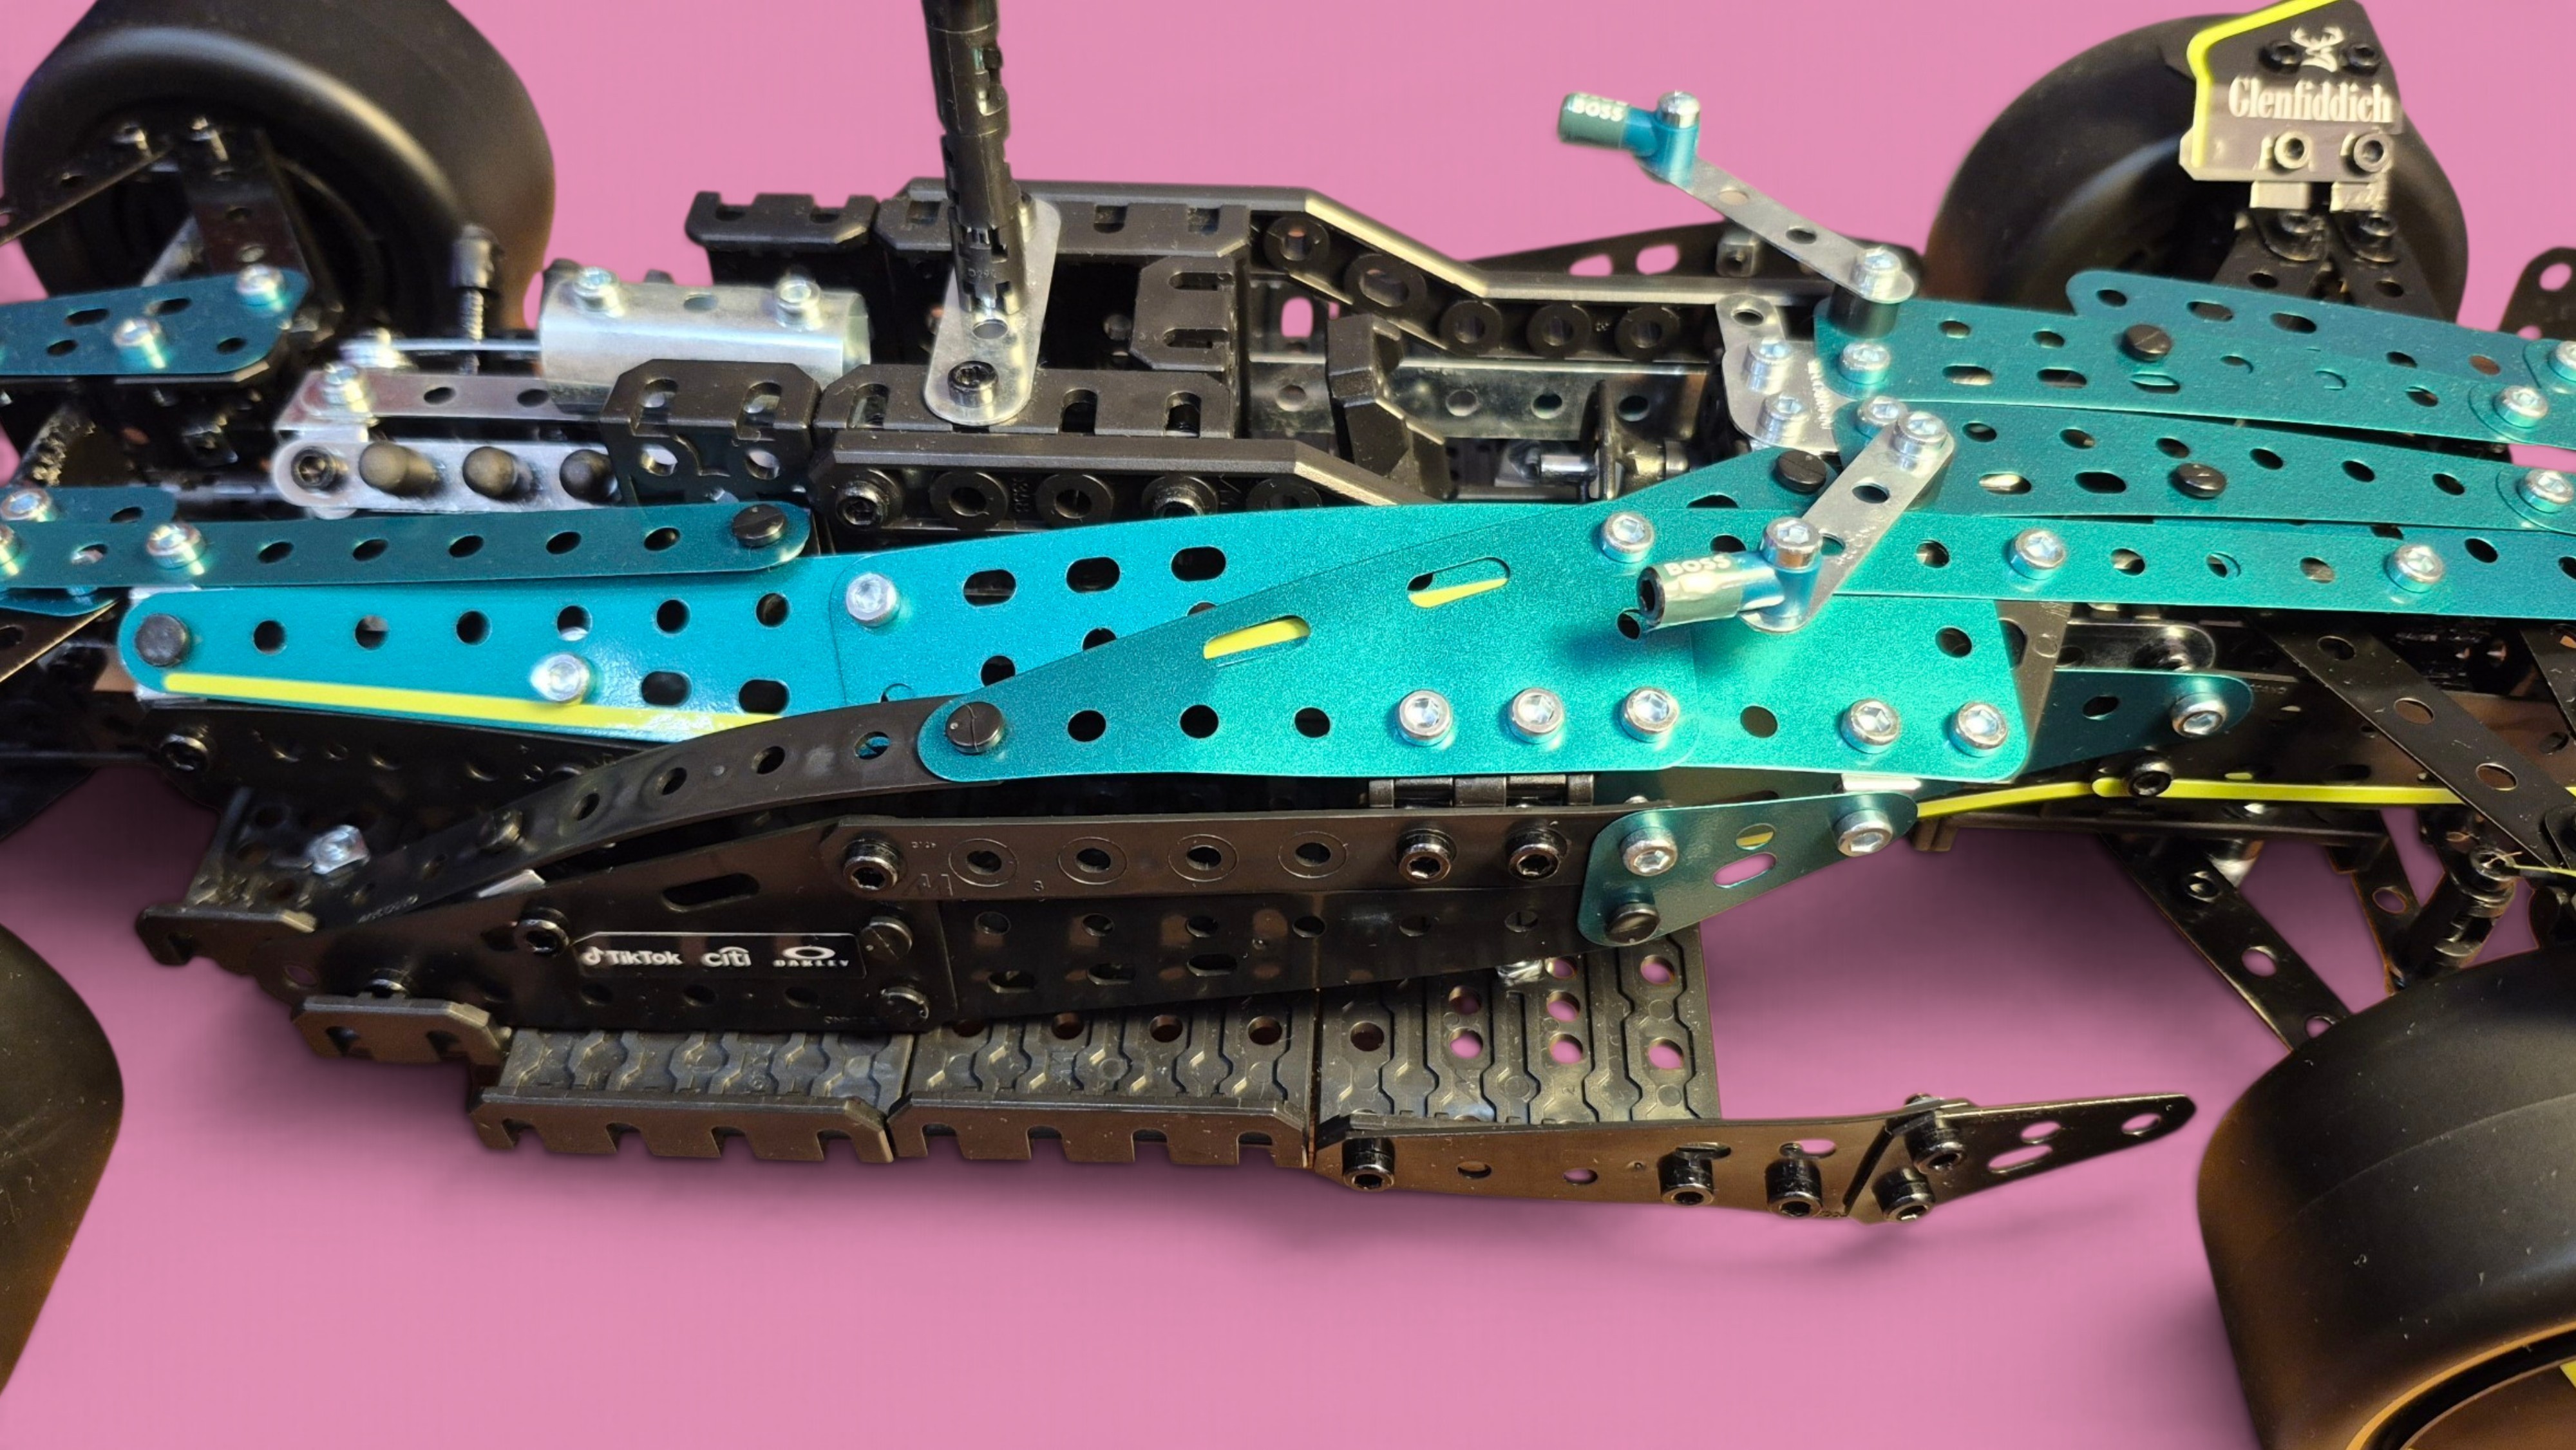
Under current ground-effect rules, sidepod shapes (such as downwash ramps or undercuts) help seal the car’s floor and optimize air pressure underneath to create significant downforce.
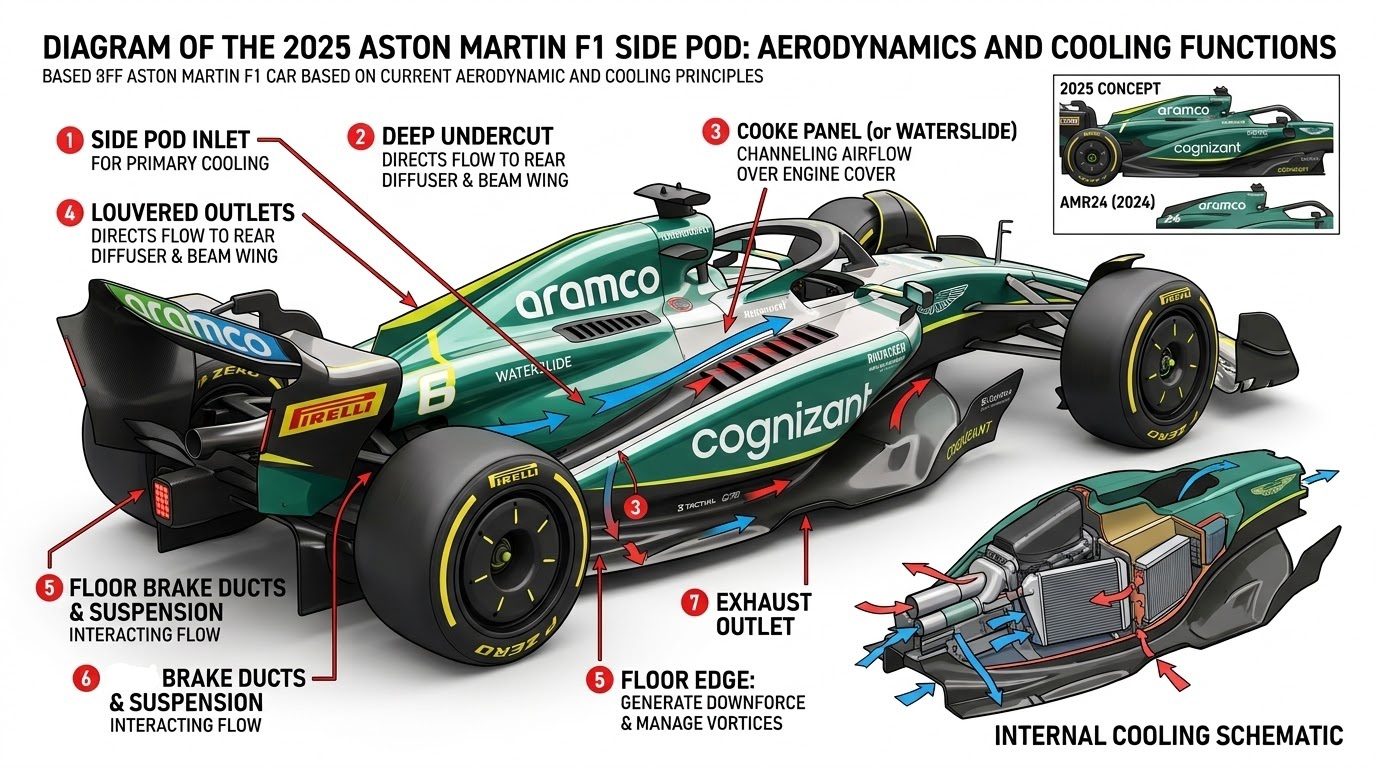
Safety Protection; They enclose mandatory carbon-fibre ‘Side Impact Structures’ (SIS) designed to absorb energy in the event of a crash from the side.
Phase 8:
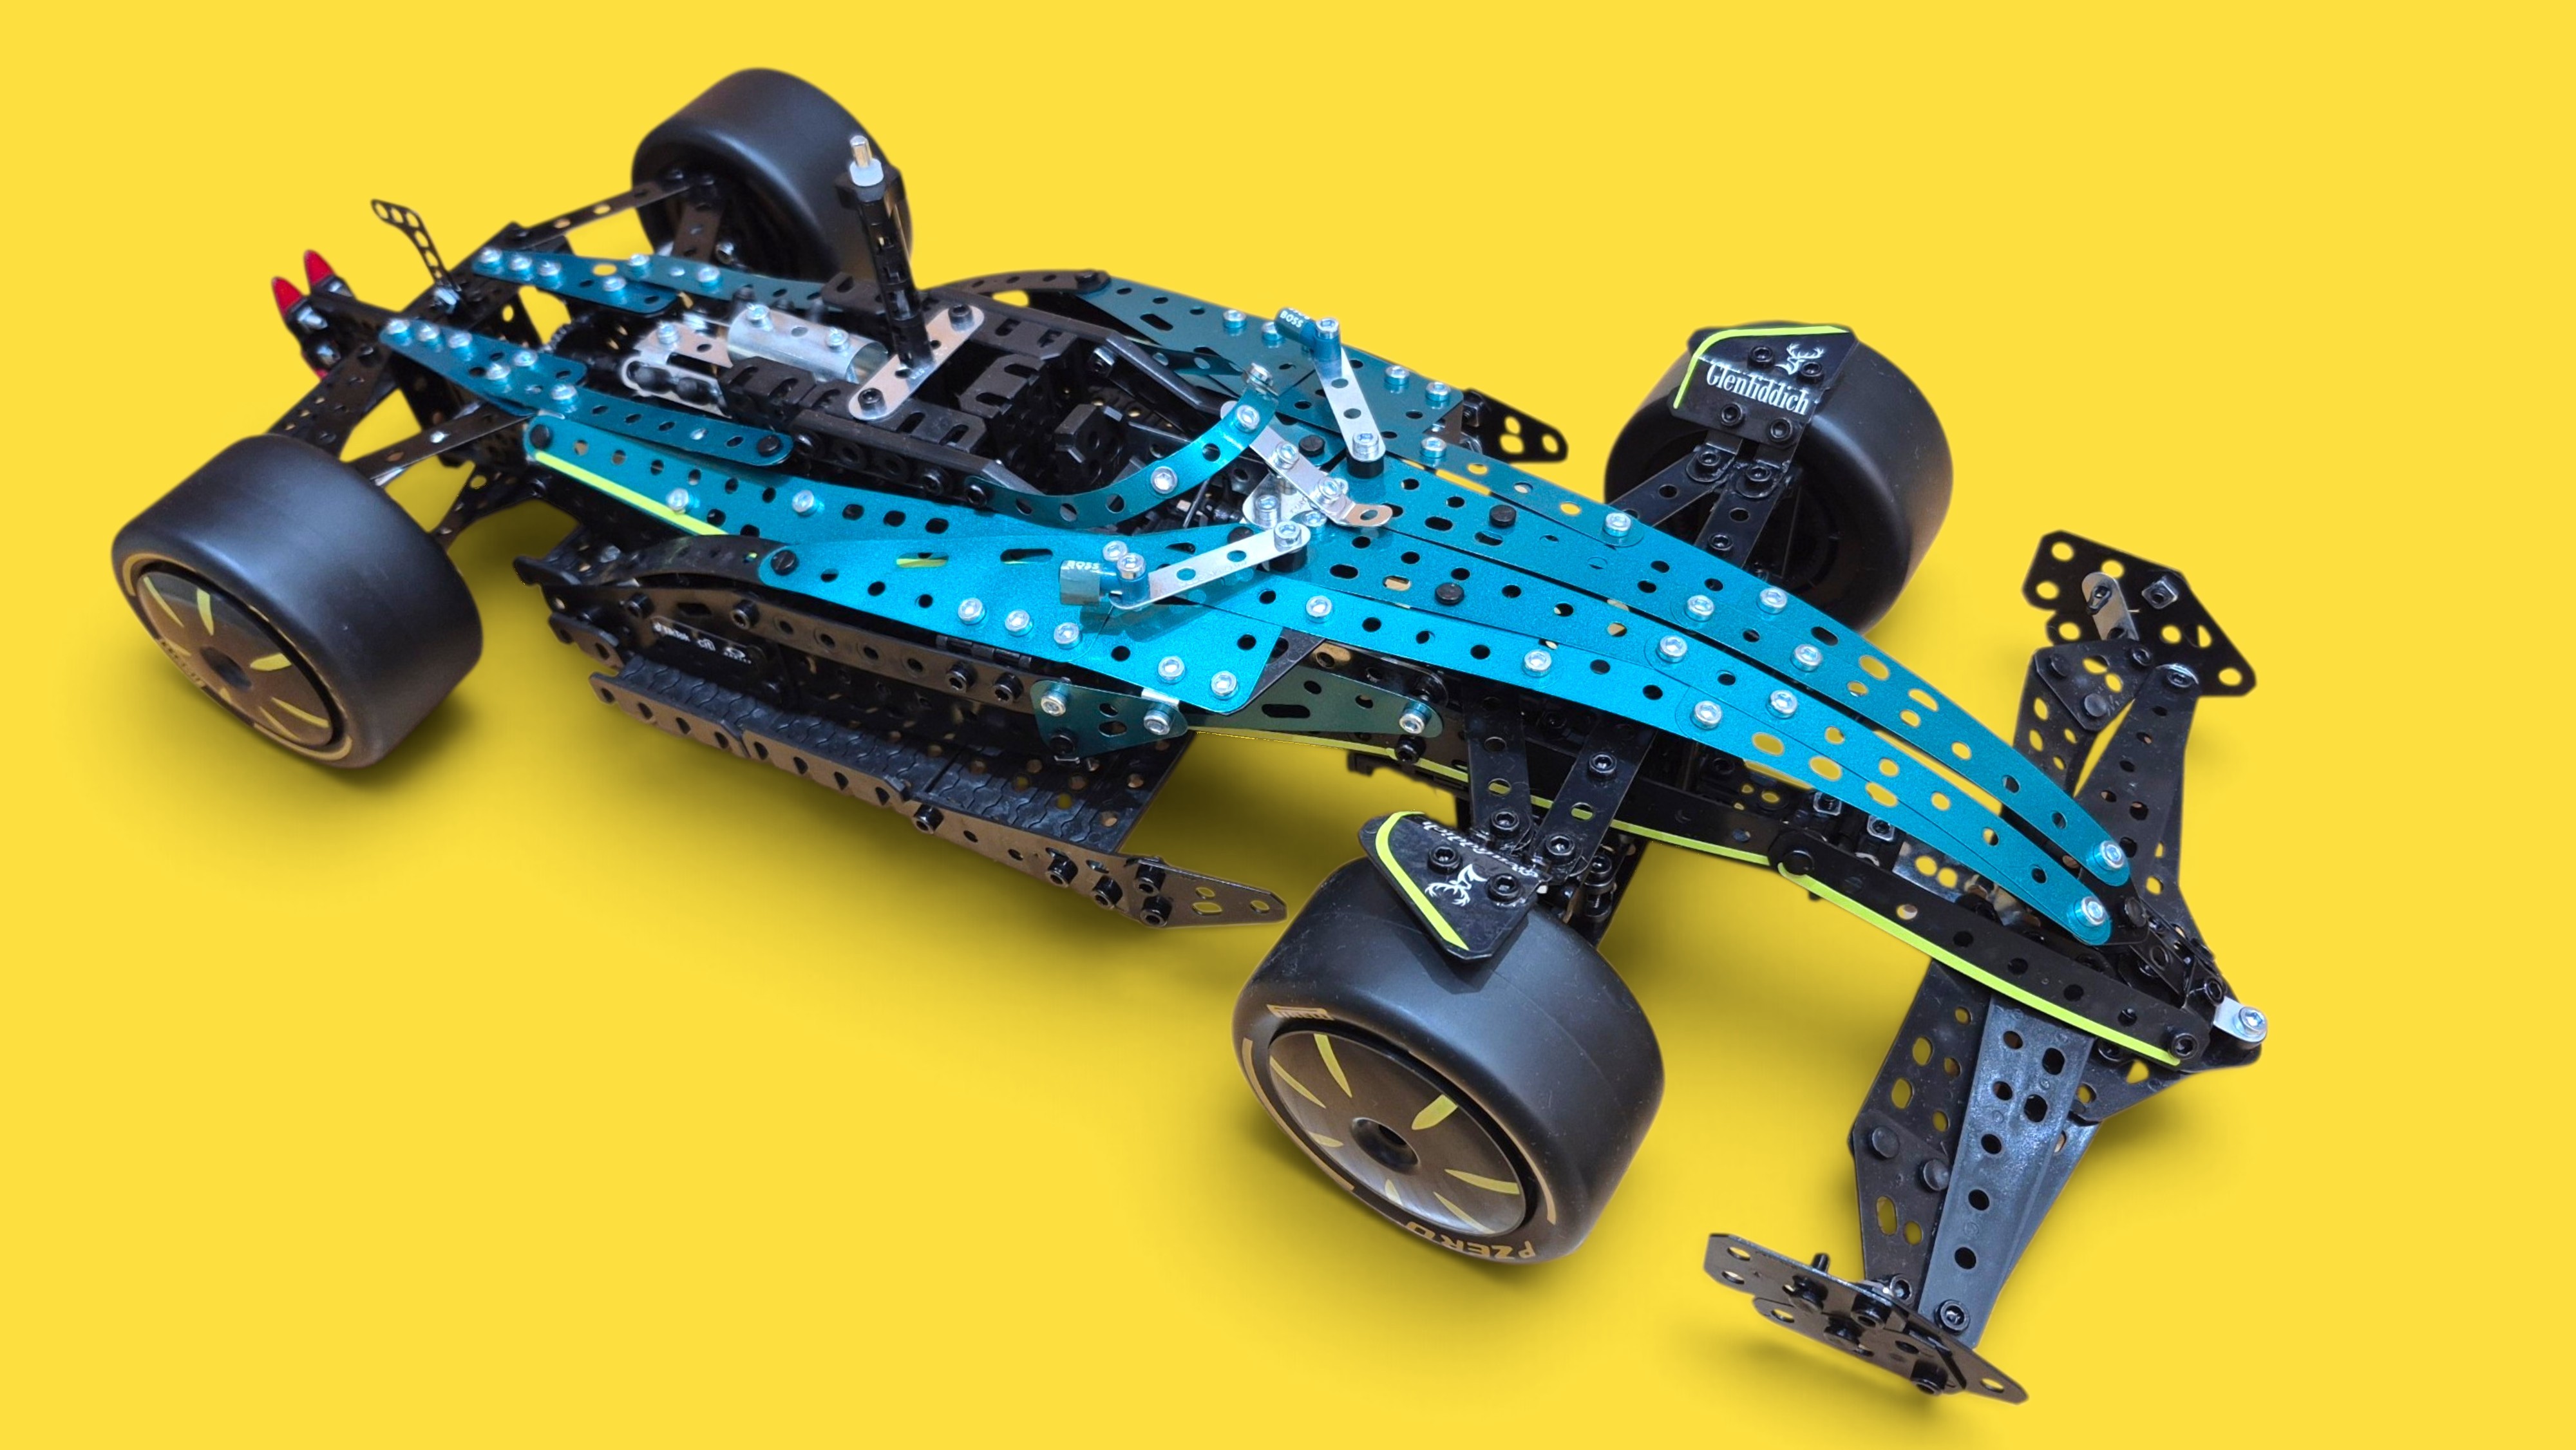 Phase 8 focuses on the left-hand side ‘side pod’ which is a mirror image of what we dealt with in Phase 7
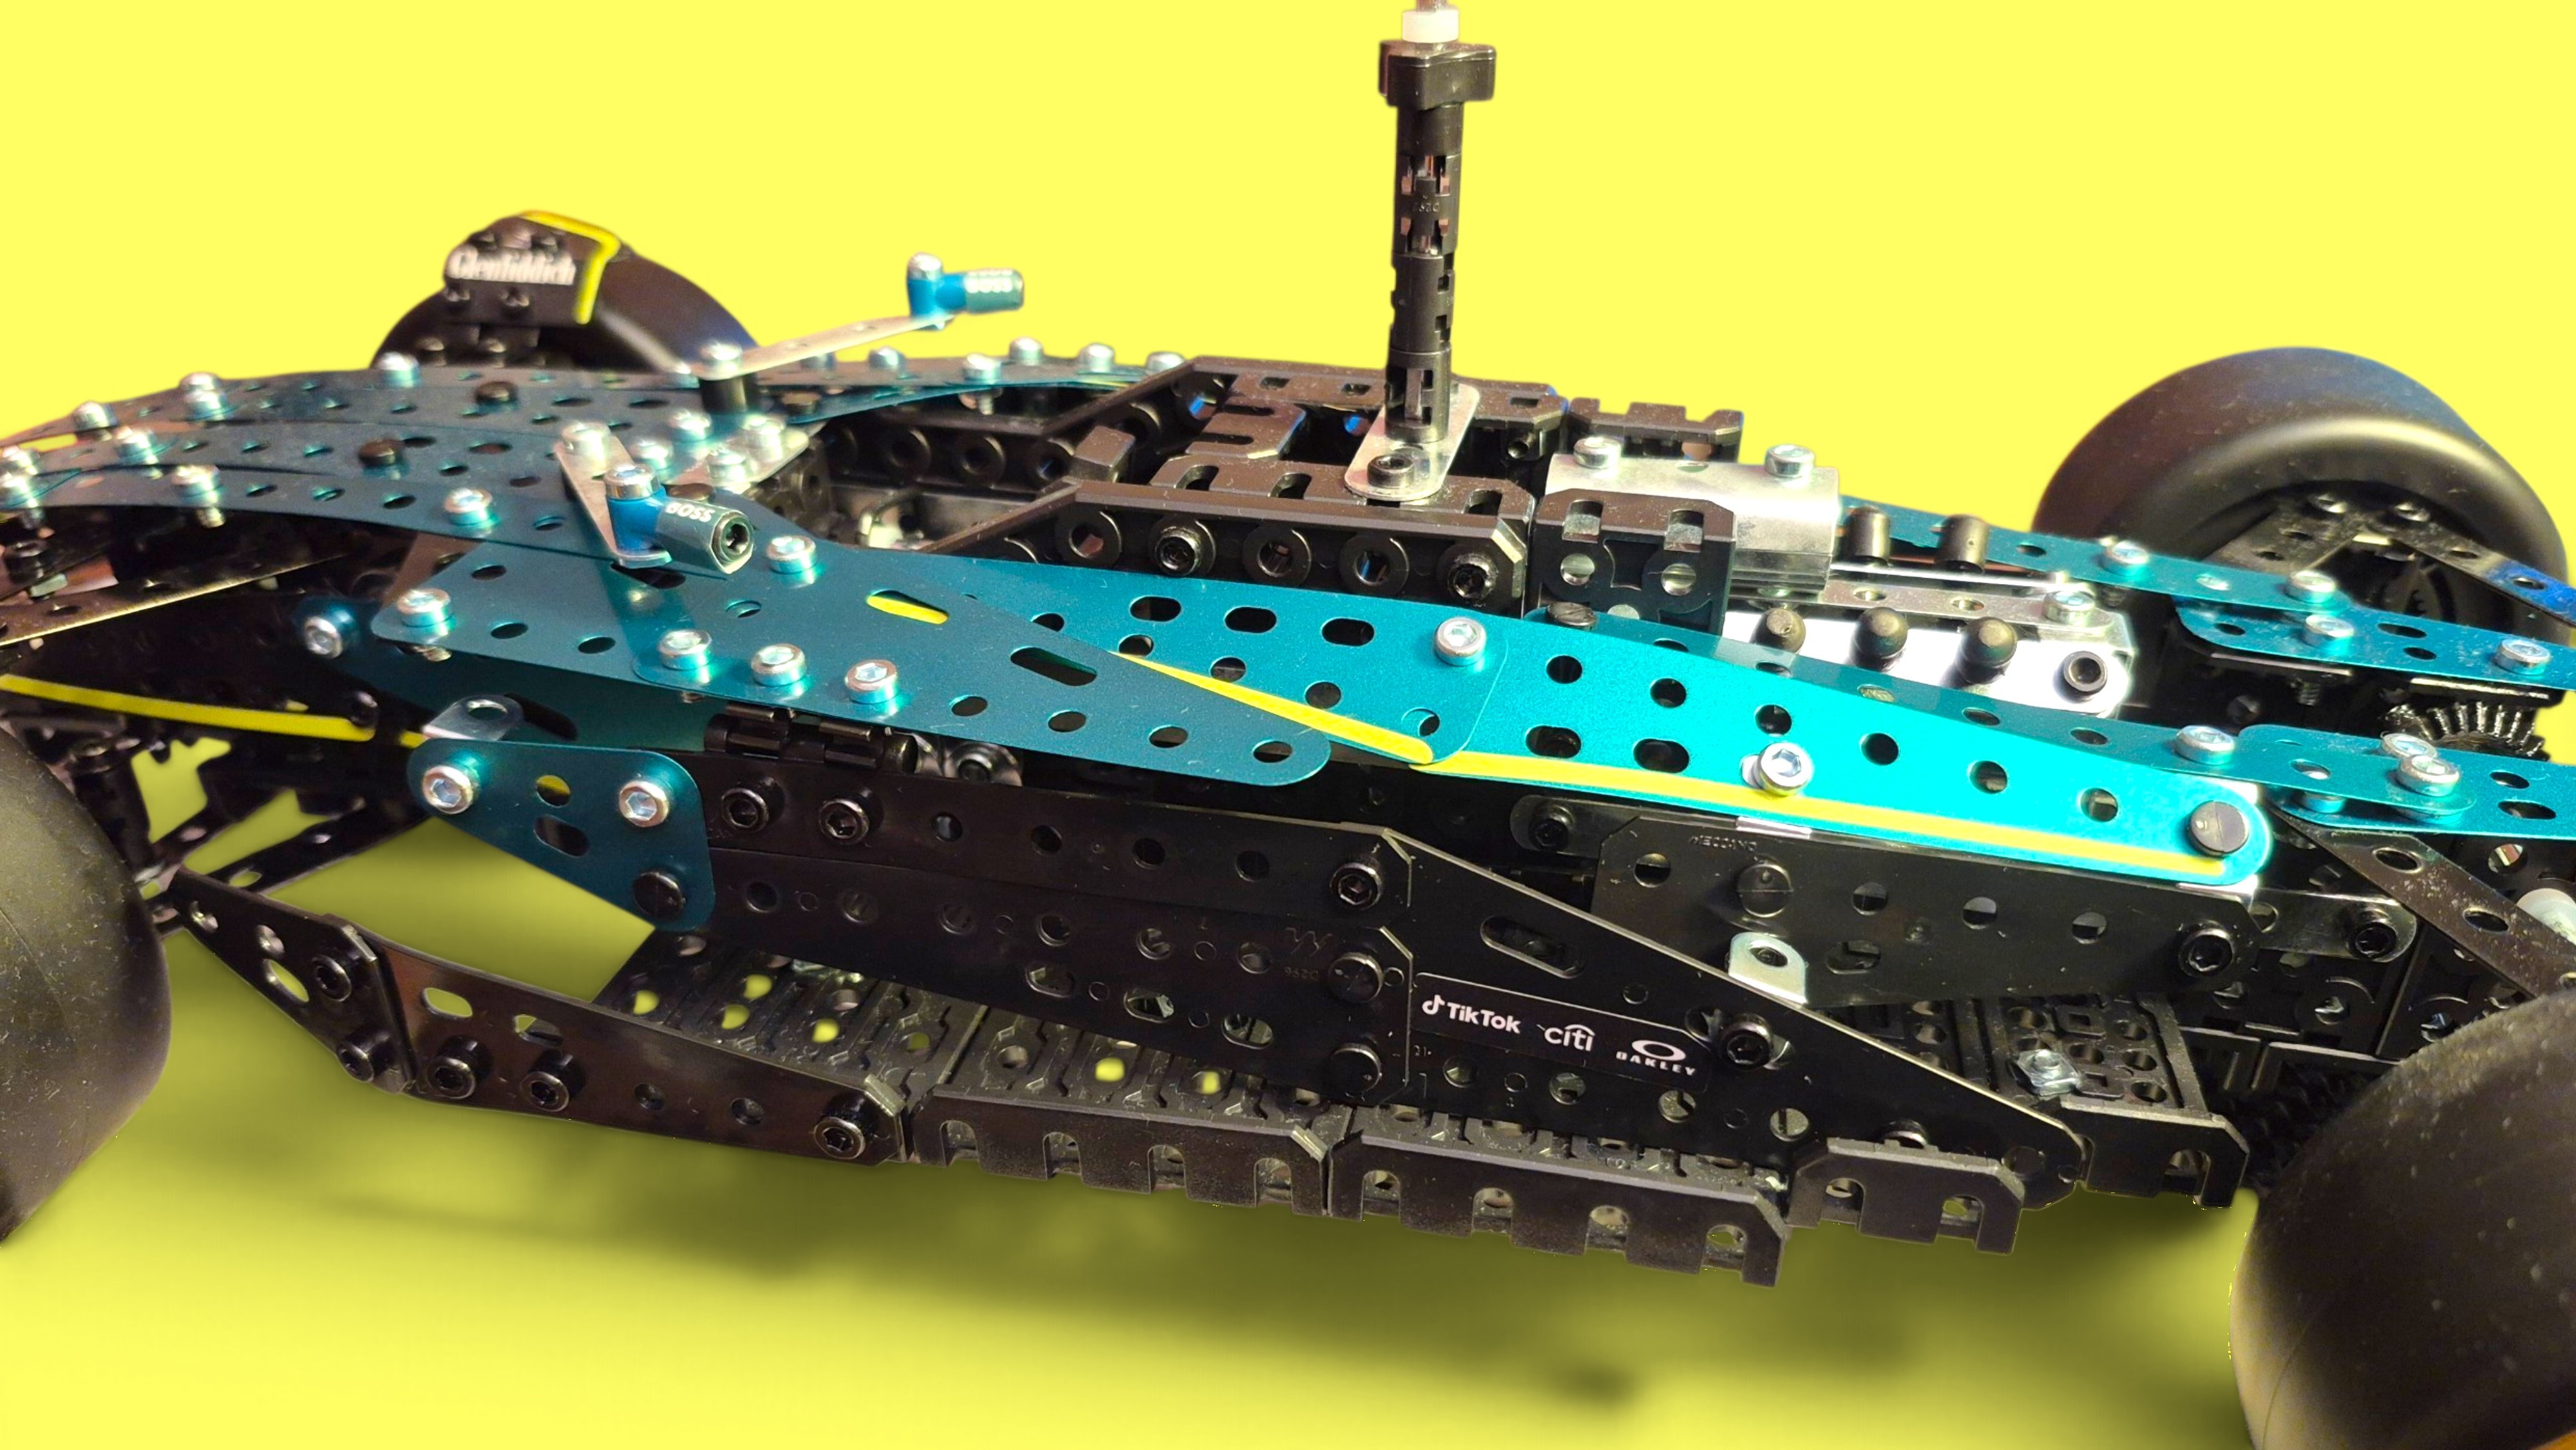
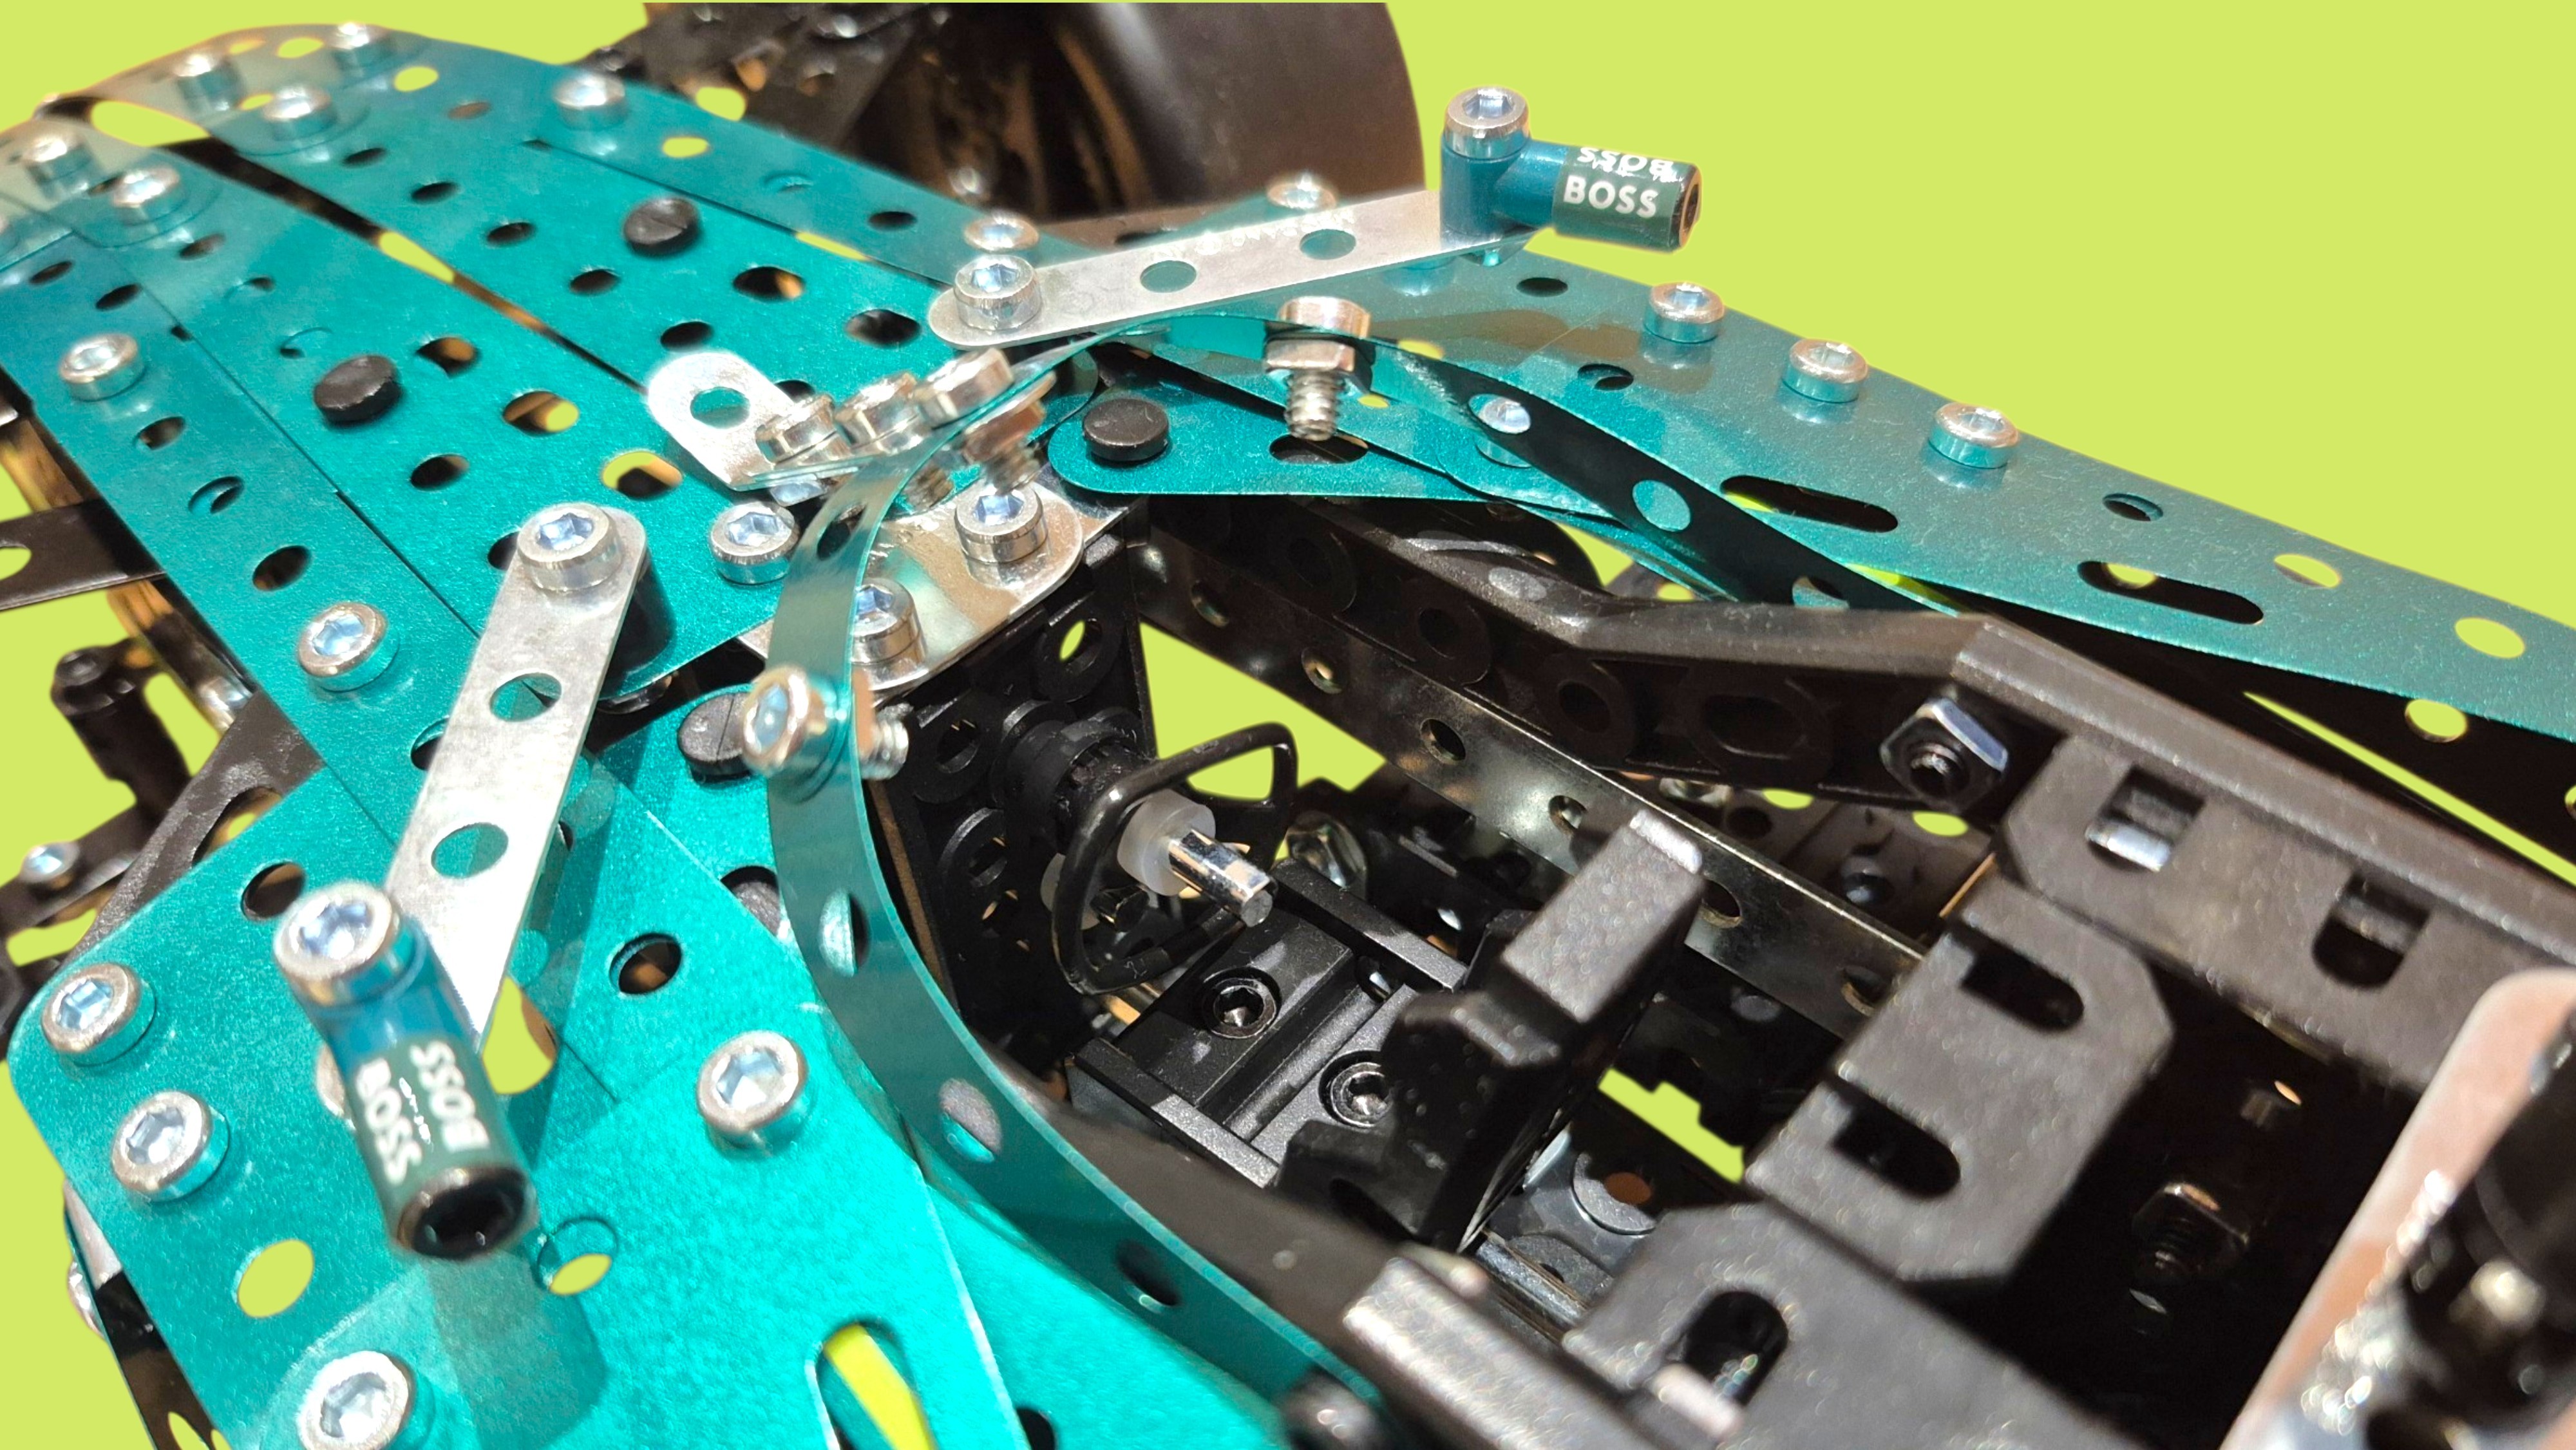
We also assemble the driver’s halo safety device and attach it to the car. You have most probably seen the halo device on all modern F1 cars, but what exactly does it do and why was it brought in?
 The F1 halo is a curved titanium safety bar surrounding the cockpit. It protects the driver’s head from flying debris, heavy impacts, and rolling cars. It was introduced for the 2018 season by the FIA to prevent fatal head injuries following severe accidents involving drivers like Felipe Massa (2009), Henry Surtees (2009), and Jules Bianchi (2014).
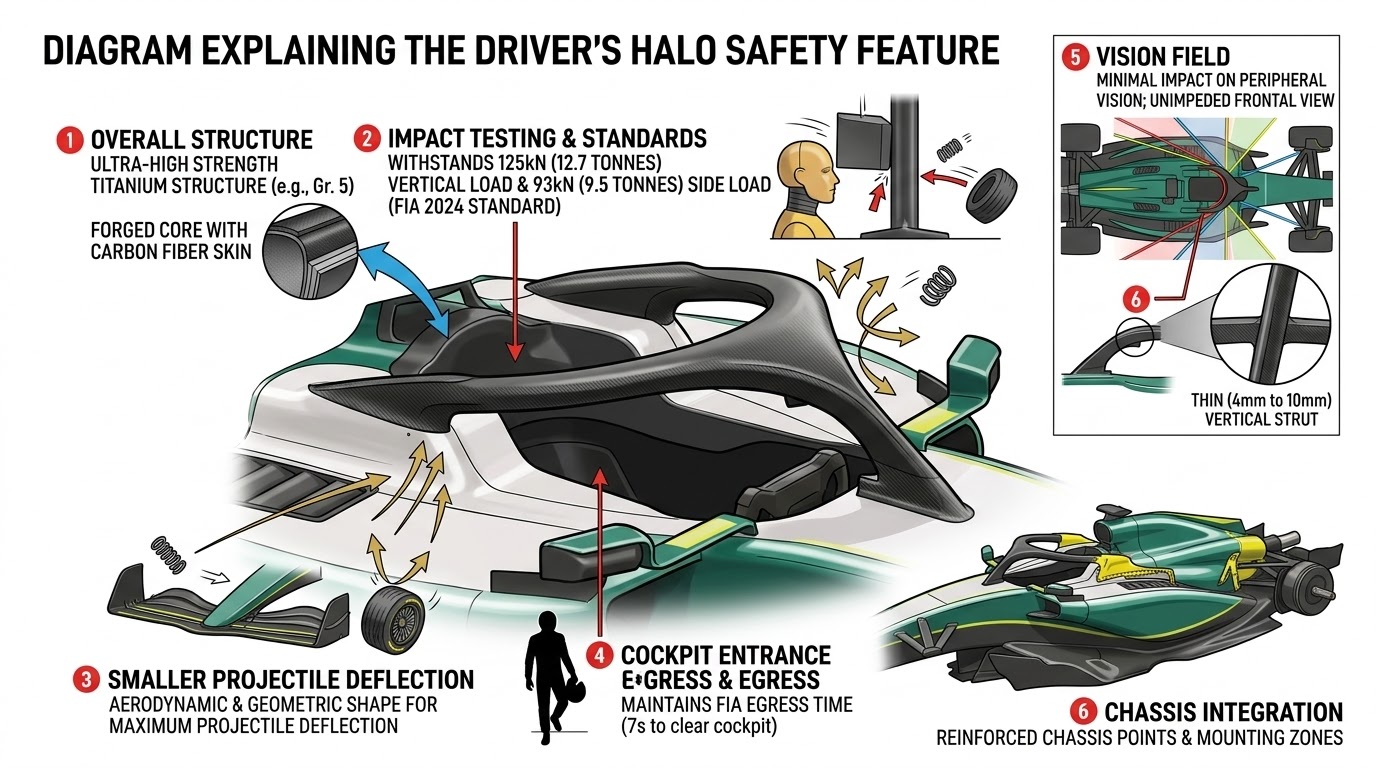
What the Halo Does:
• Deflects Debris: It pushes away loose car parts, detached wheels, and barriers during high-speed crashes.
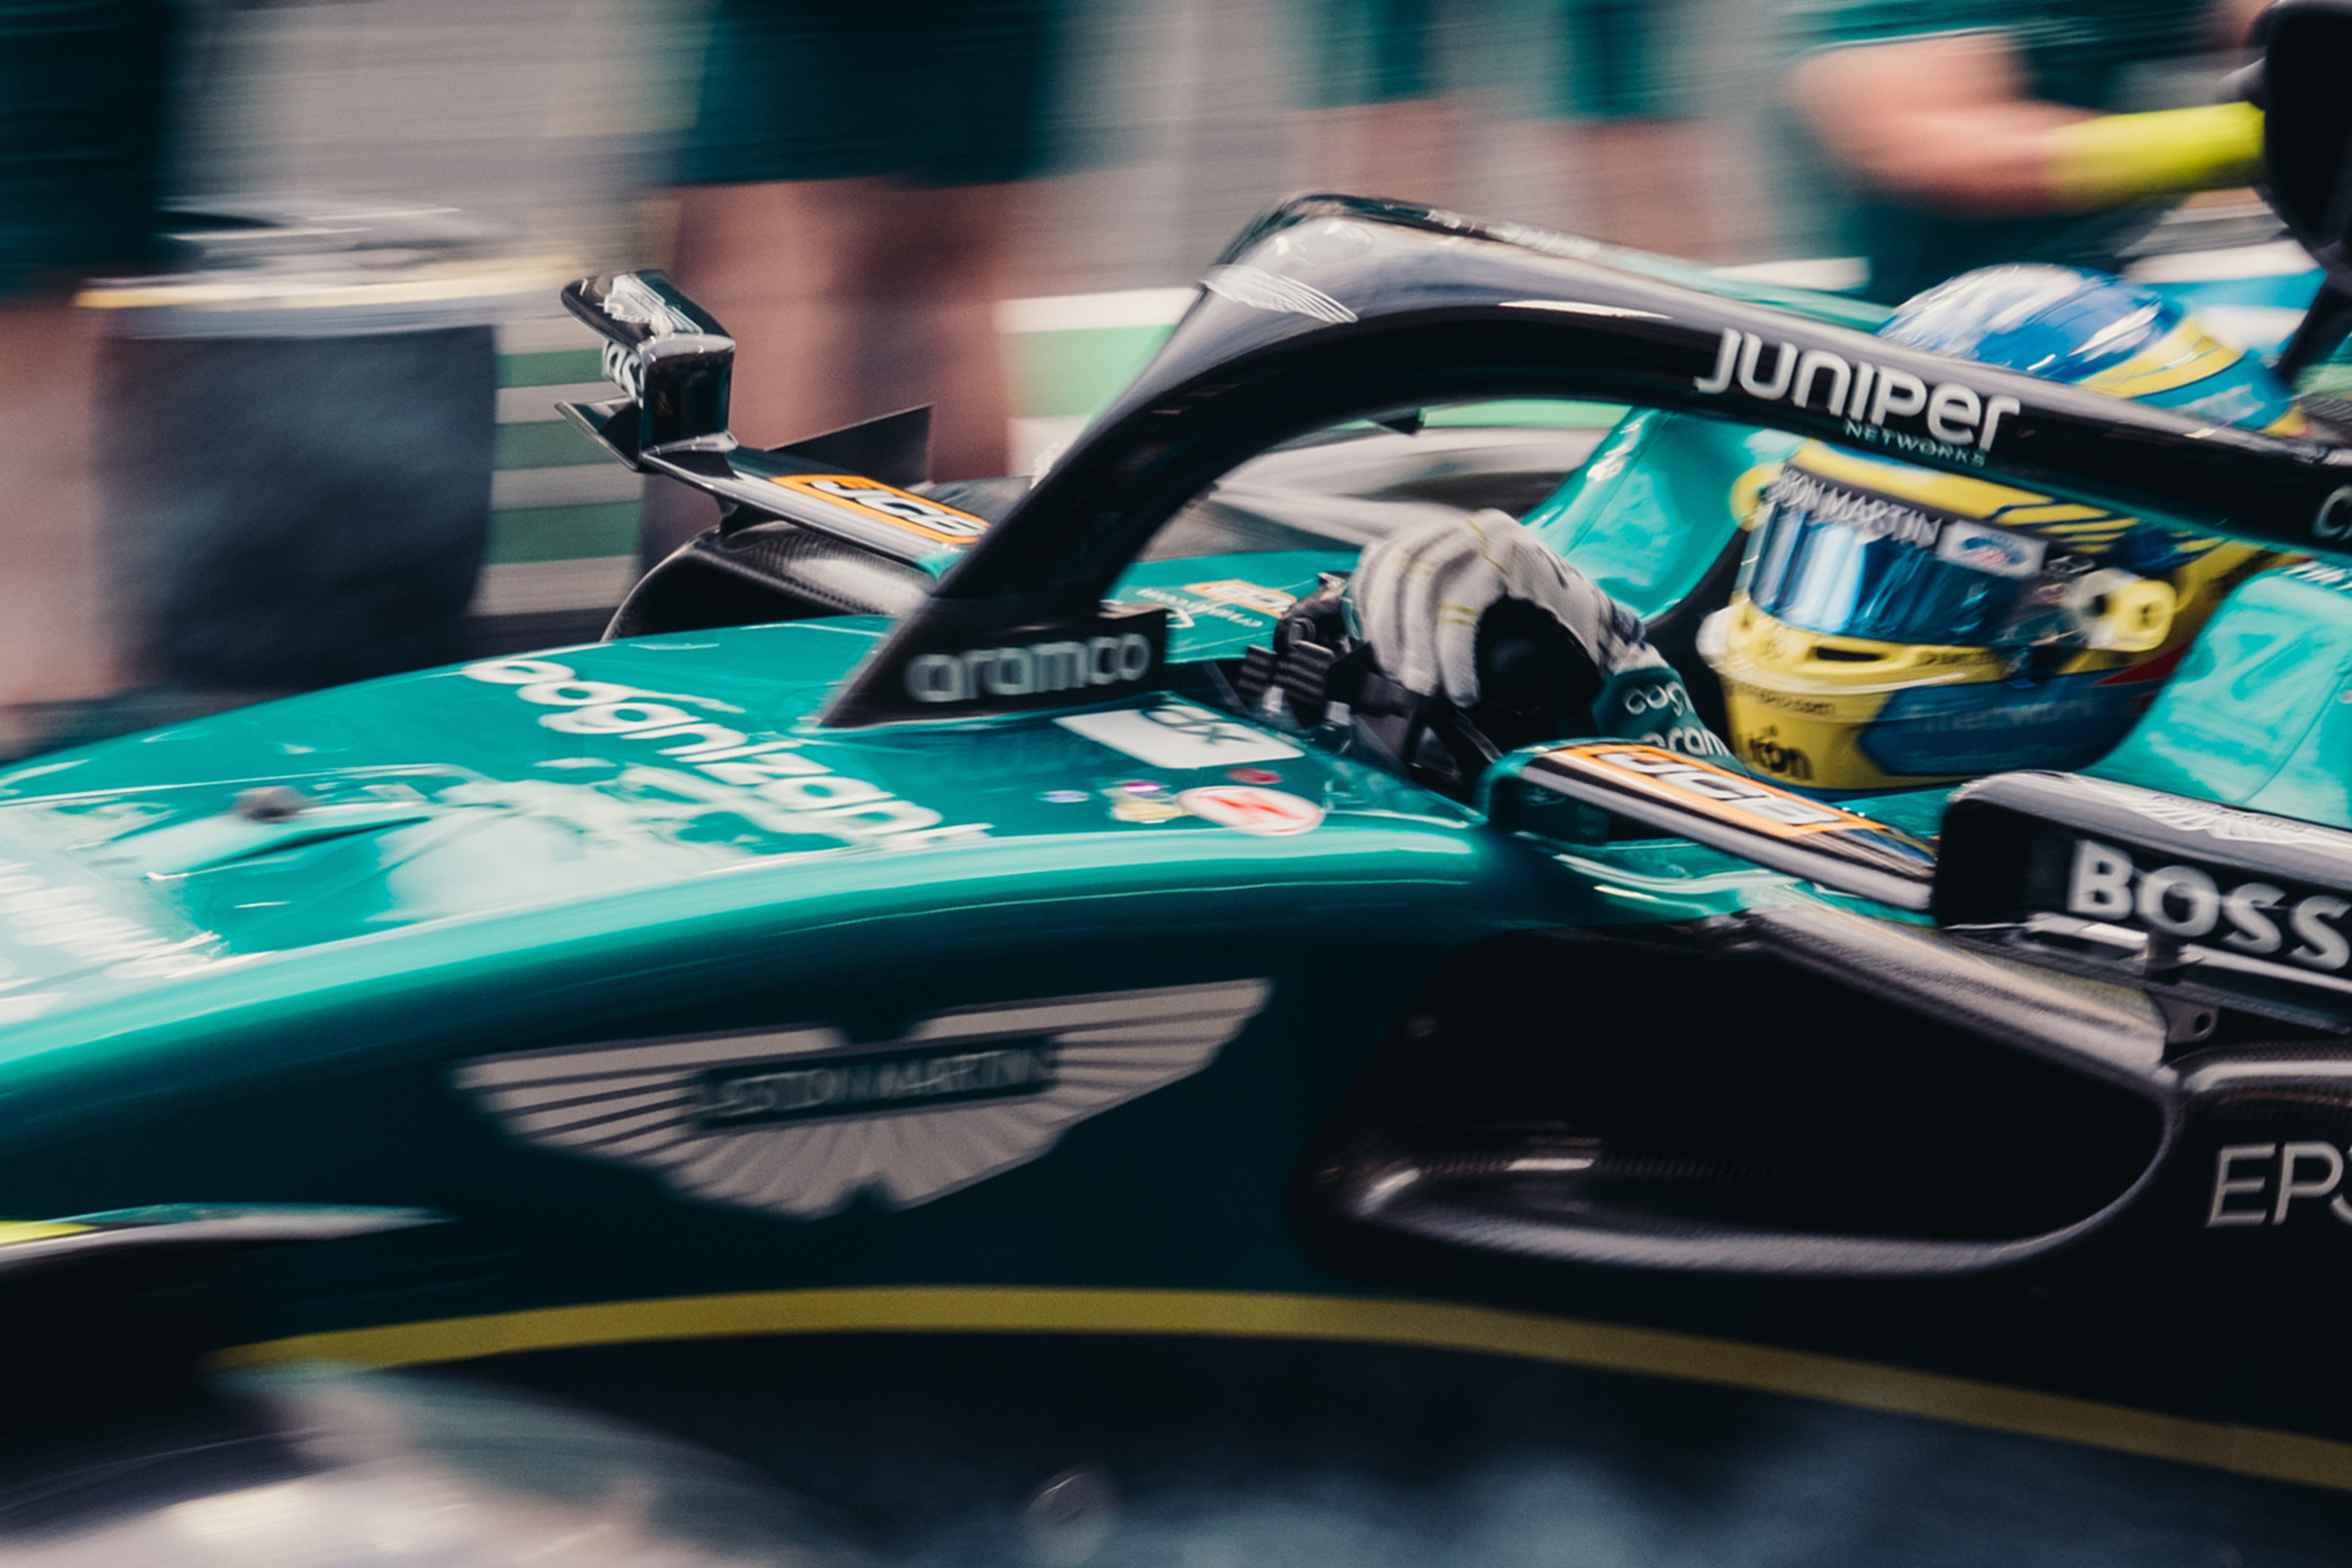
• Supports Massive Weight: Built from grade-5 titanium, the ~7 kg frame can withstand up to 12 tonnes of static load—the equivalent of a London double-decker bus.
• Protects in Rollovers: It creates a safety cell around the driver’s helmet if the car flips or another vehicle lands on top of the cockpit.
• Proven Lifesaver: It has saved multiple drivers from serious injury or death, including Charles Leclerc (Spa 2018), Romain Grosjean (Bahrain 2020), Lewis Hamilton (Monza 2021), and Zhou Guanyu (Silverstone 2022).
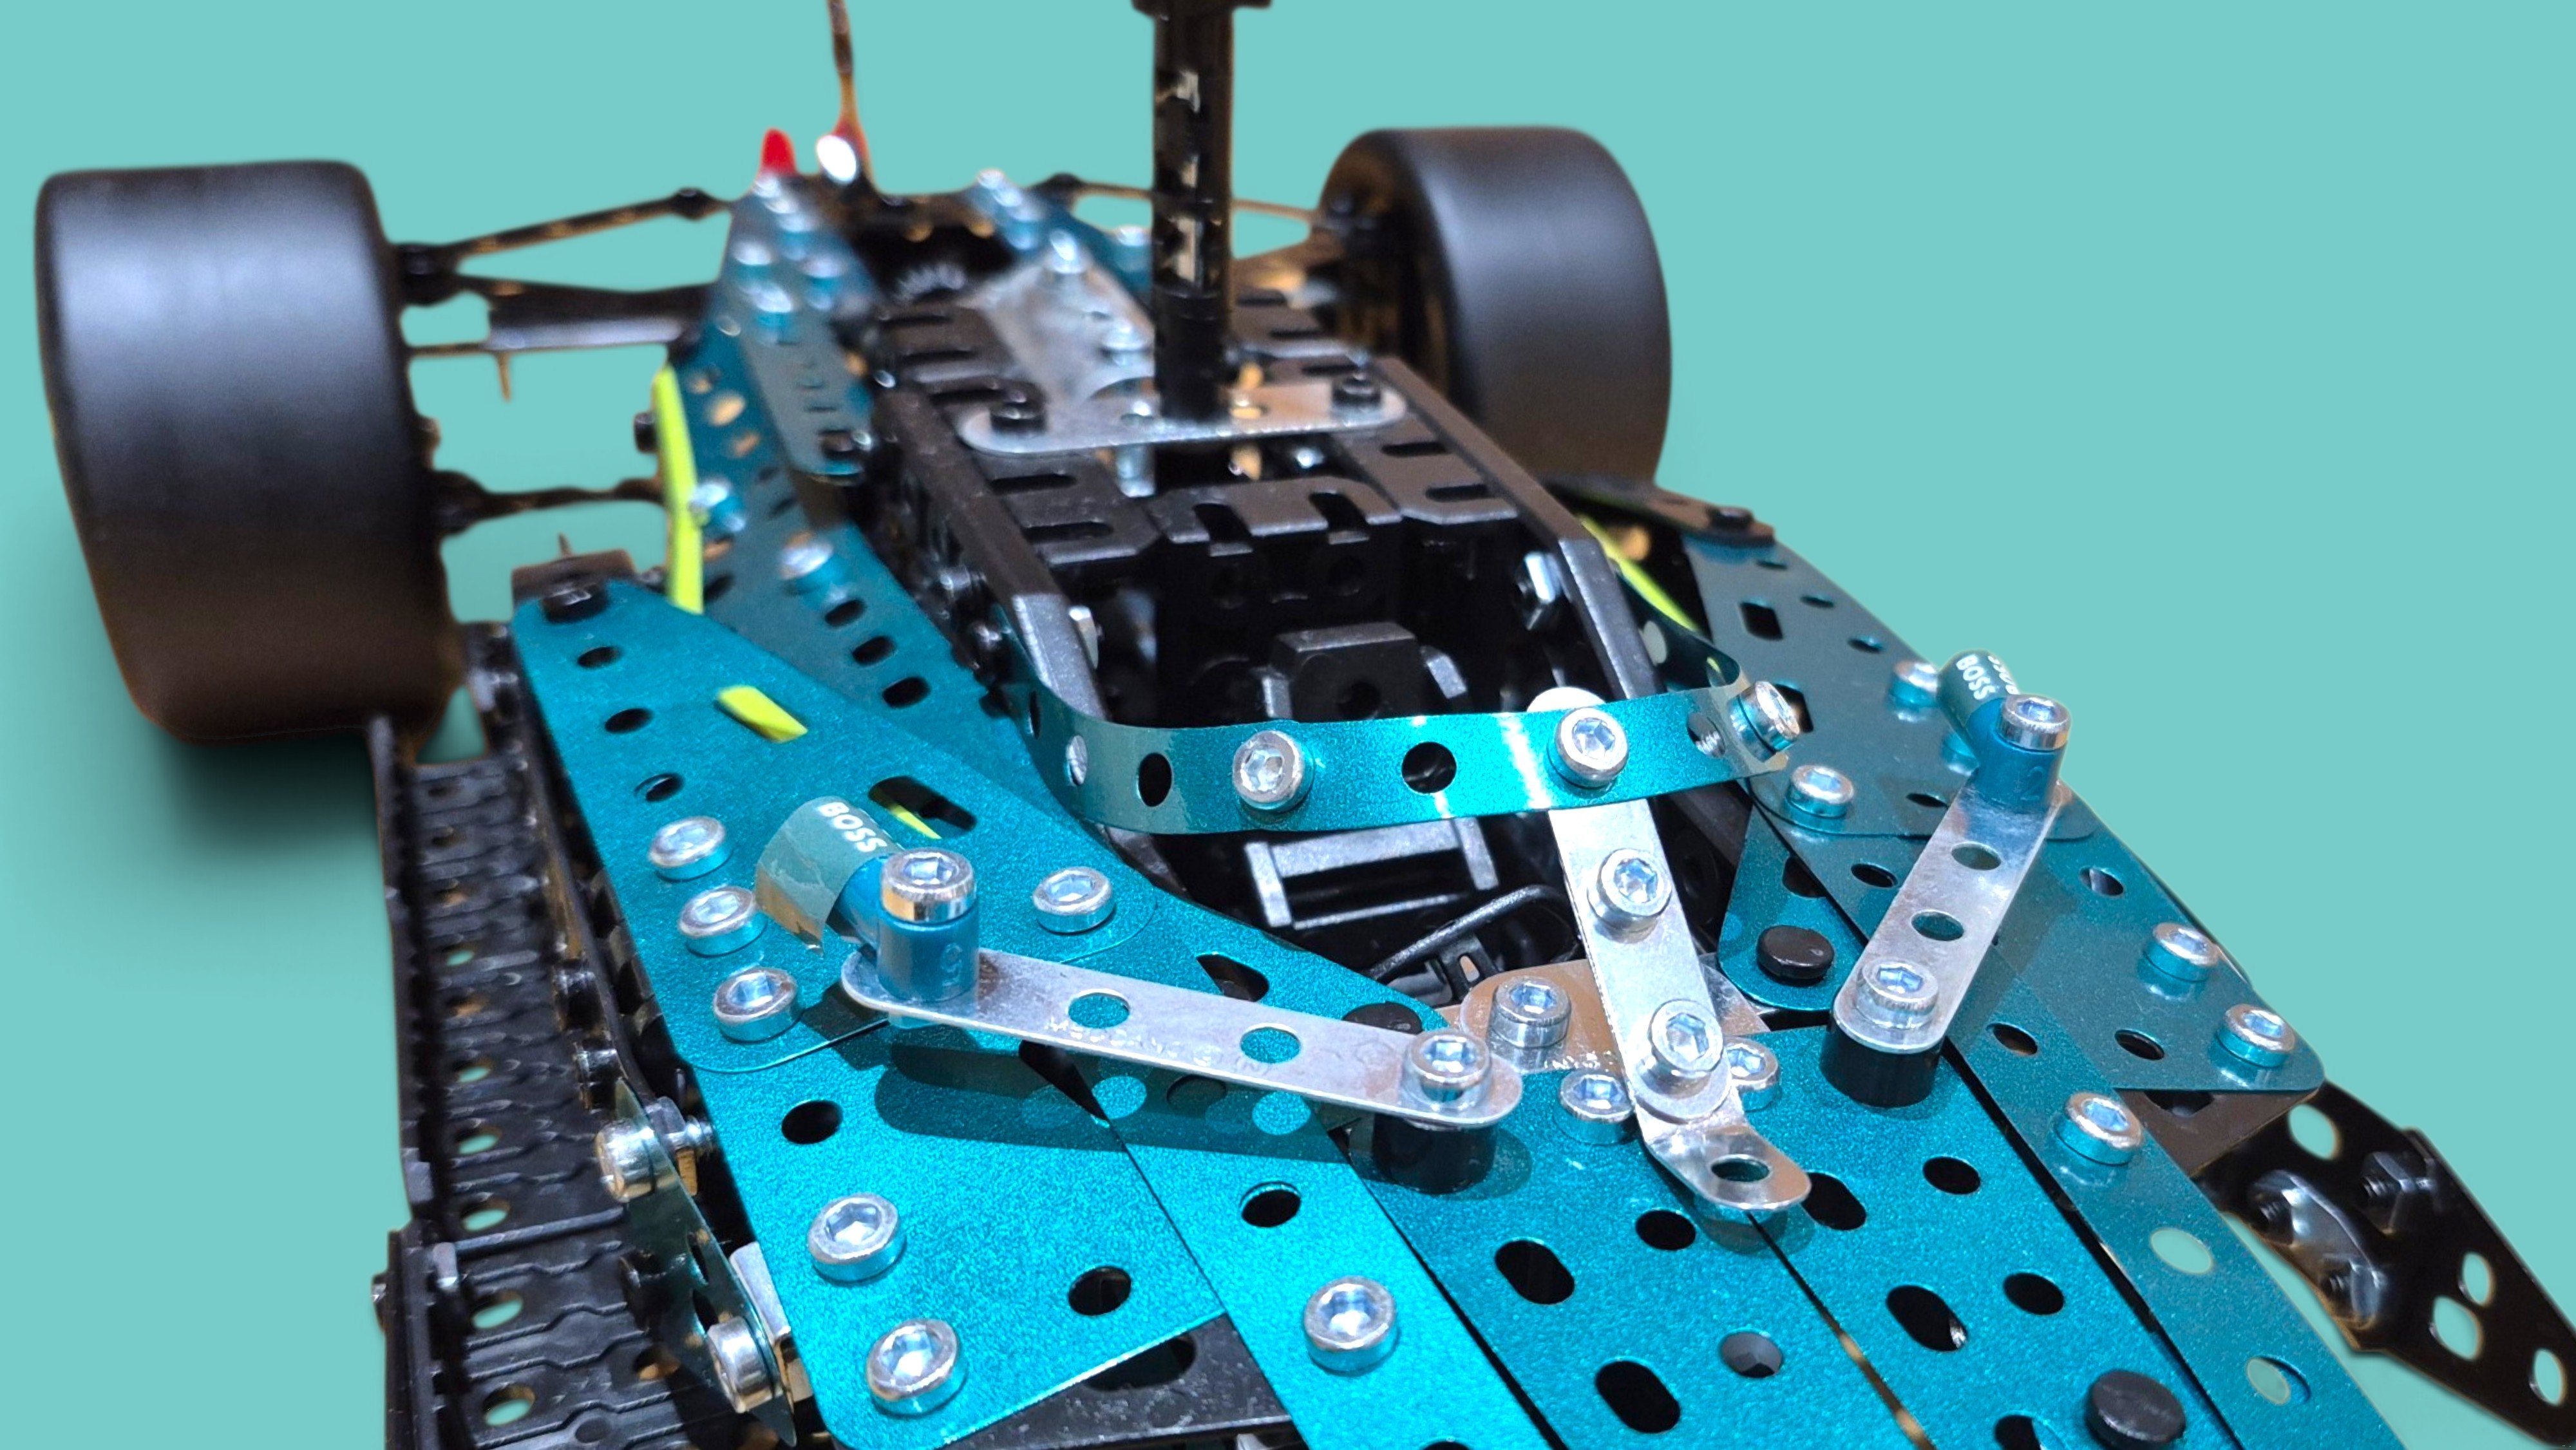
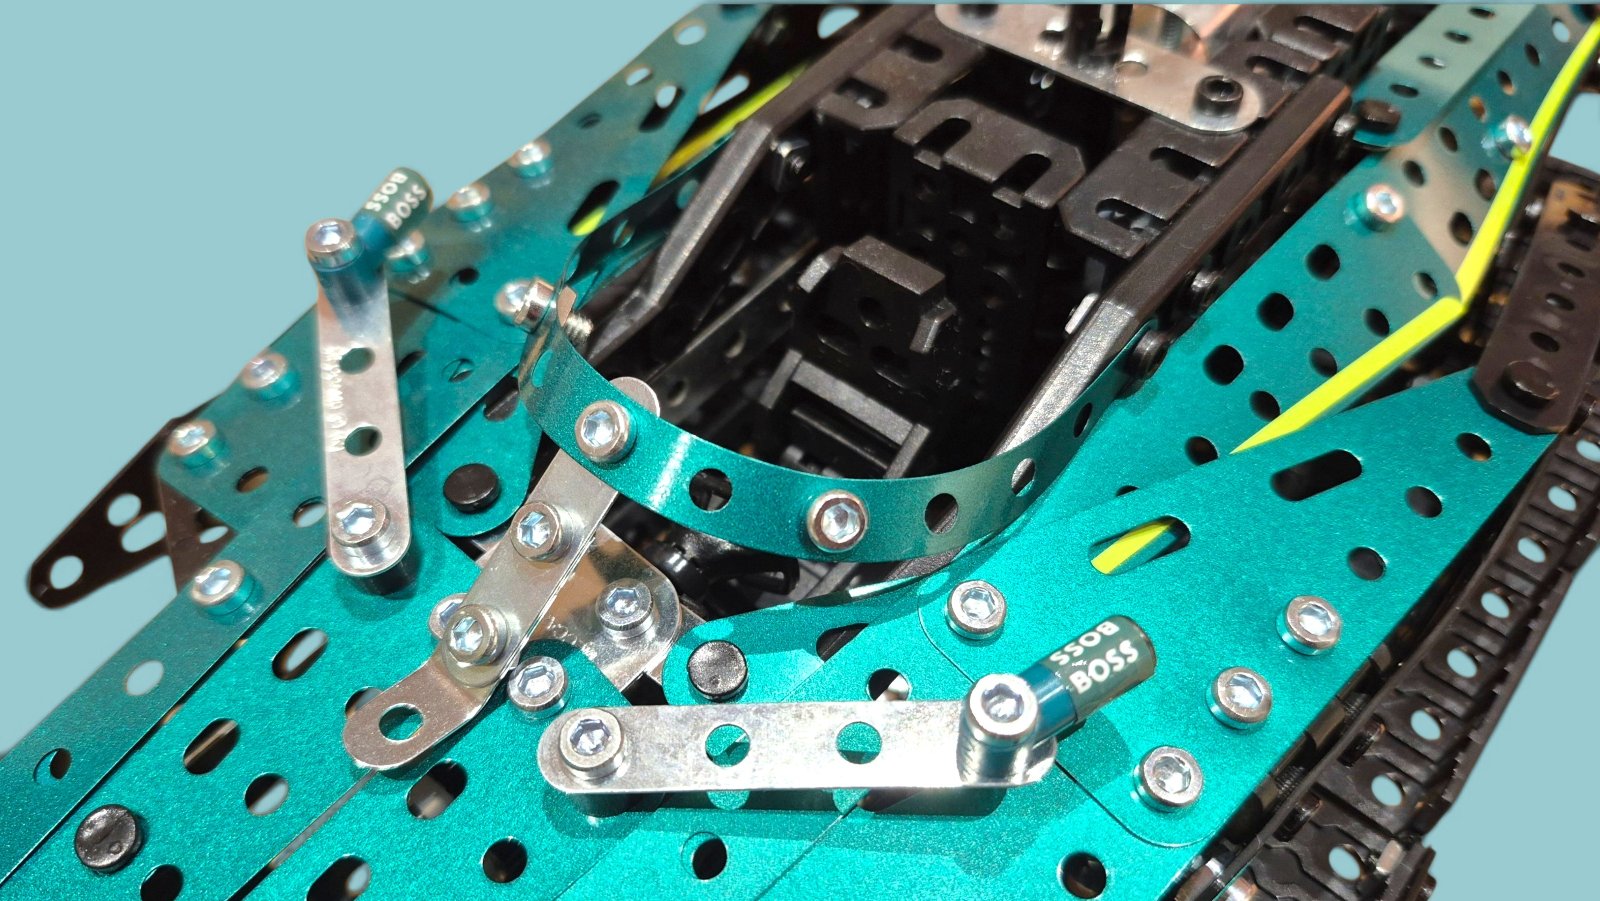
Meccano have certainly done a remarkable job of recreating the halo for this model, made of three curved turquoise flexible pieces and two silver struts, this Meccano structure curves beautifully and realistically around the cockpit.
Phase 9:
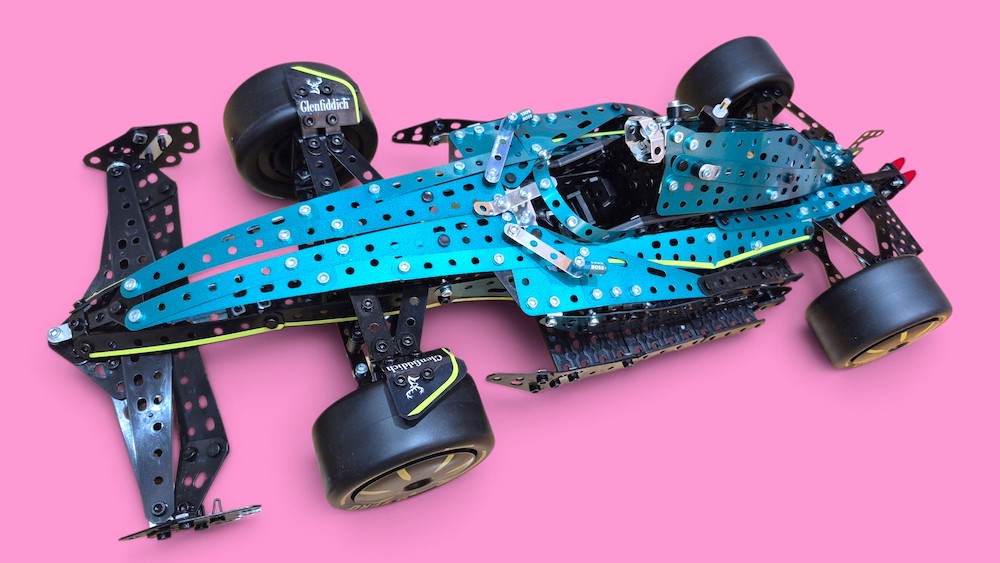
In this penultimate phase, we build the engine cover as a standalone unit off the vehicle. The cover is removable so you can impress your friends and family by removing the cover and showing off the functioning V6 engine.
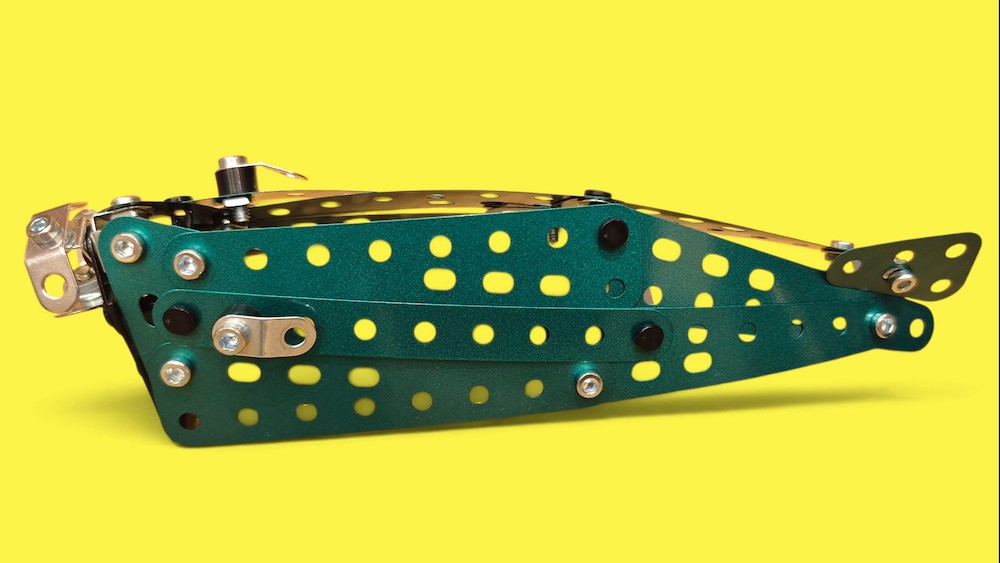 On a modern Formula 1 car, the engine cover is far more than a simple protective hood; it is a complex, multifunctional carbon-fibre panelling system that acts as a primary aerodynamic and thermal management device.
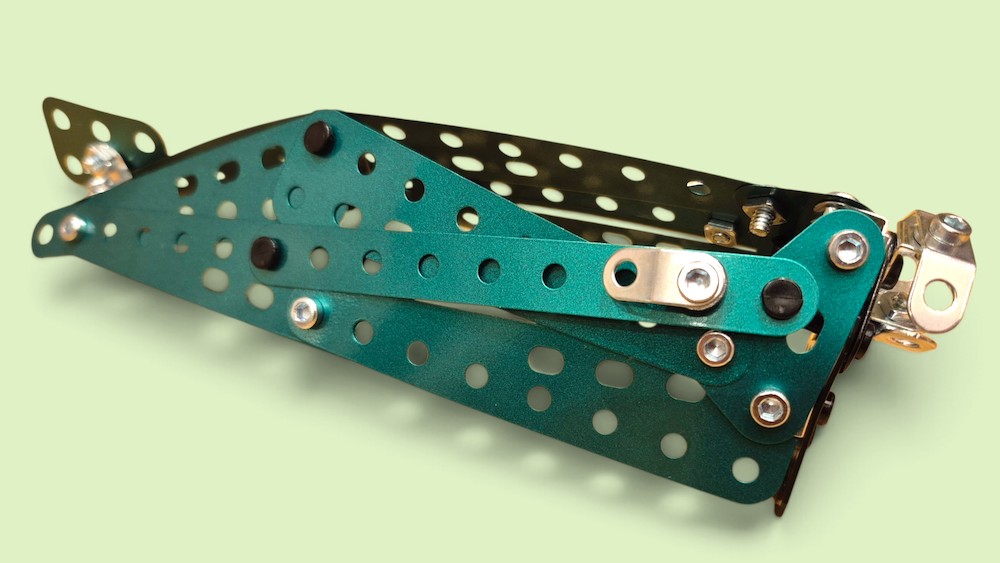
Aerodynamic Flow & Rear-Wing Feeding: The primary job of the engine cover is to direct clean airflow smoothly over the back of the car. It tapers sharply behind the driver (often referred to as a ‘coke-bottle’ shape) to deliver undisturbed high-speed air to the beam wing, rear wing, and floor diffuser. This helps maximize rear downforce and overall aerodynamic efficiency while reducing unwanted drag.
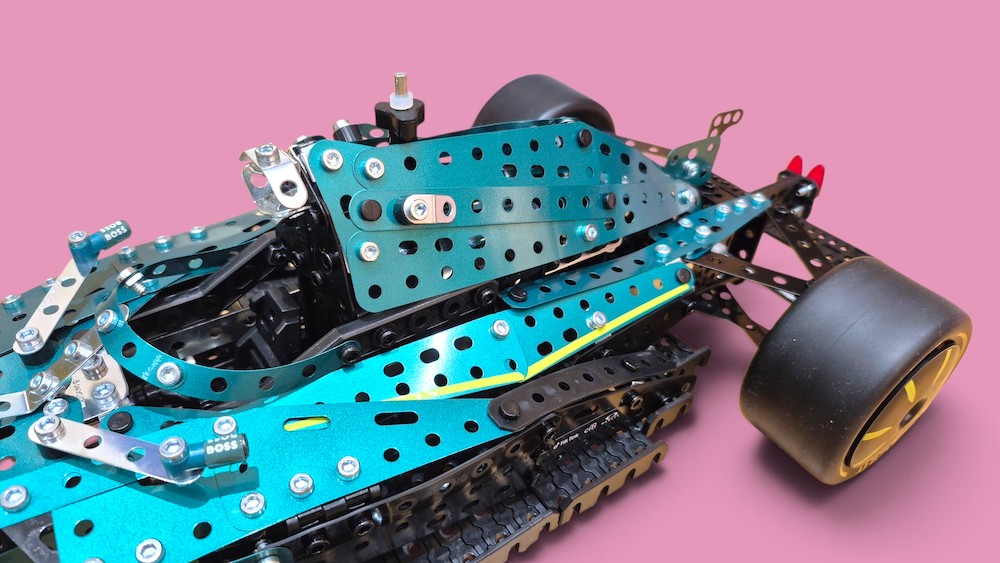
Thermal Management & Heat Rejection: Modern F1 turbo-hybrid power units operate under extreme heat. The engine cover houses internal ducting, large rear exit vents, and customizable cooling louvers (slats). These components allow engineers to vent hot air from the radiators and intercoolers out of the bodywork. Teams alter the layout and size of these vents depending on ambient track temperatures.
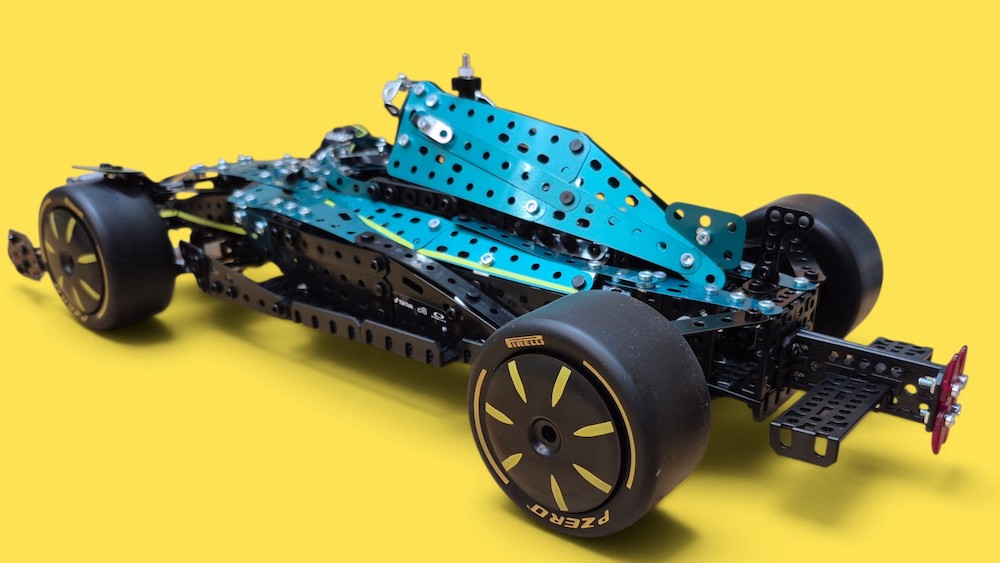 Integration of the Airbox & Shark Fin:
Airbox Intake: Positioned directly above the driver’s head, the main air intake embedded in the engine cover forces ambient air into the engine’s turbocharger and auxiliary cooling systems.
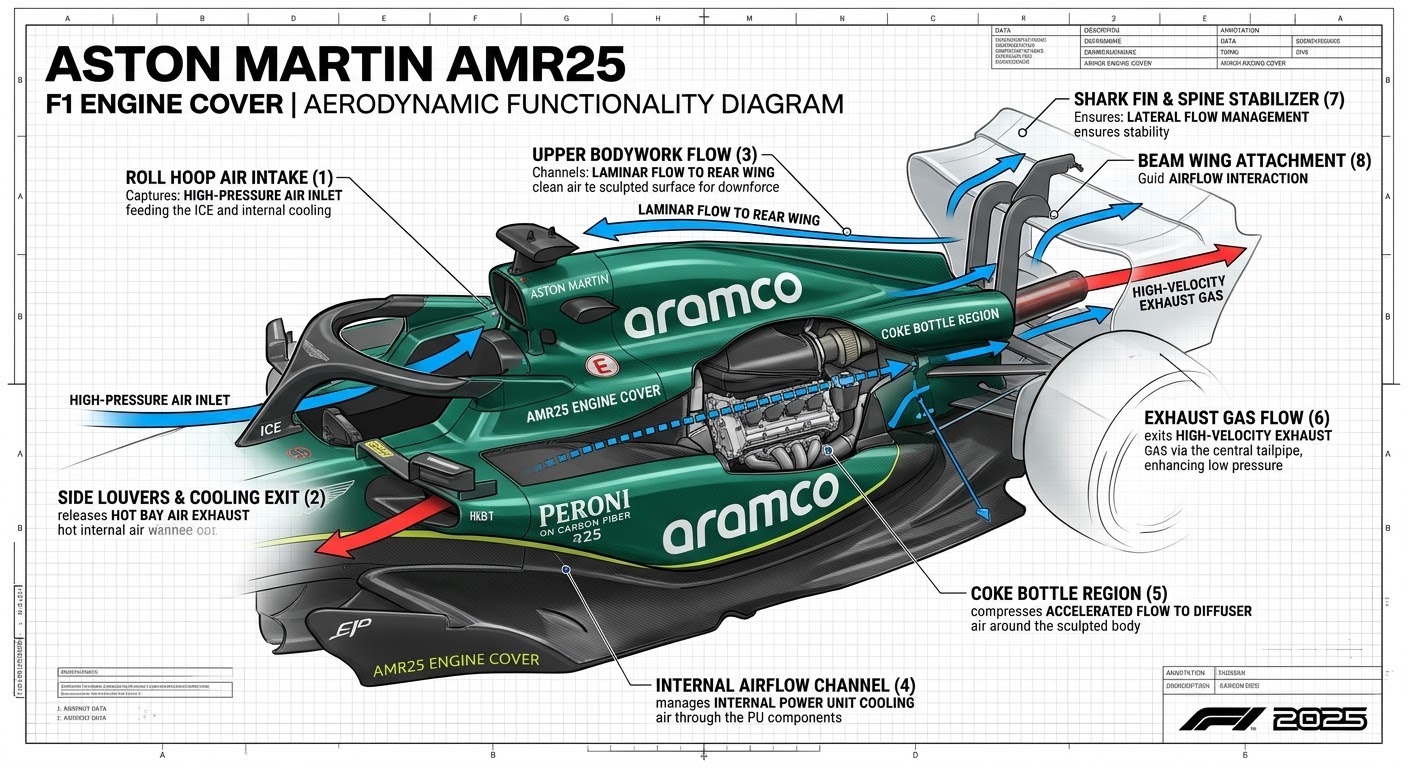
Dorsal “Shark Fin”: Extending along the spine of the cover, the prominent shark fin stabilizes lateral airflow when the car is yawing (cornering). This keeps the airflow straight as it hits the rear wing, providing consistent downforce during high-speed cornering.
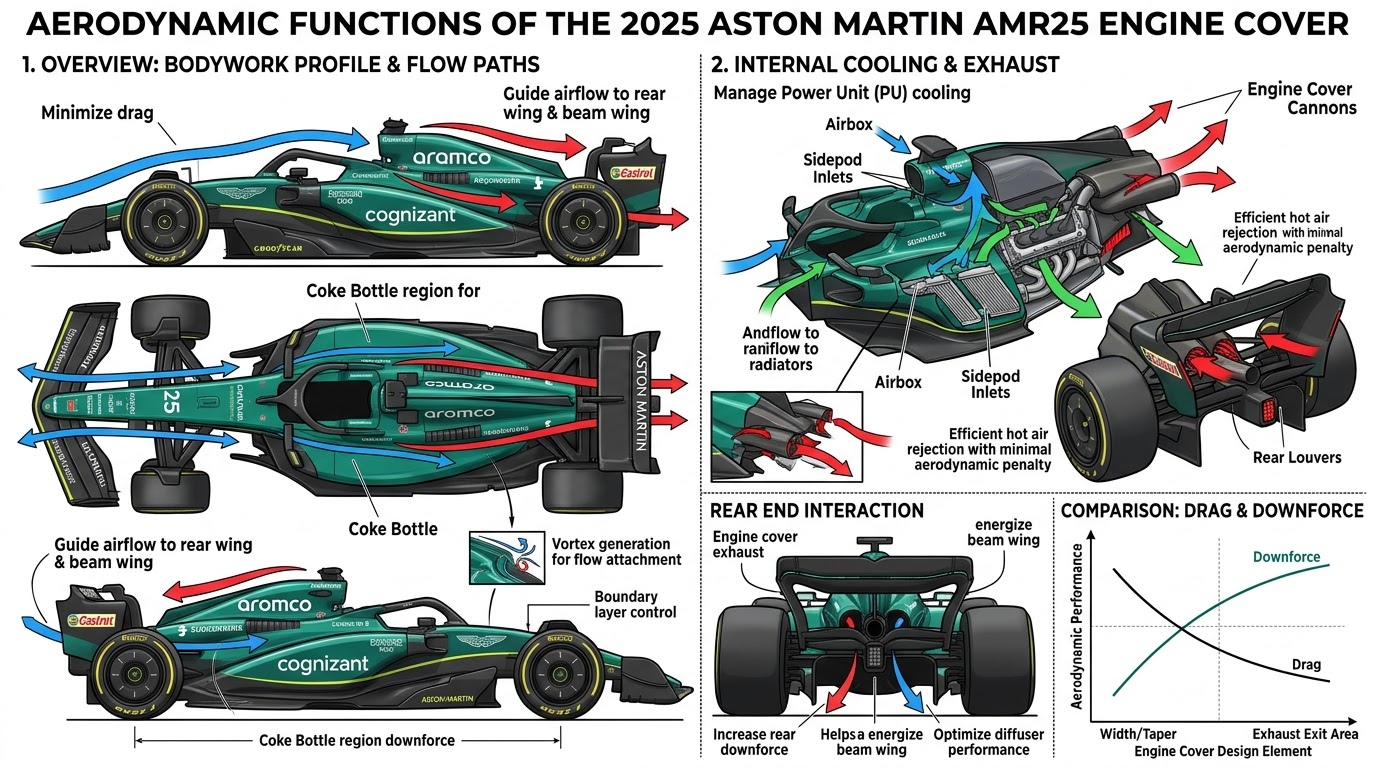
Packaging & Protection: It tightly shields the internal components—including the internal combustion engine, MGU-K (Motor Generator Unit-Kinetic), MGU-H (Motor Generator Unit-Heat) — key parts of the hybrid energy recovery system, energy store, and exhaust systems—from external elements, debris, and airstream resistance.
In short, the engine cover transforms hot internal exhaust into controlled aerodynamic energy, balancing cooling needs with low drag to optimize performance at 200+ mph. With the final phase just stone’s throw away, stay tuned to Free Car Mag and our Meccano Workshop Diary!
Final Phase 10: Coming Soon
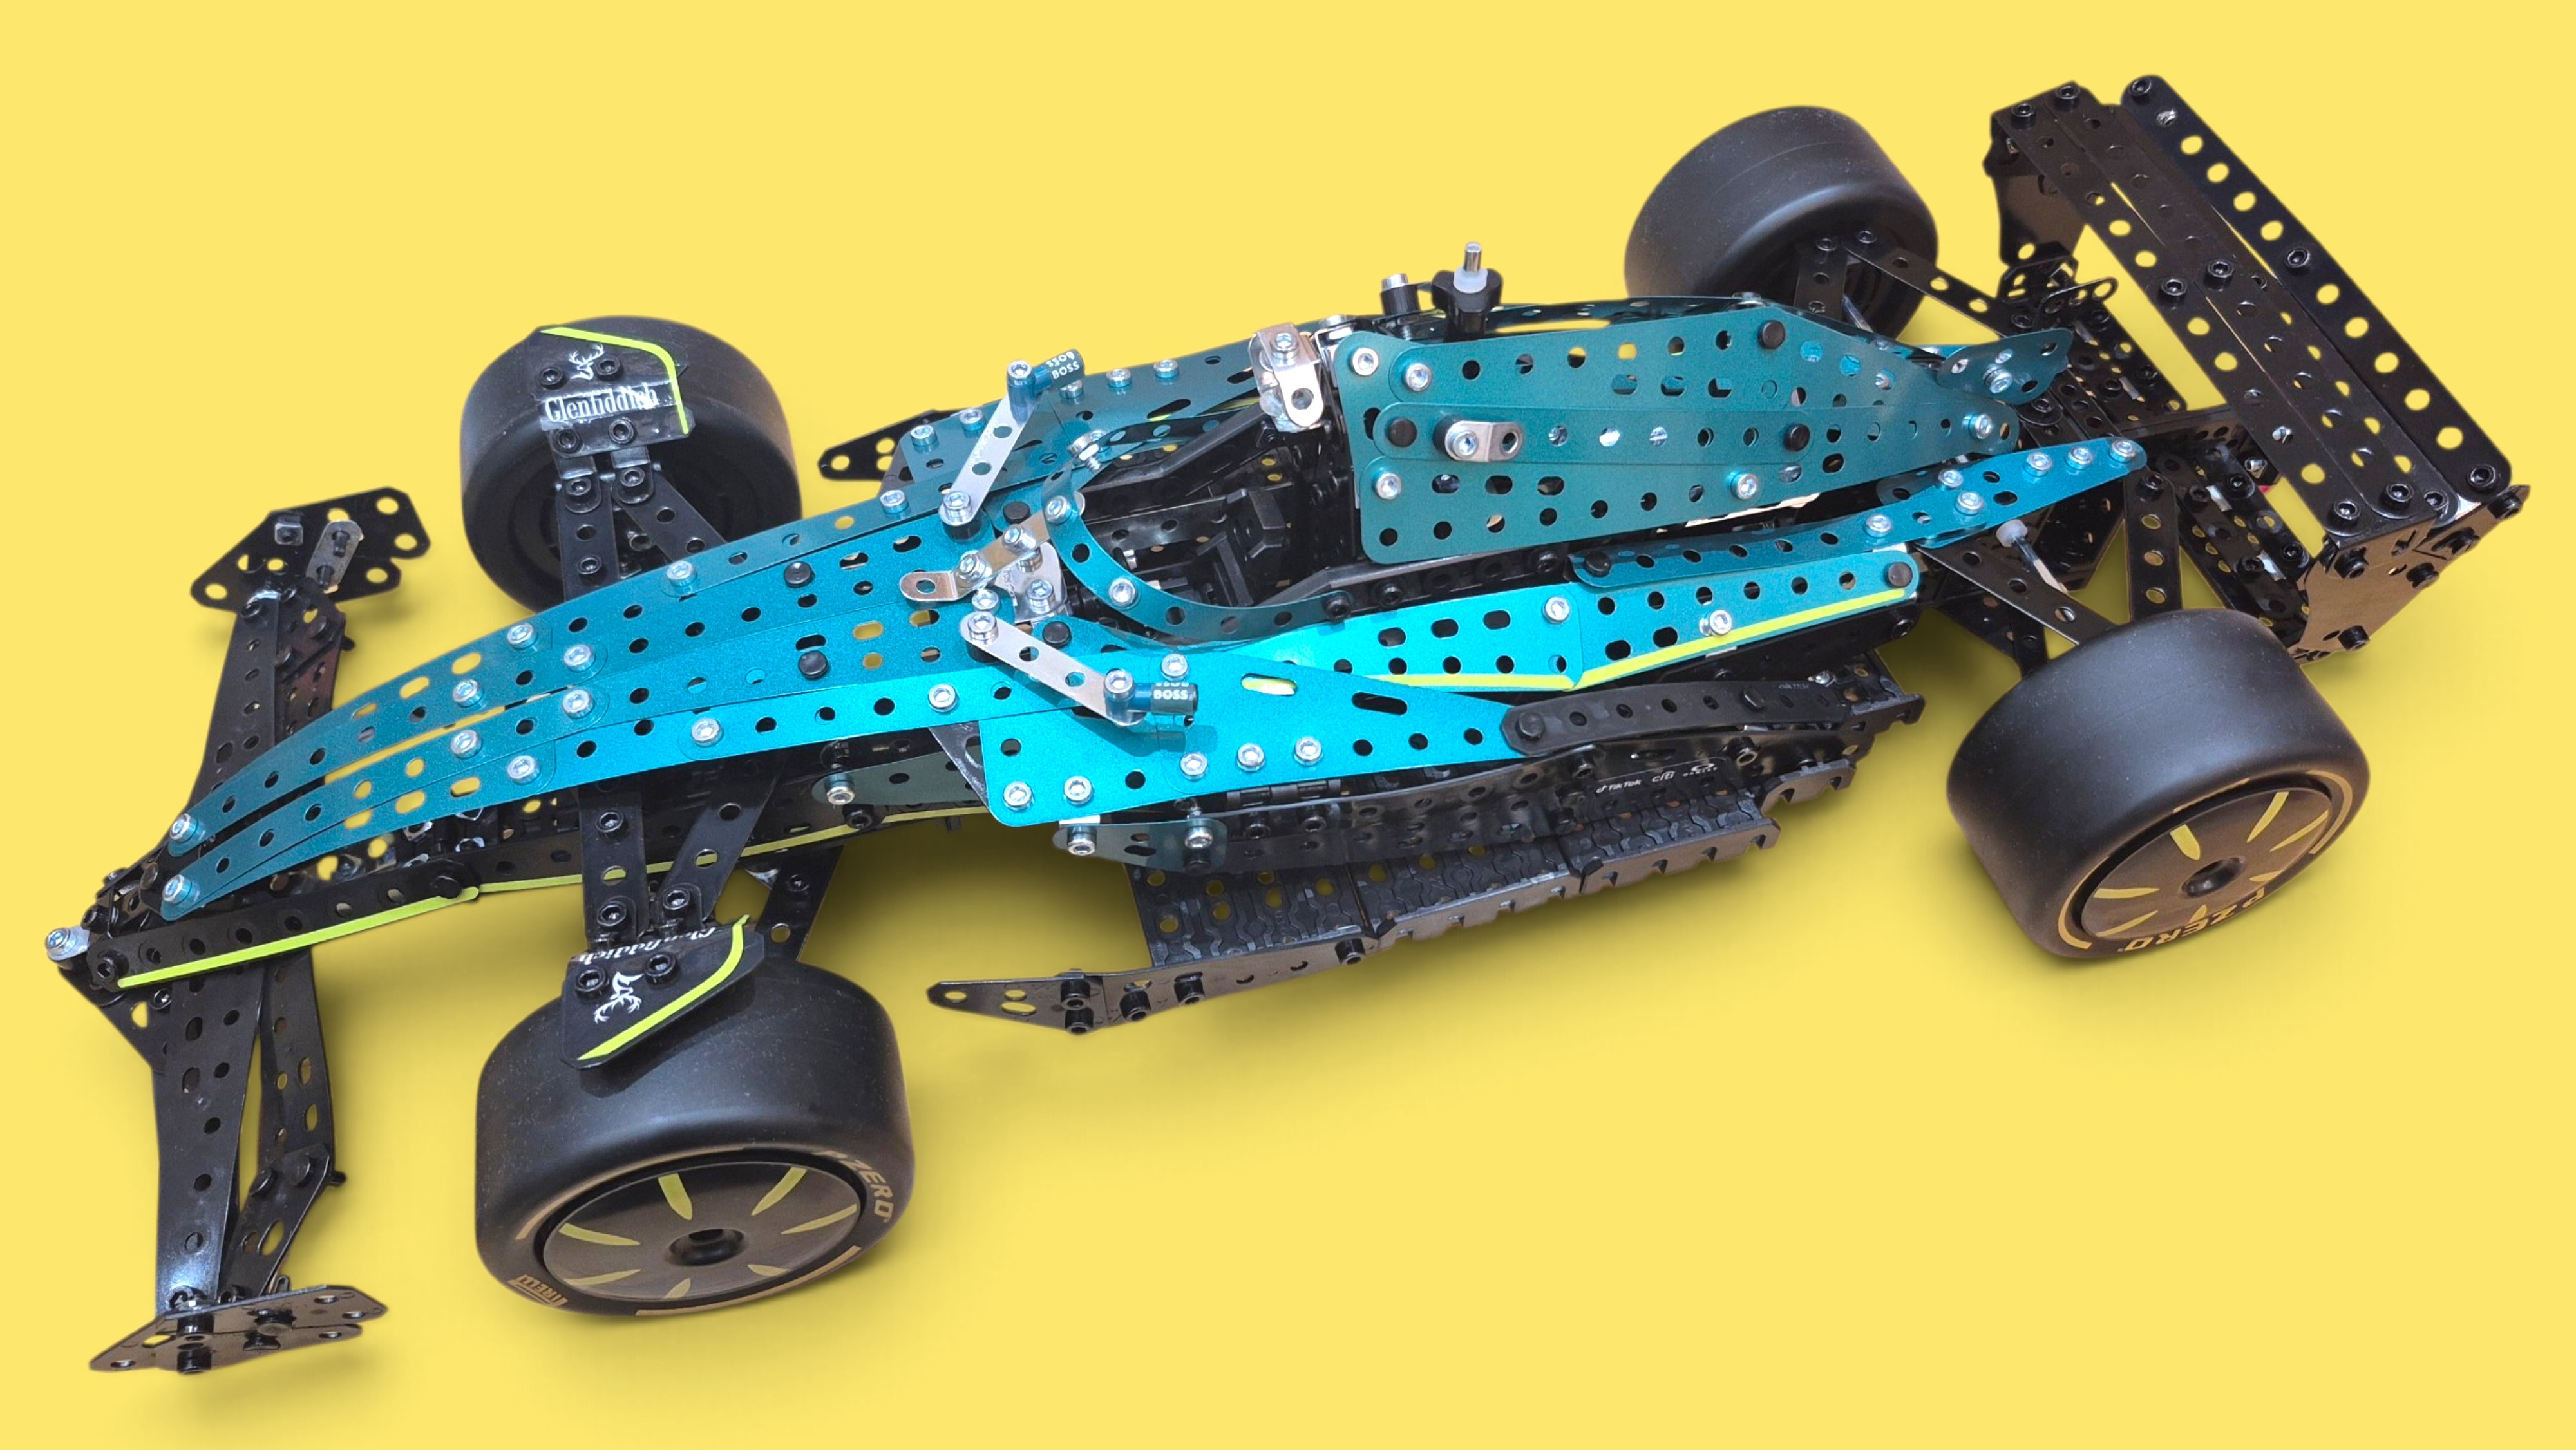
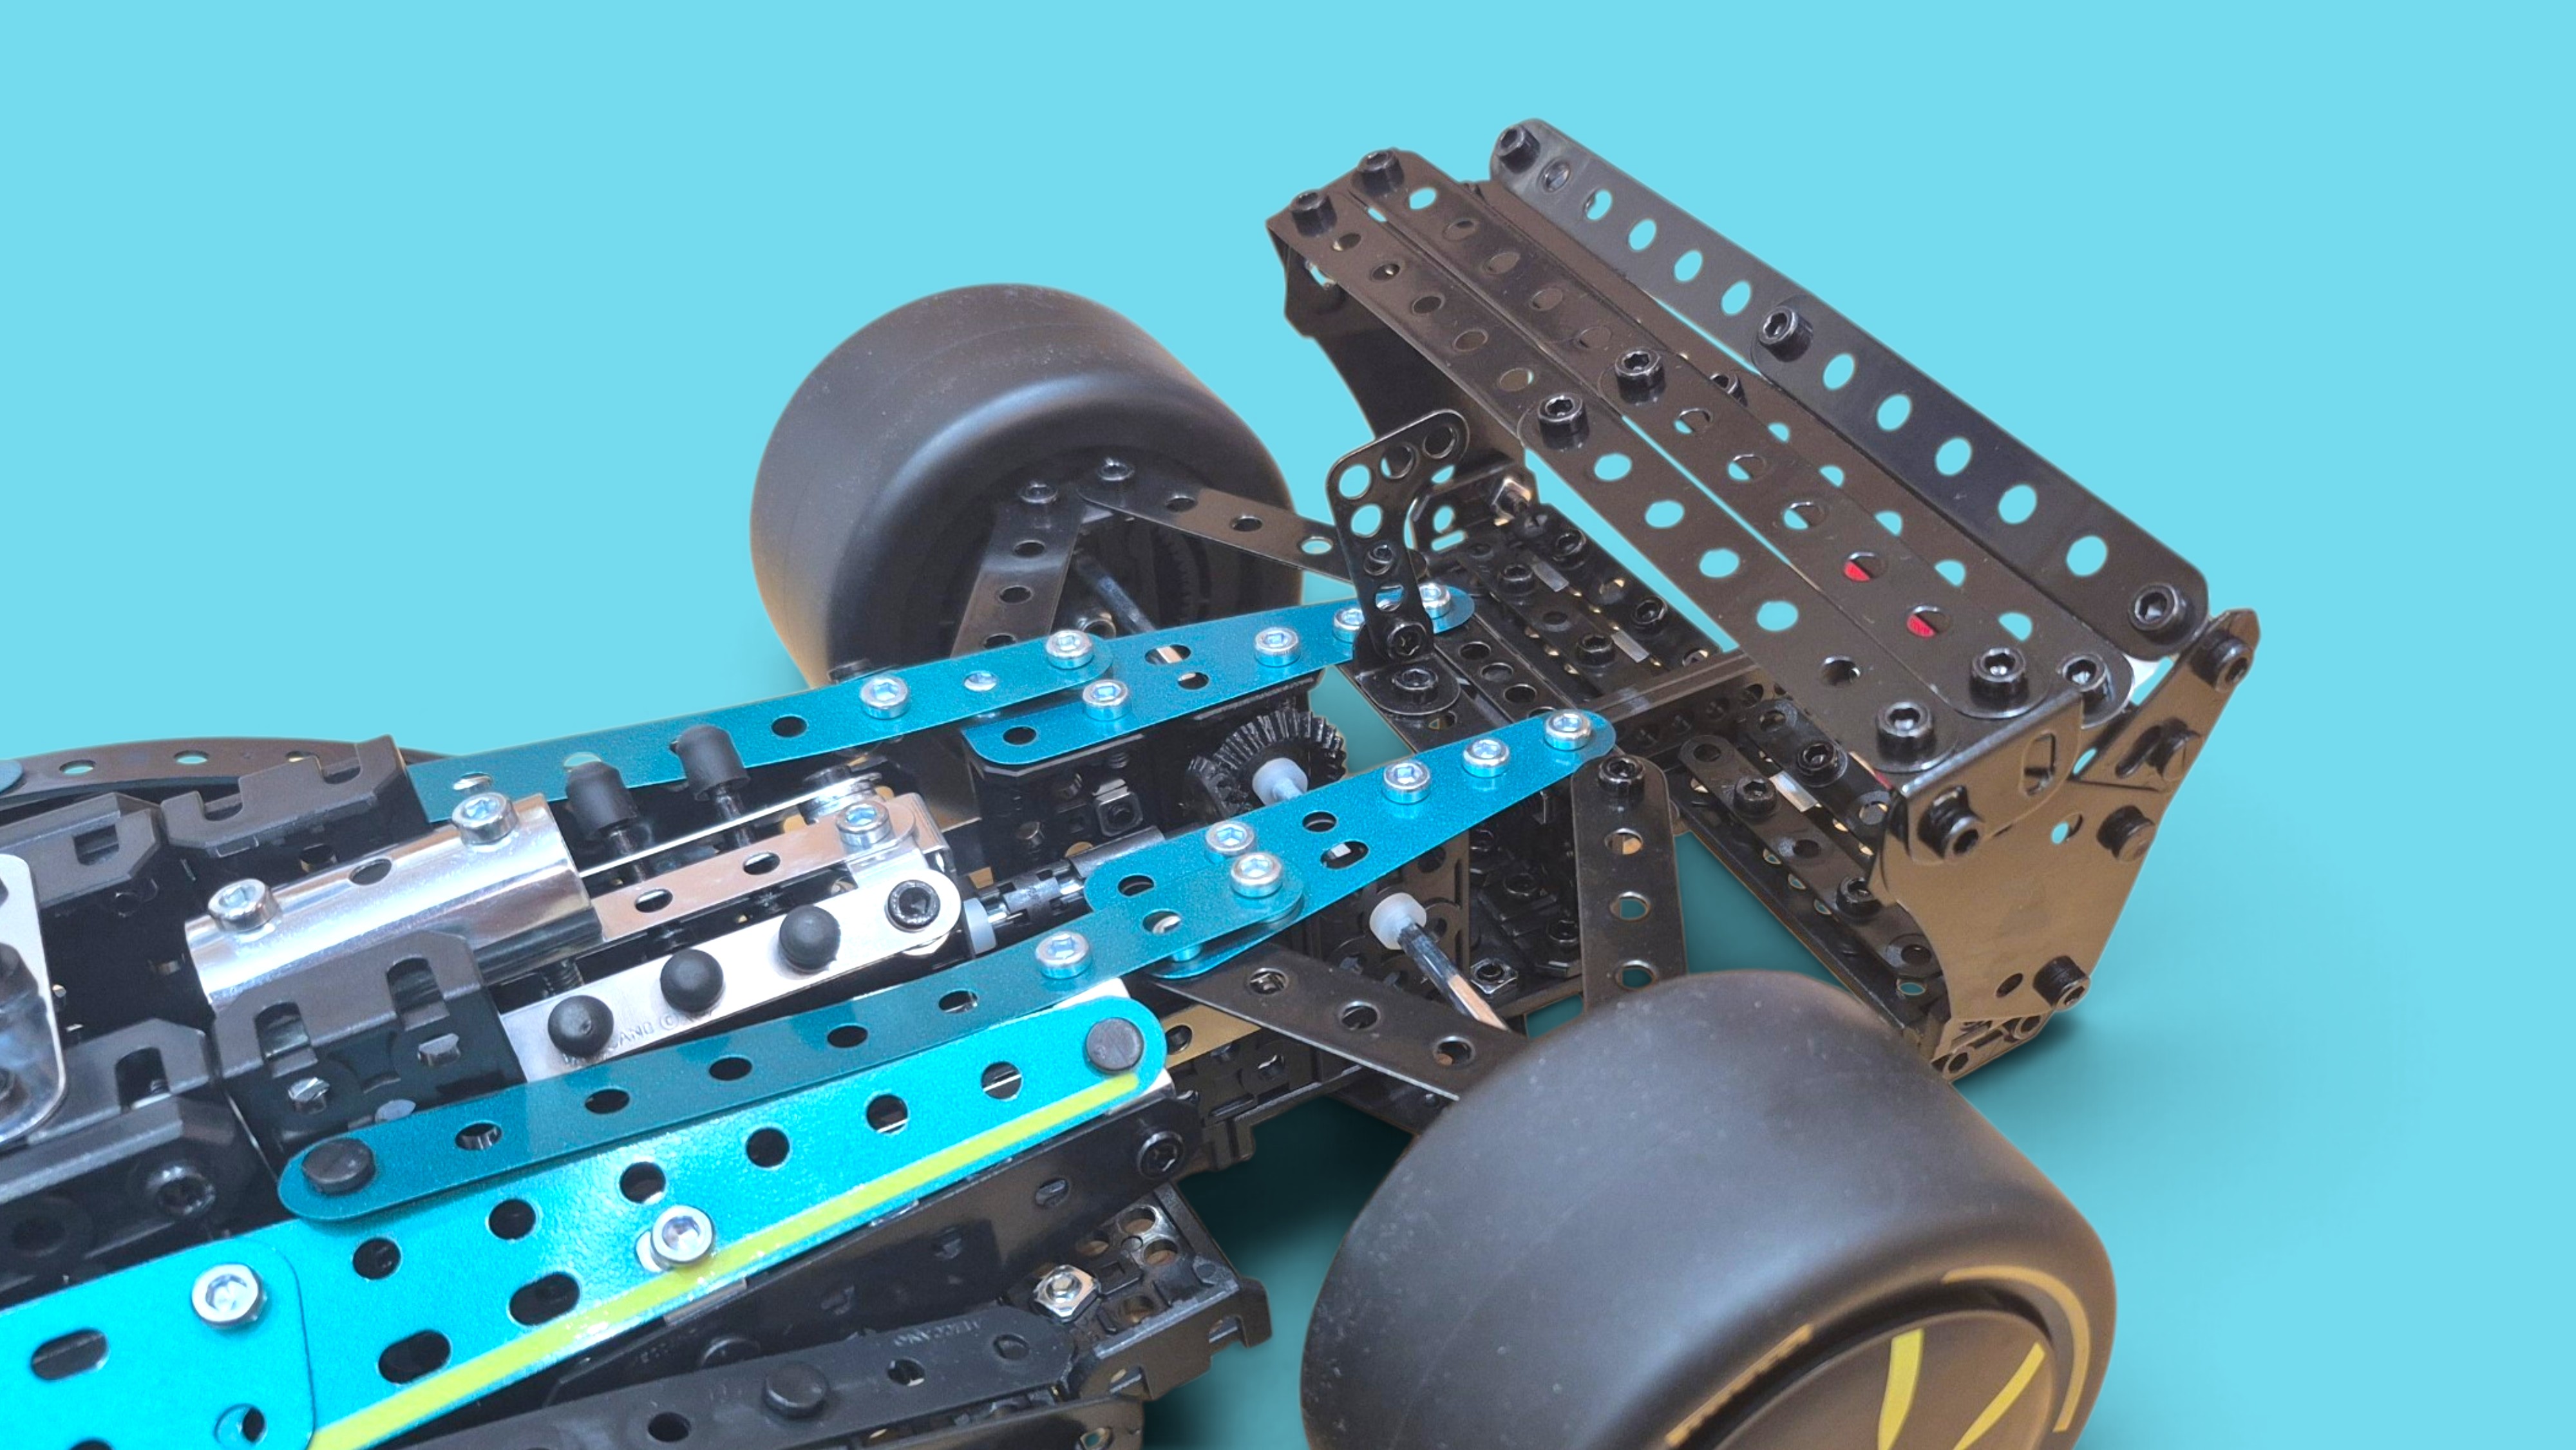
In the final part of the build, we construct the rear spoiler, DRS System, and apply all the decals to the car. This is a bittersweet moment as we are pleased to complete the build but also feel a little sad as the fun and enjoyment of the building process has come to an end.
The rear spoiler (wing) generates massive downforce (aerodynamic grip) to press the car into the track during high-speed corners, while the DRS (Drag Reduction System) temporarily opens a flap on that wing to slash air resistance and boost straight-line speed.
The Rear Spoiler (Wing)
• Creates Downforce: It acts like an upside-down airplane wing. As air rushes over and under the elements, it pushes the rear of the car down, giving the tyres grip to corner at extreme speeds. • Creates Drag: The very force that pushes the car down also creates aerodynamic drag (wind resistance), which slows the car down on long straightaways.
 The DRS (Drag Reduction System)
• Opens the Flap: When activated, a hydraulic or electric actuator flips open a section (up to an 85 mm gap) on the upper element of the rear wing.
• Reduces Drag & Downforce: Air flows straight through the opening instead of hitting a solid wall of carbon fibre, sharply dropping wind resistance.
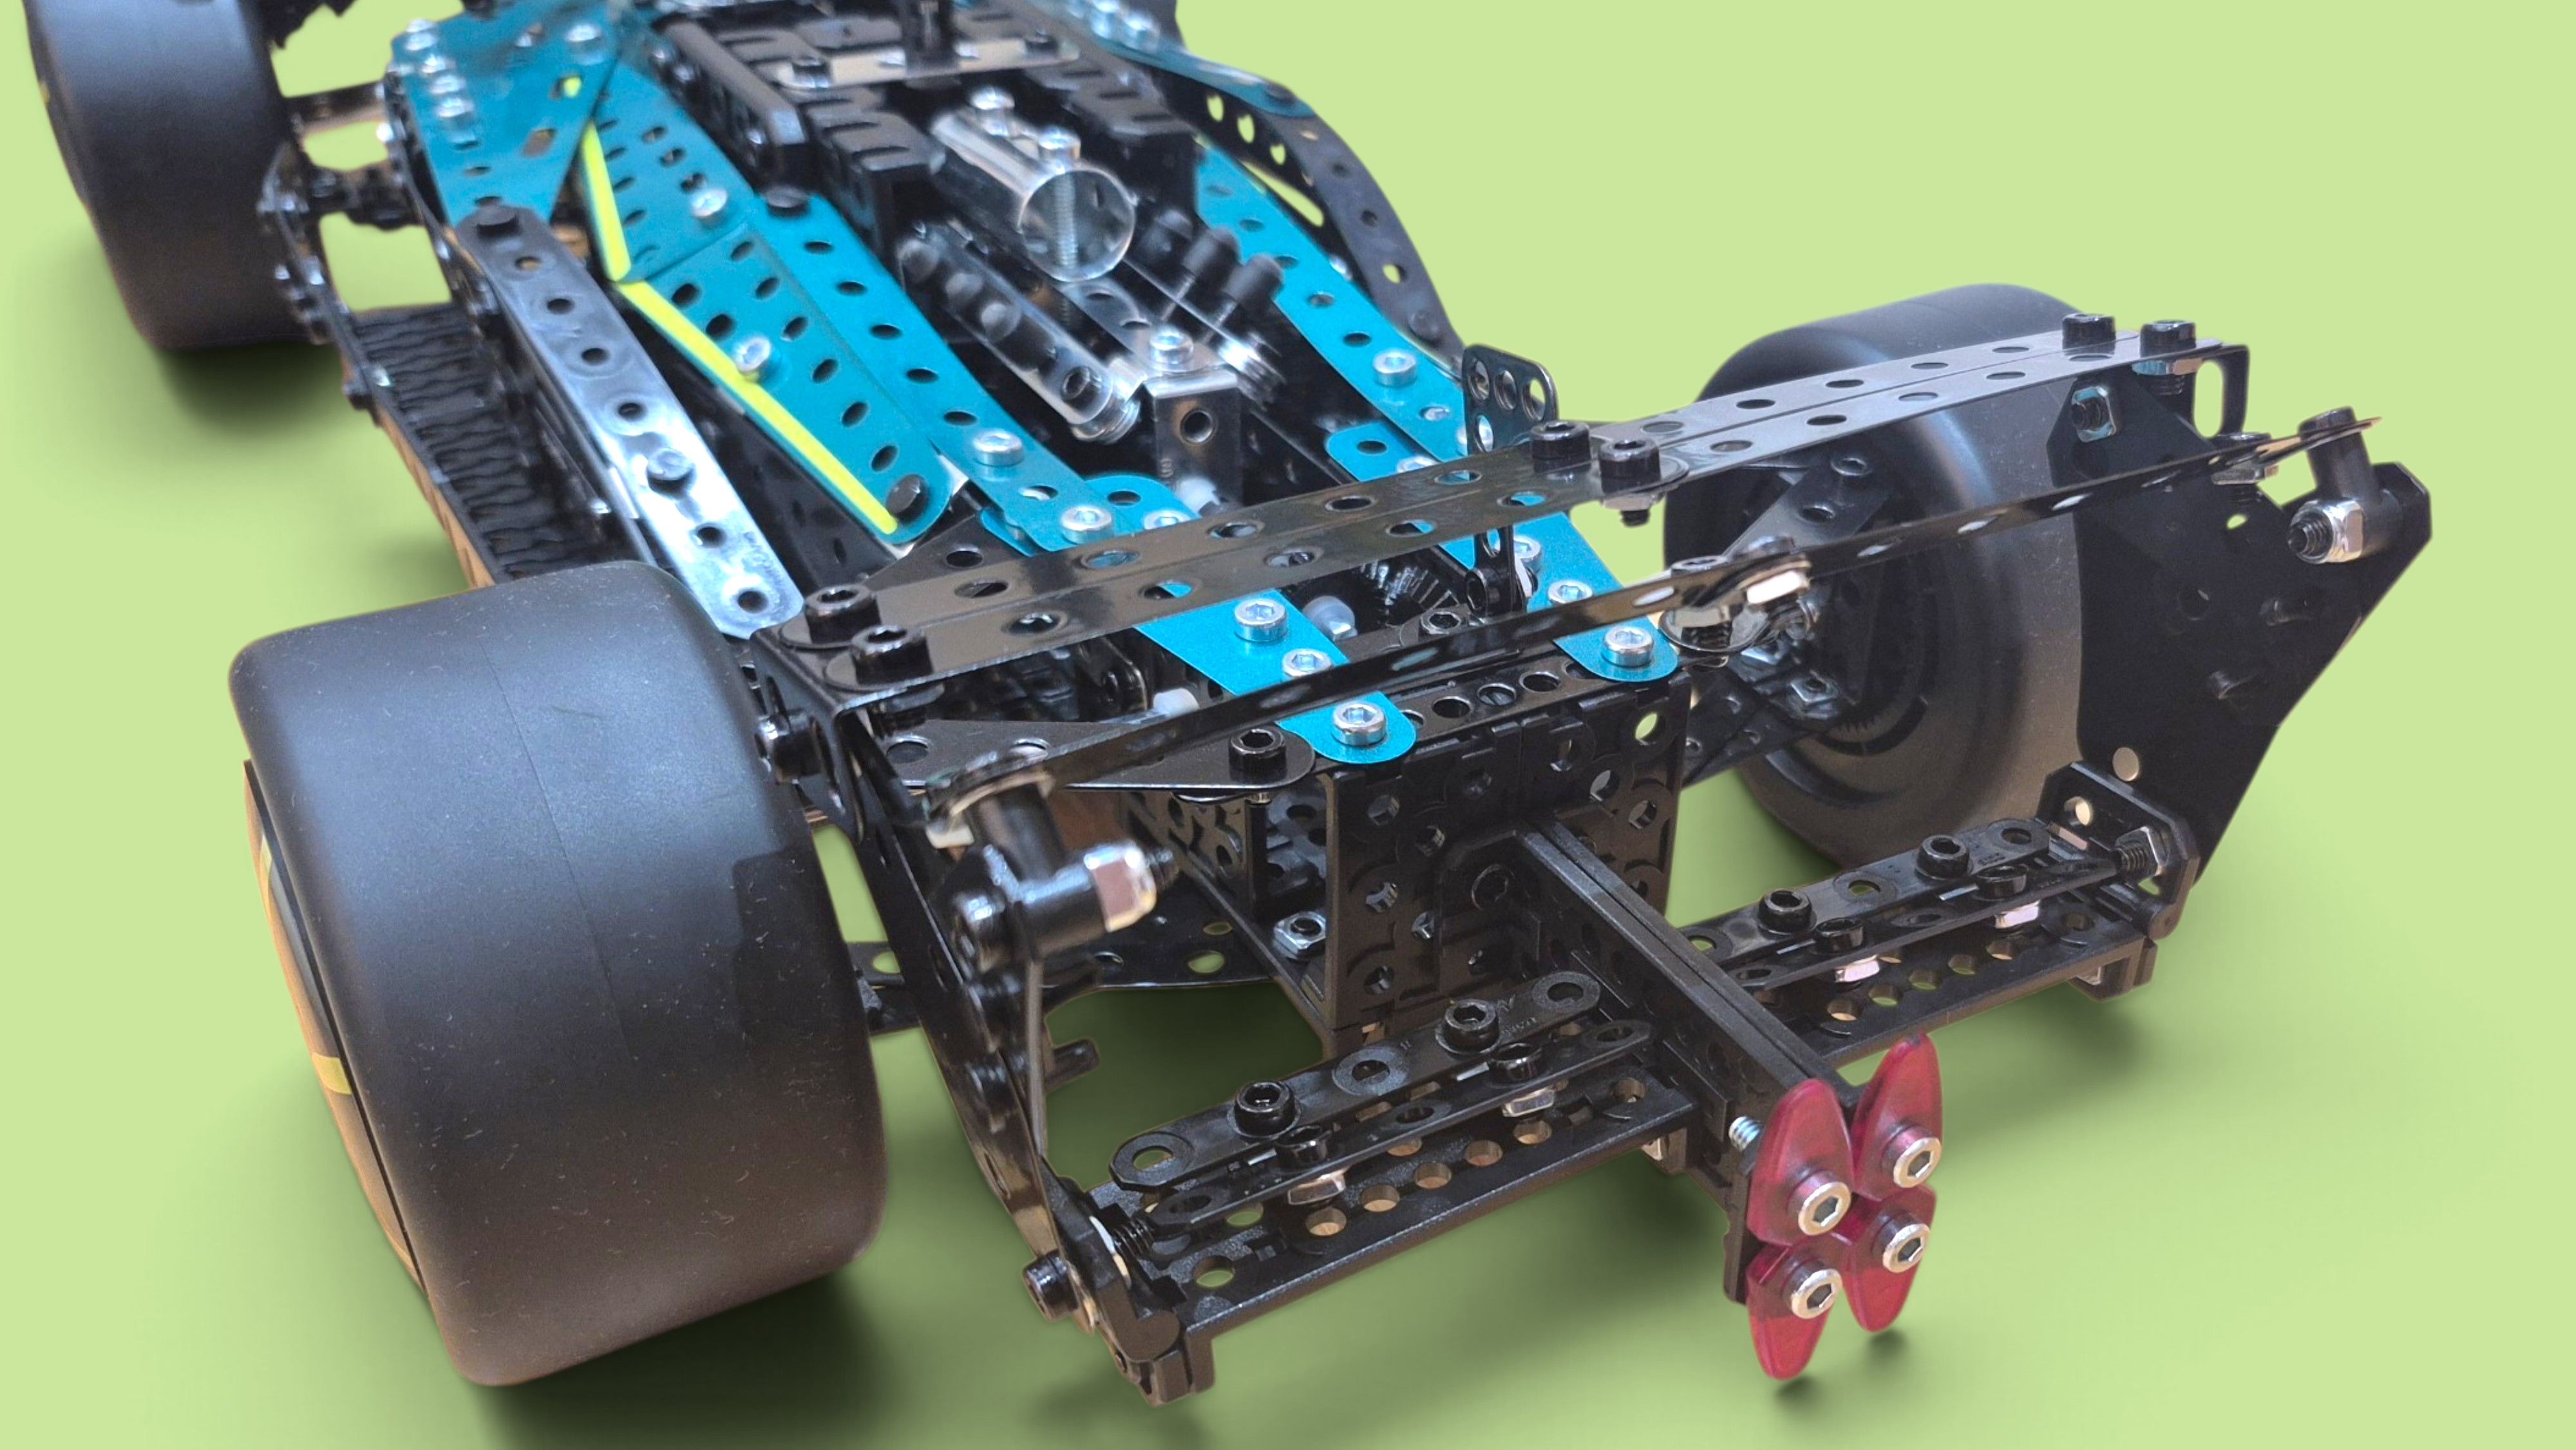
• Increases Top Speed: The reduction in drag gives the car a straight-line speed advantage of roughly 10 to 20 km/h (4 to 9 mph).
• Usage Rules: Historically used from 2011 to 2025, a chasing driver could activate DRS inside designated track zones if they were within 1 second of the car ahead at a detection point.
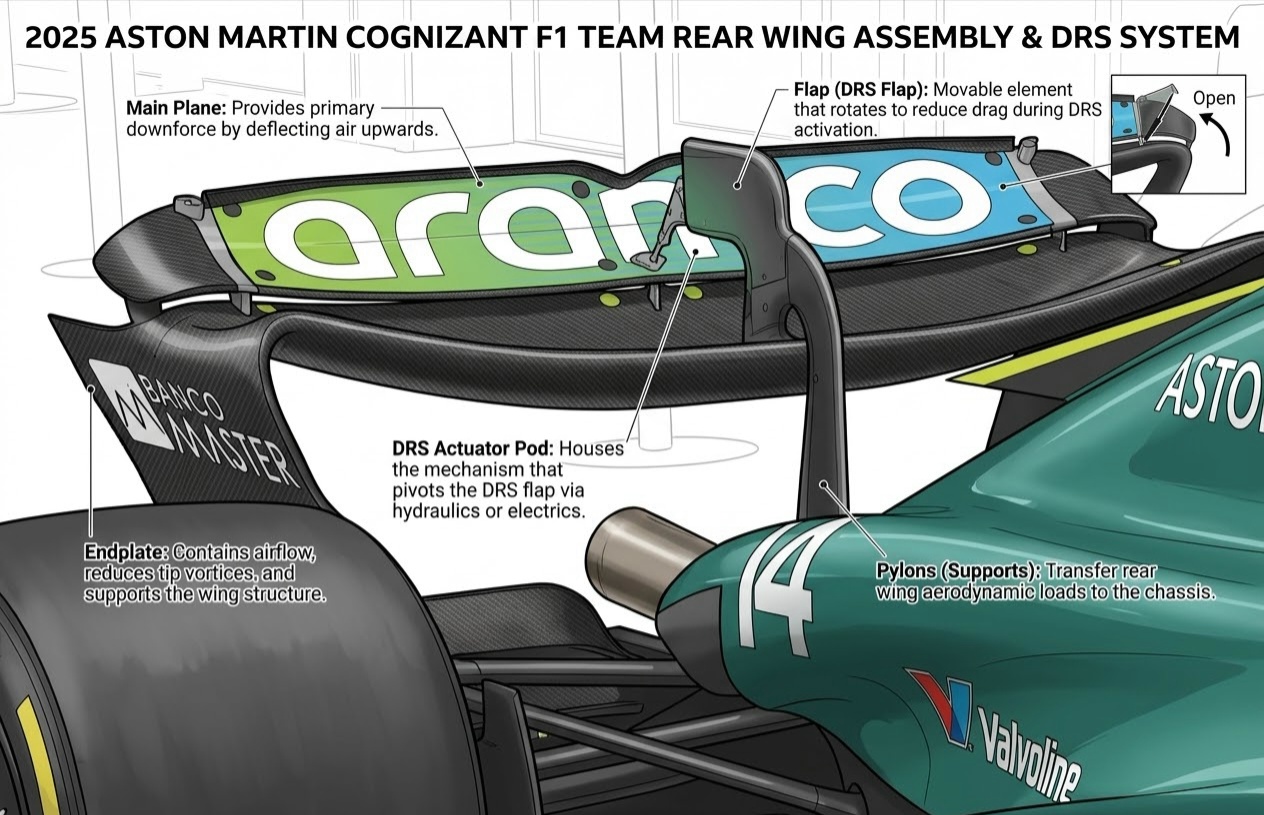 • Automatic Deactivation: The flap snaps shut the moment the driver touches the brake pedal or releases the throttle, immediately restoring cornering downforce. (Note: In modern regulations starting in 2026, traditional DRS has evolved into broader active aerodynamics across the front and rear wings).
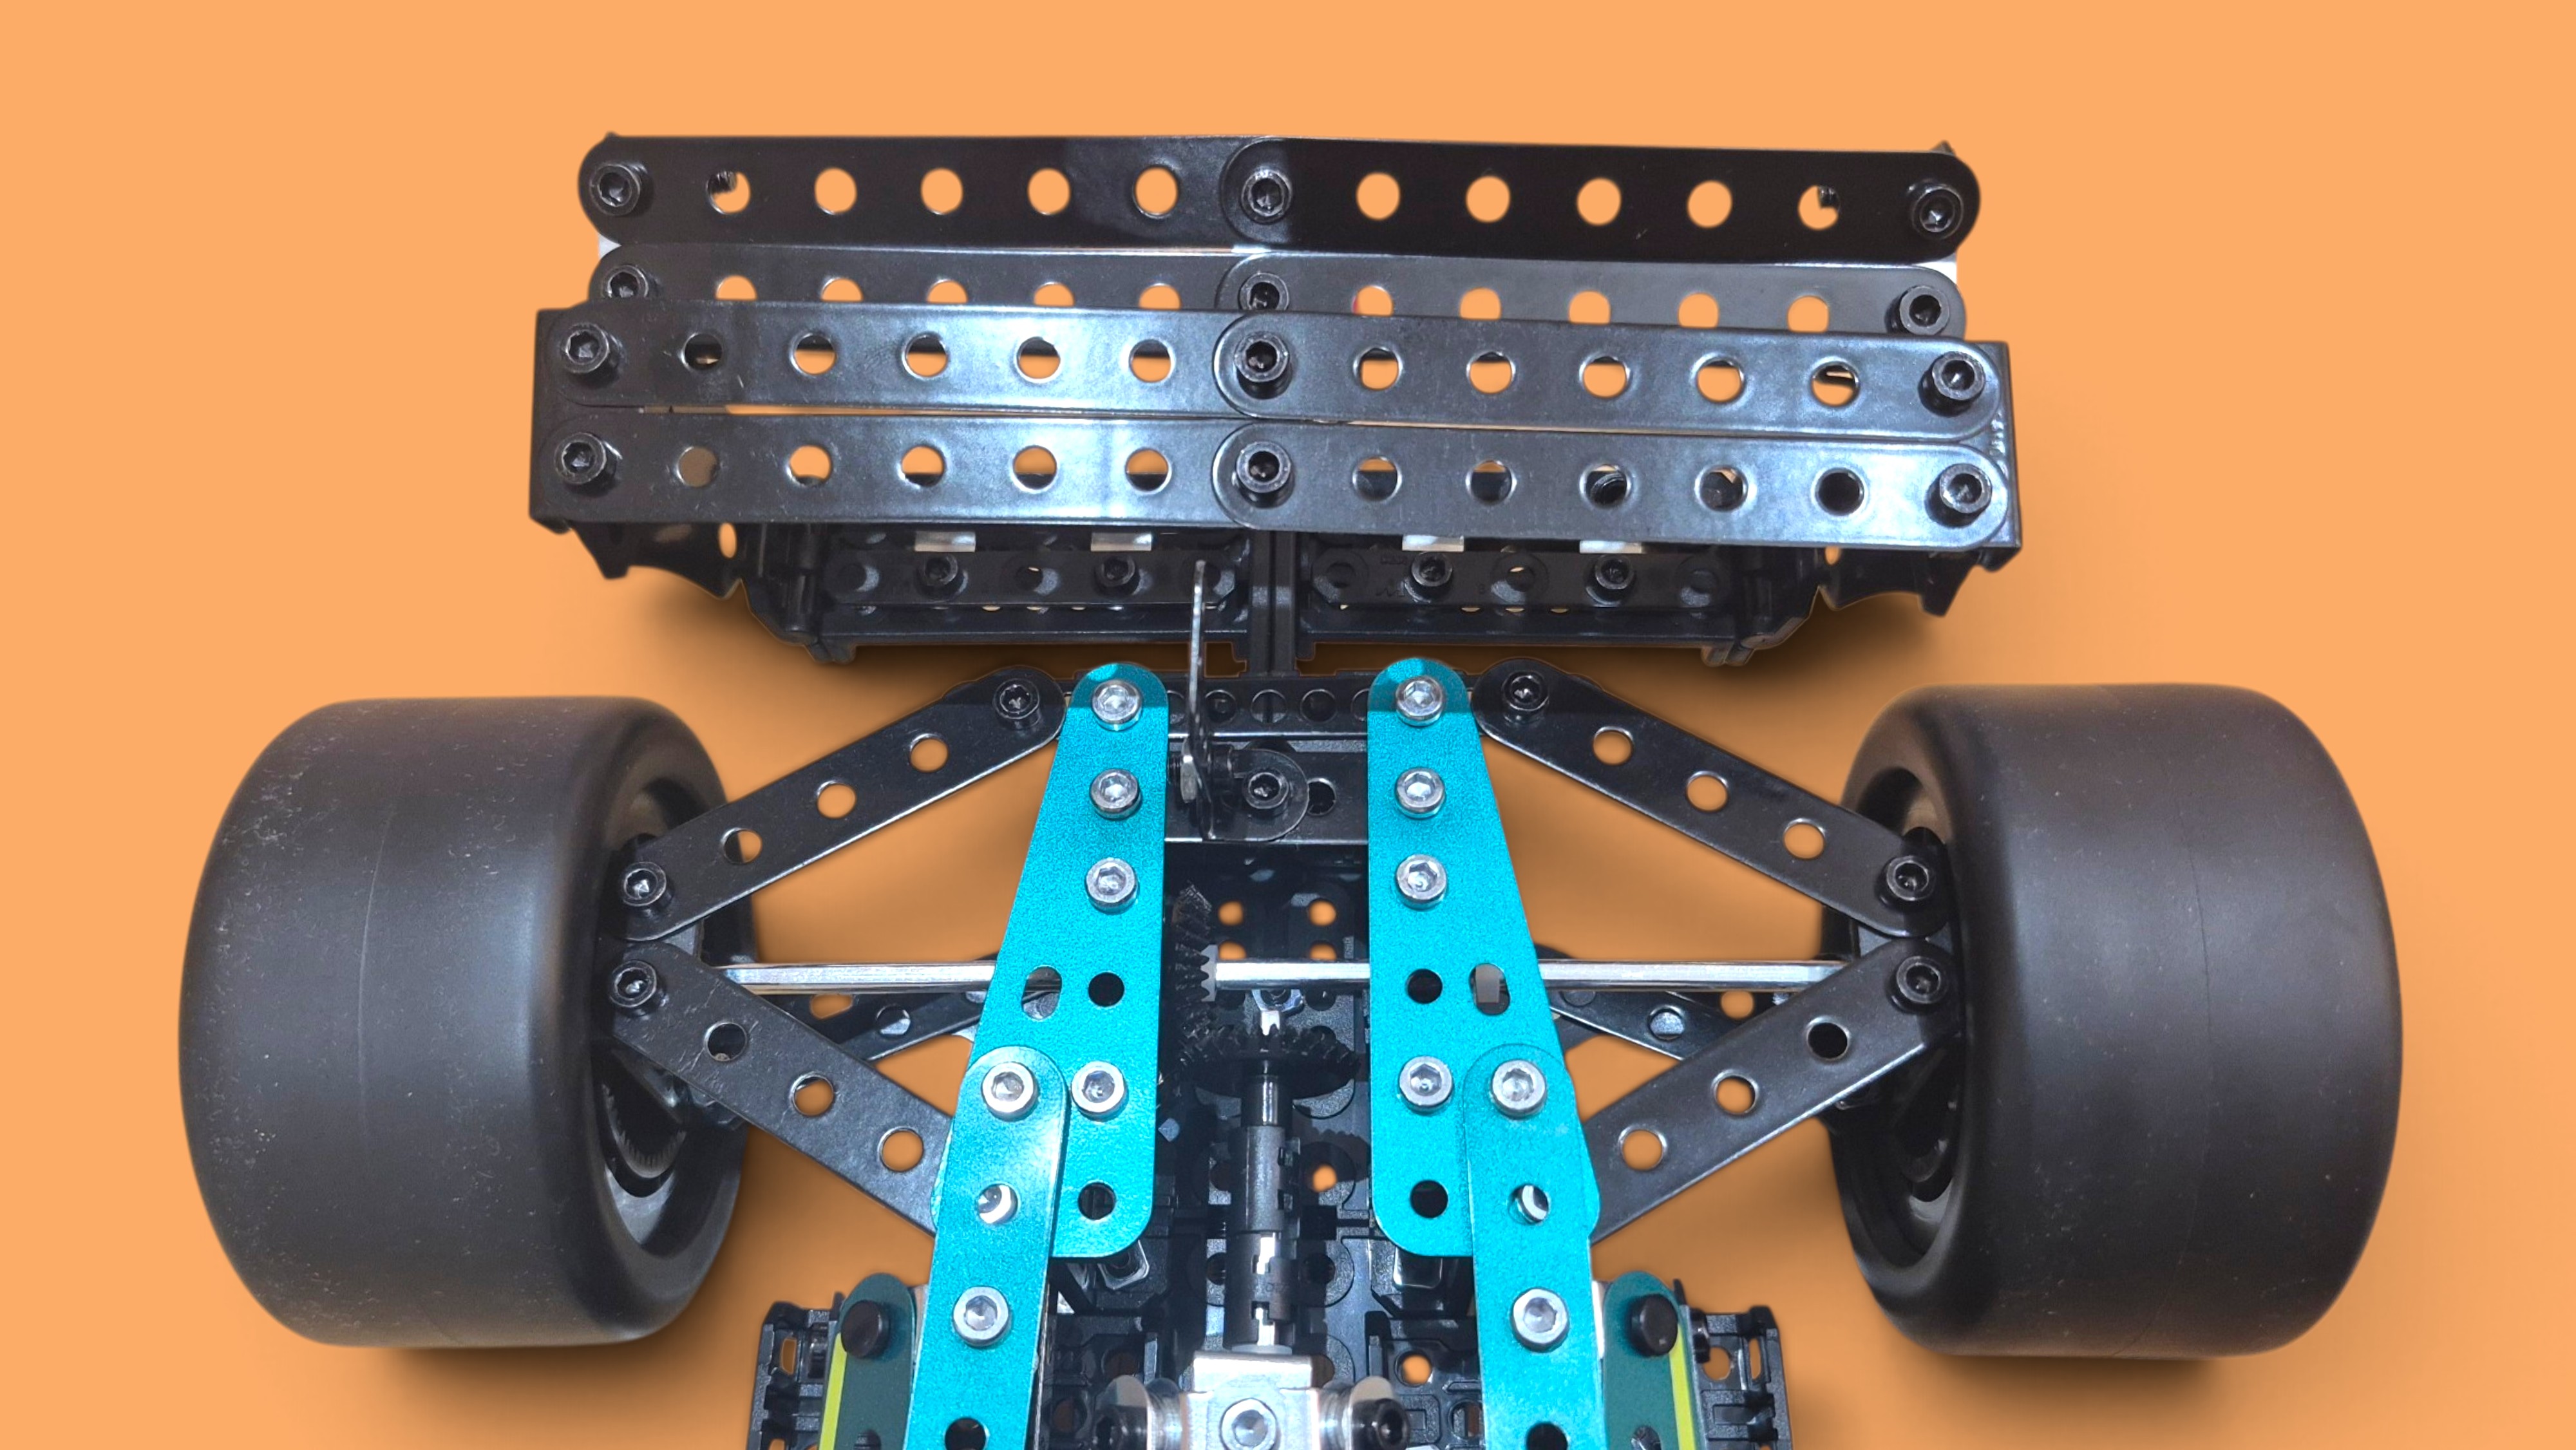
As you are assembling the rear wing, do not be tempted to over tighten the bolts as the metal strips are quite thin and flex very easily.
The very final step is to stick all the decals to the car in the correct order. Start by removing any fine dust using an air duster. For the stickers to form a good adhesion, we used some rubbing alcohol and some cotton buds to wipe the panels where all the stickers will be placed.
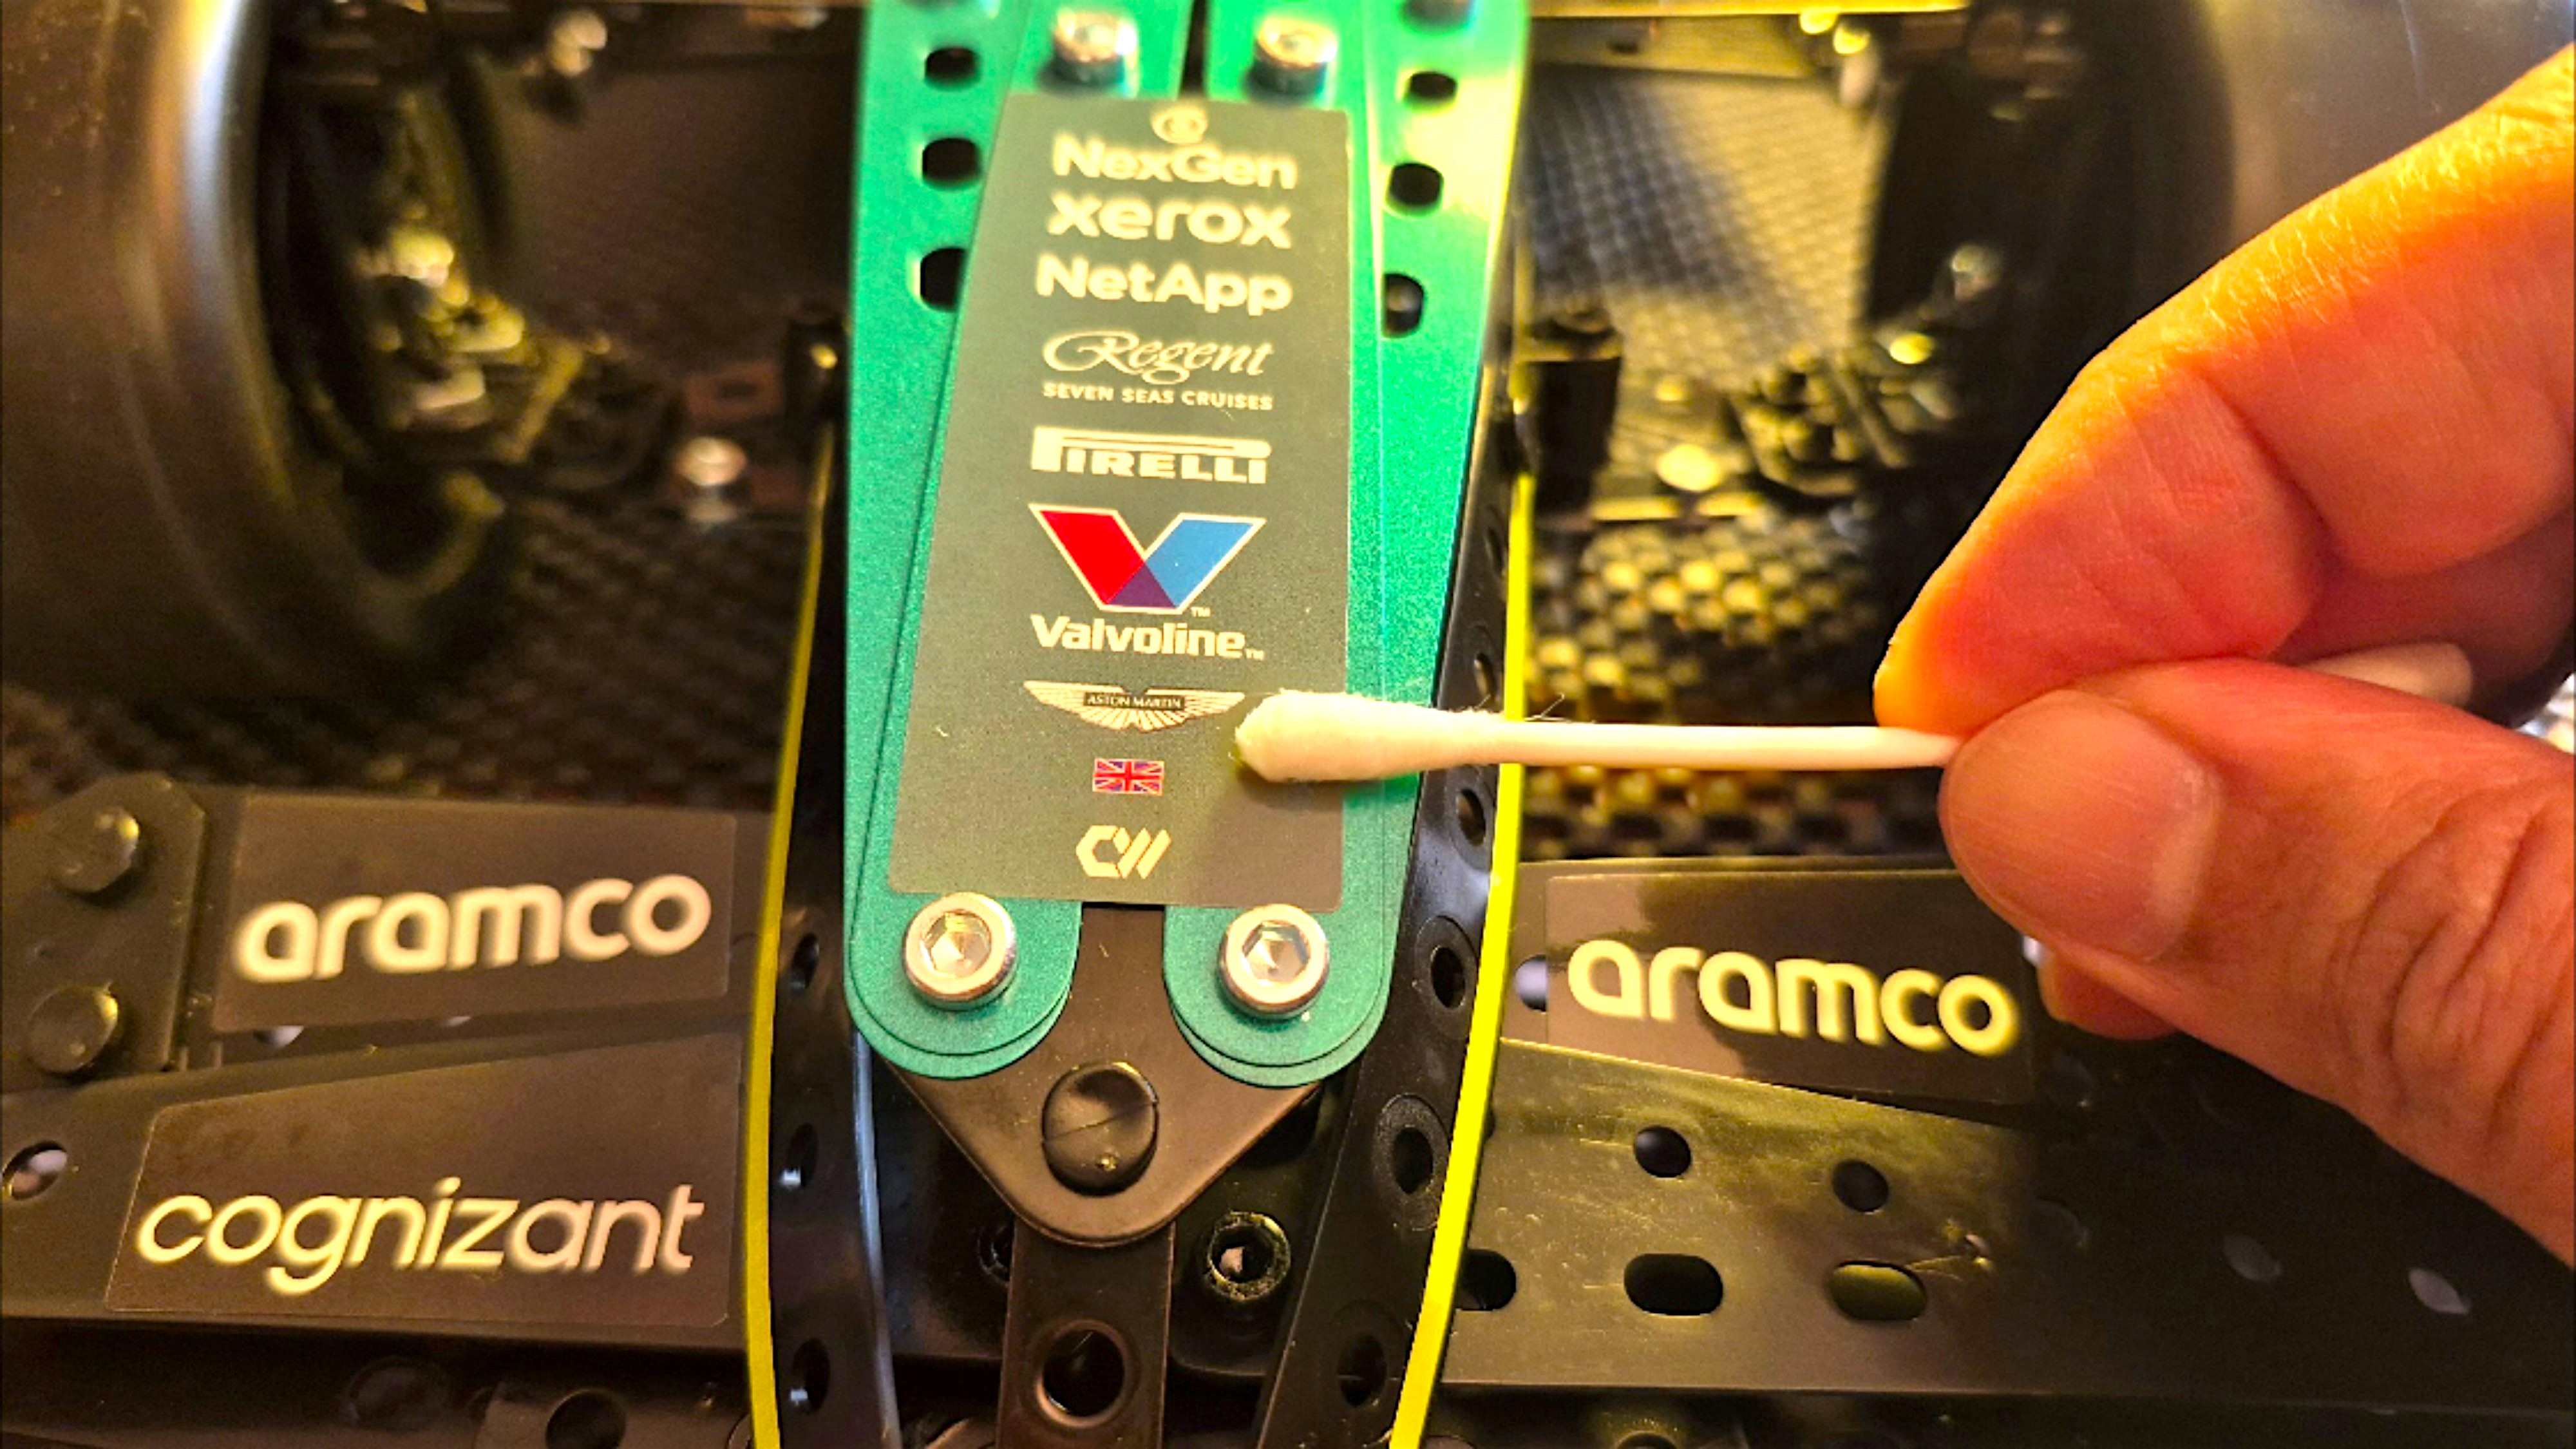
Allow the rubbing alcohol to dry completely and stick all the decals following the correct order as instructed in the manual. Use a set of tweezers and a dry cotton bud to help you place the decals in the correct place and use a clean dry cotton bud to apply gentle pressure to smooth down the decal driving out any air bubbles.
Formula 1 cars have decals and stickers primarily for multi-million-pound sponsorships and commercial partnerships. Because F1 is one of the most expensive sports in the world—with teams spending hundreds of millions of pounds or dollars annually—selling visual real estate on the car’s bodywork is a team’s primary source of revenue.
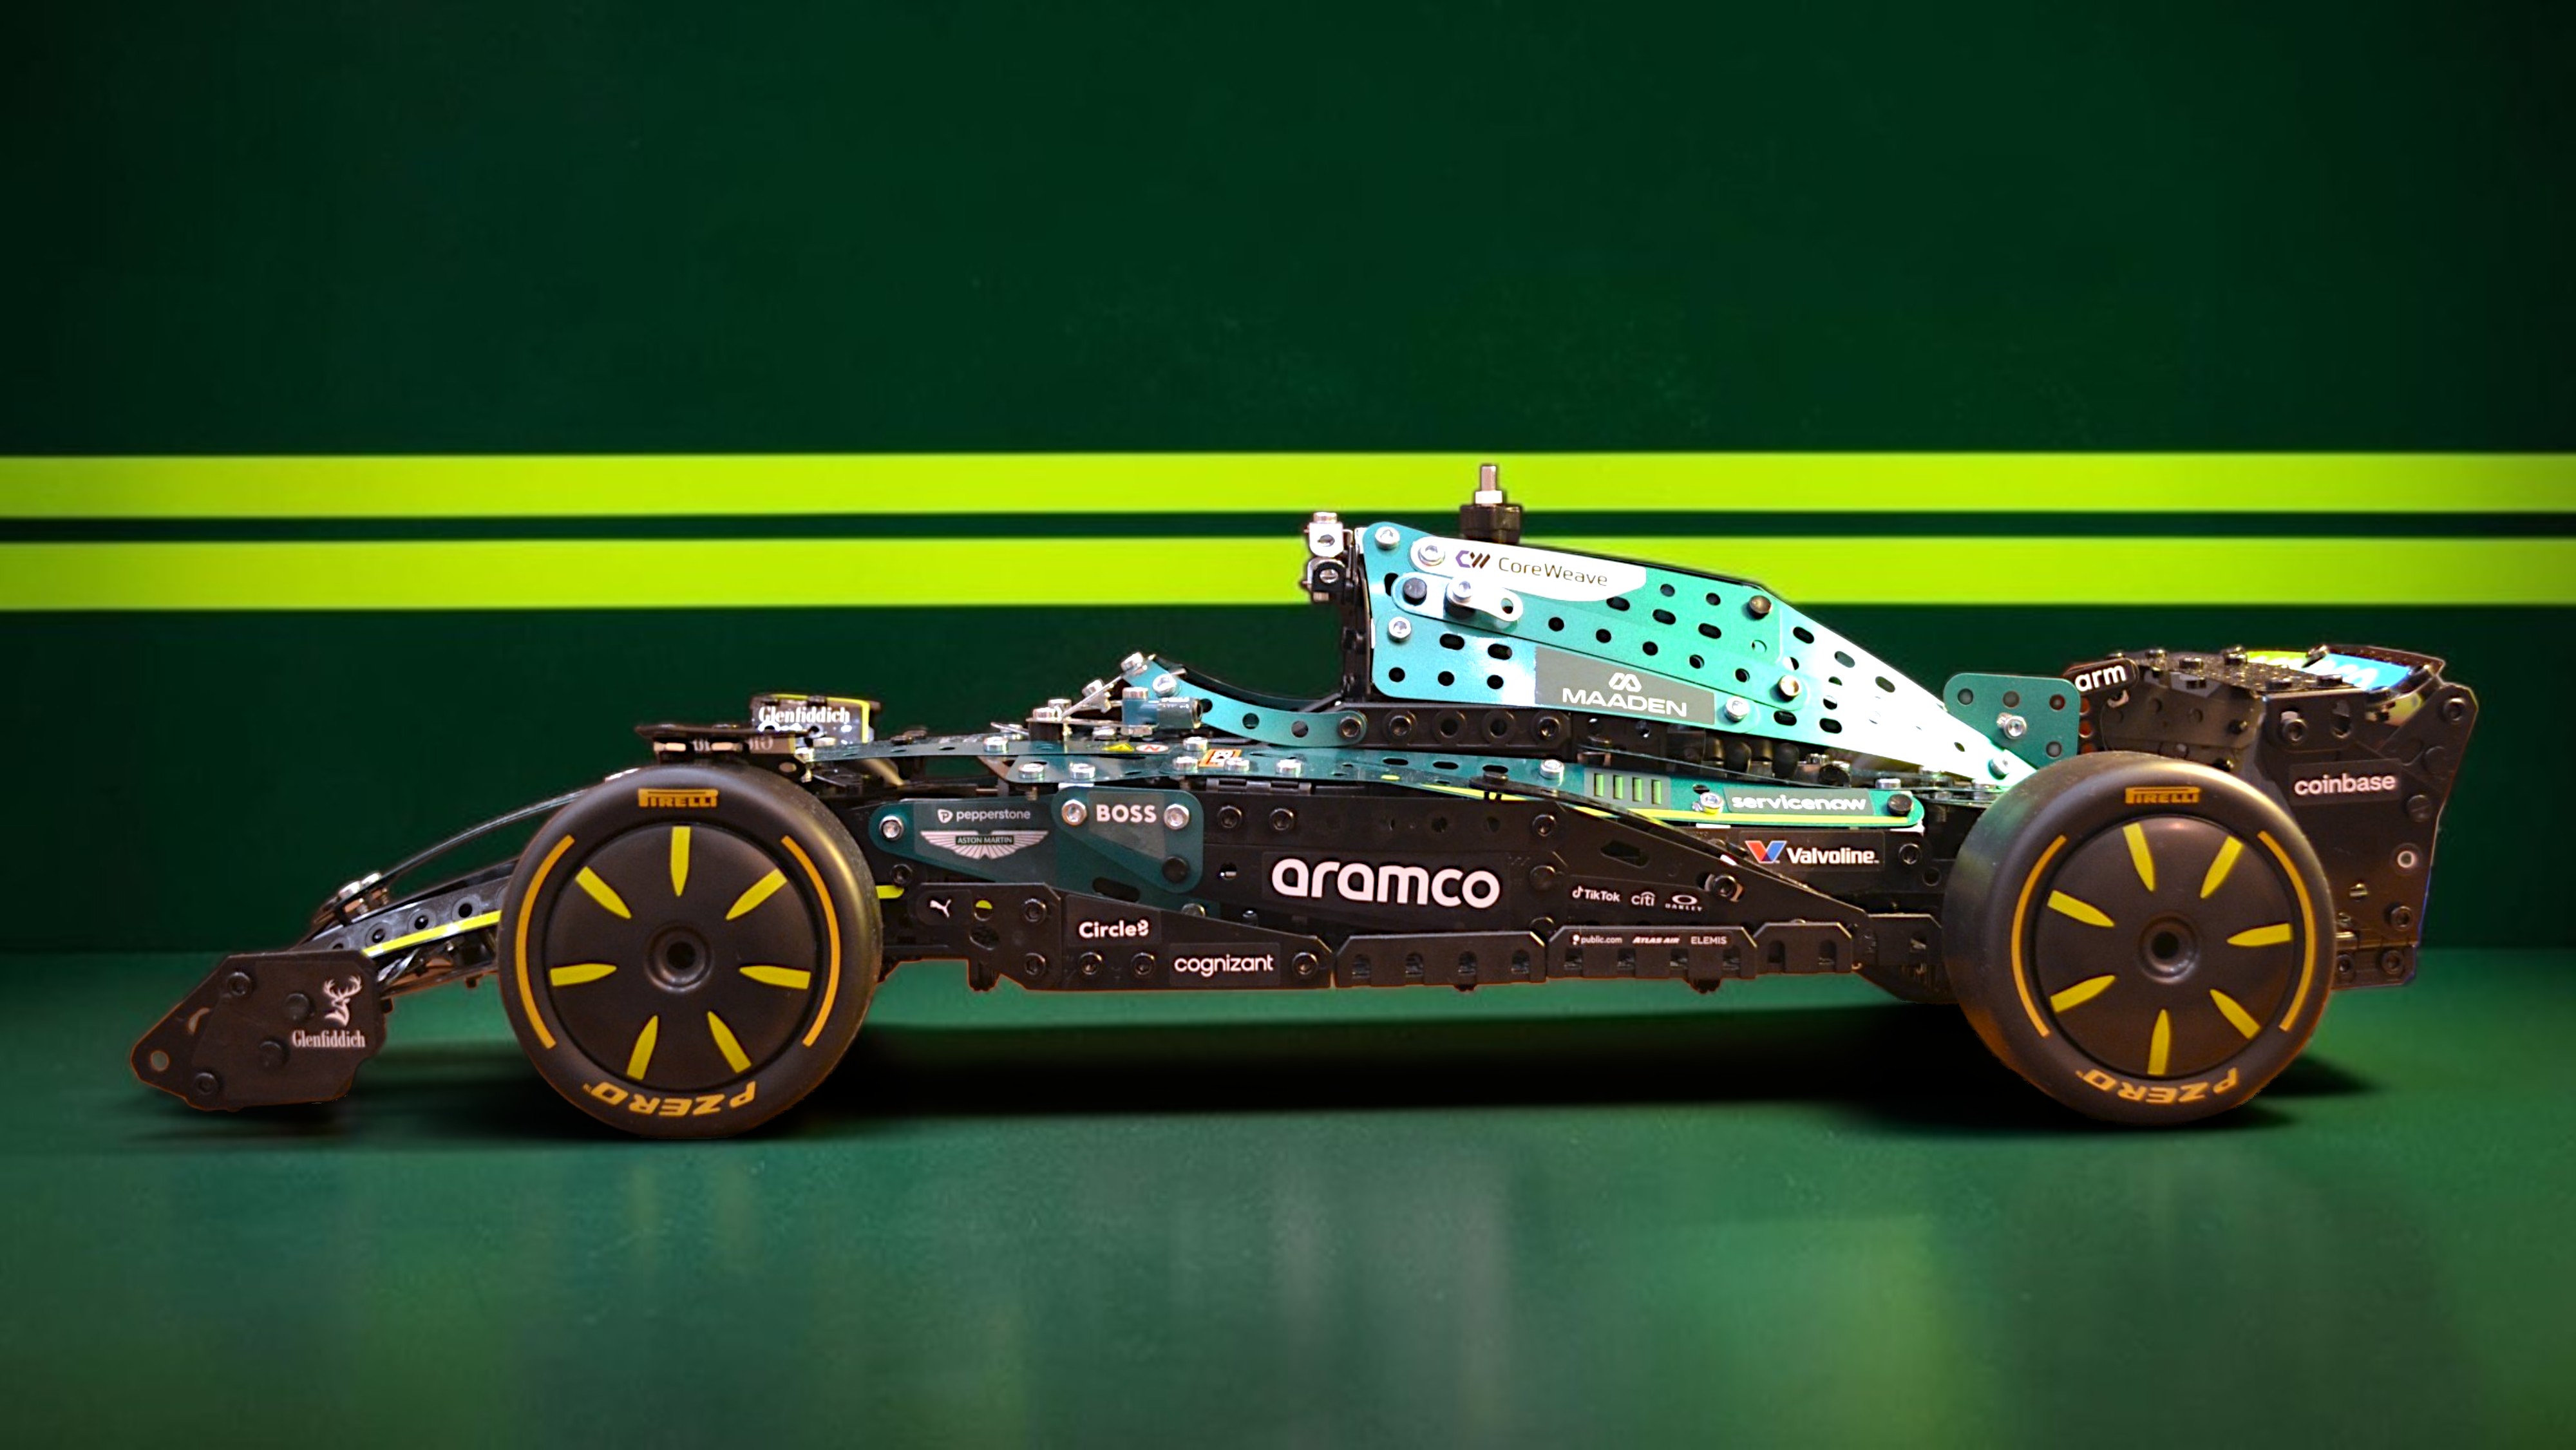 Weight and Performance
While the designs look like painted livery from a distance, they are almost exclusively high-tech vinyl stickers or decals for performance reasons:
• Shaving Grams: Traditional automotive paint is heavy. A full, multi-layered paint job can add several kilograms to a car. In a sport where teams fight to hit the minimum weight limit, stickers are micro-thin and dramatically lighter.
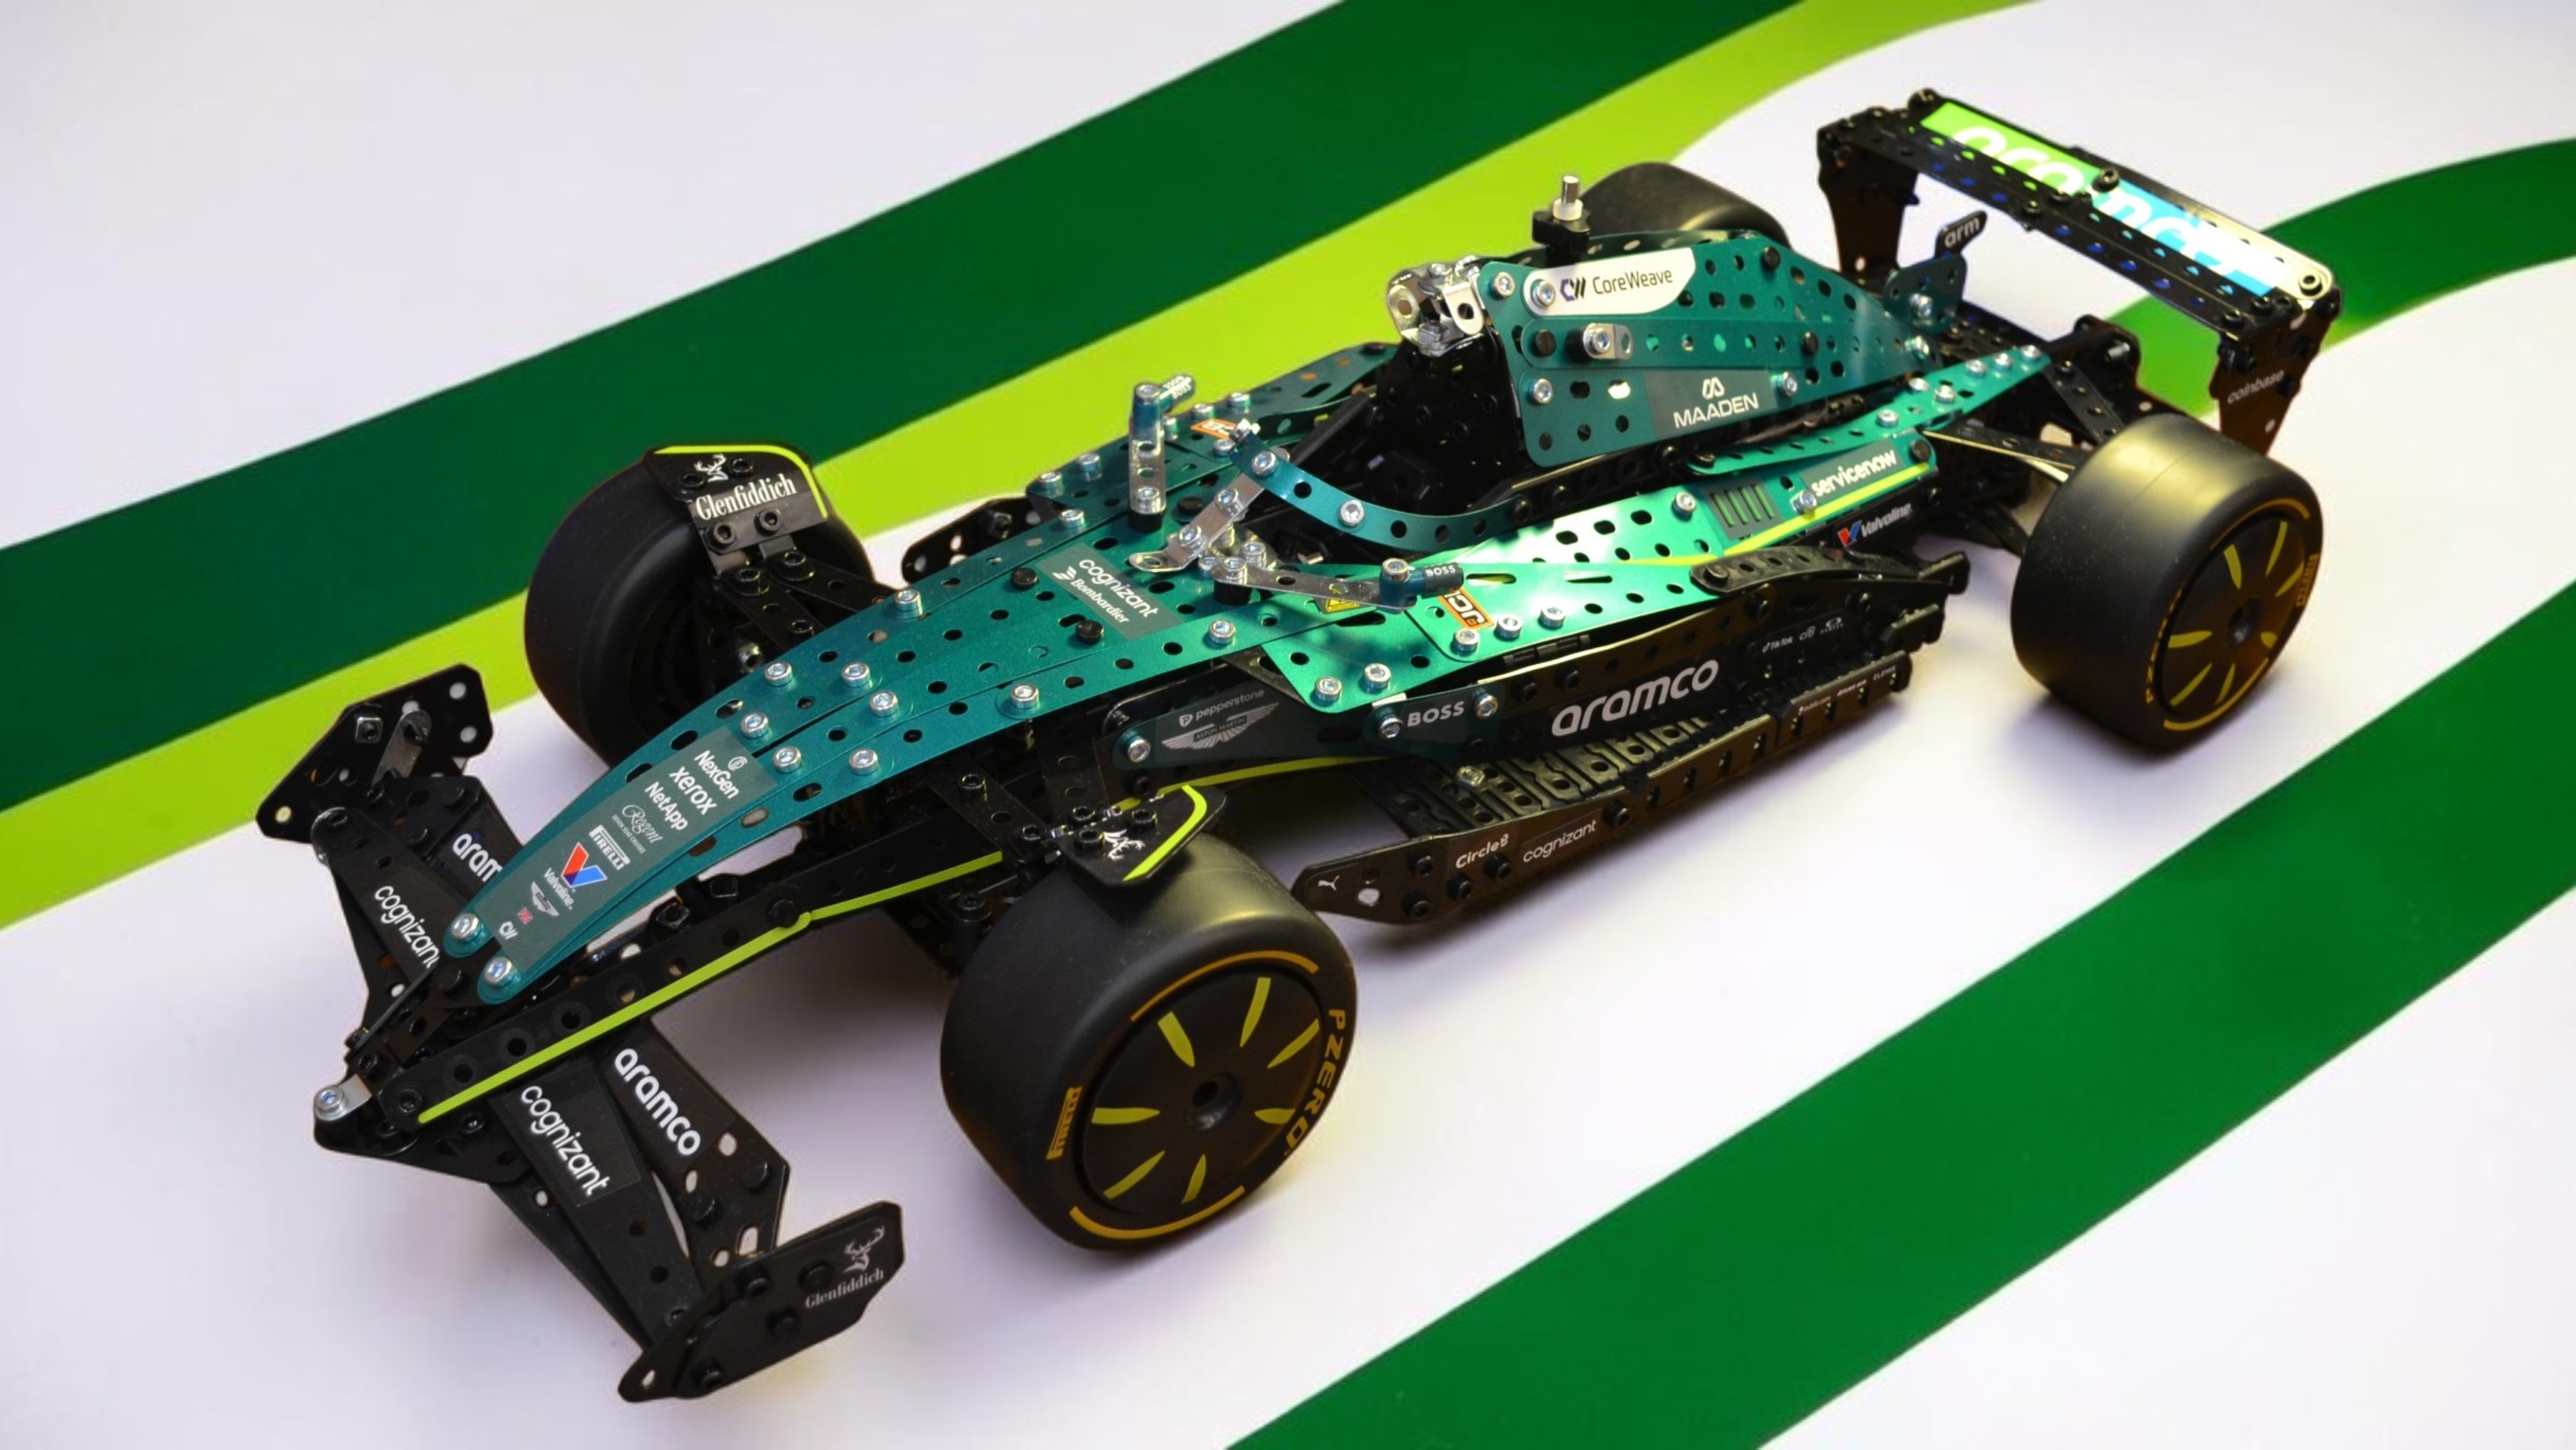
• Aerodynamic Smoothness: Modern F1 decals are mathematically engineered to be incredibly thin (often just a few microns thick) so they do not disrupt the boundary layer of airflow over the carbon fibre bodywork.
• Easy Replacement: F1 cars frequently crash or suffer damage from track debris. If a front wing or sidepod needs to be replaced mid-weekend, mechanics can instantly apply a fresh set of pre-cut decals to the new carbon fibre part rather than waiting for paint to dry.
This Meccano set has been an absolute joy to construct and a fantastic aid for learning about aerodynamics, racing car engineering and everything else that goes into a Formula 1 car. We hope you enjoyed our workshop manual and if you decide to buy and build this Meccano set, why not follow along as you build your project and let us know how you got on via our Twitter/X page @FreeCarMag1.
Take a look at our final studio photoshoot of the car here
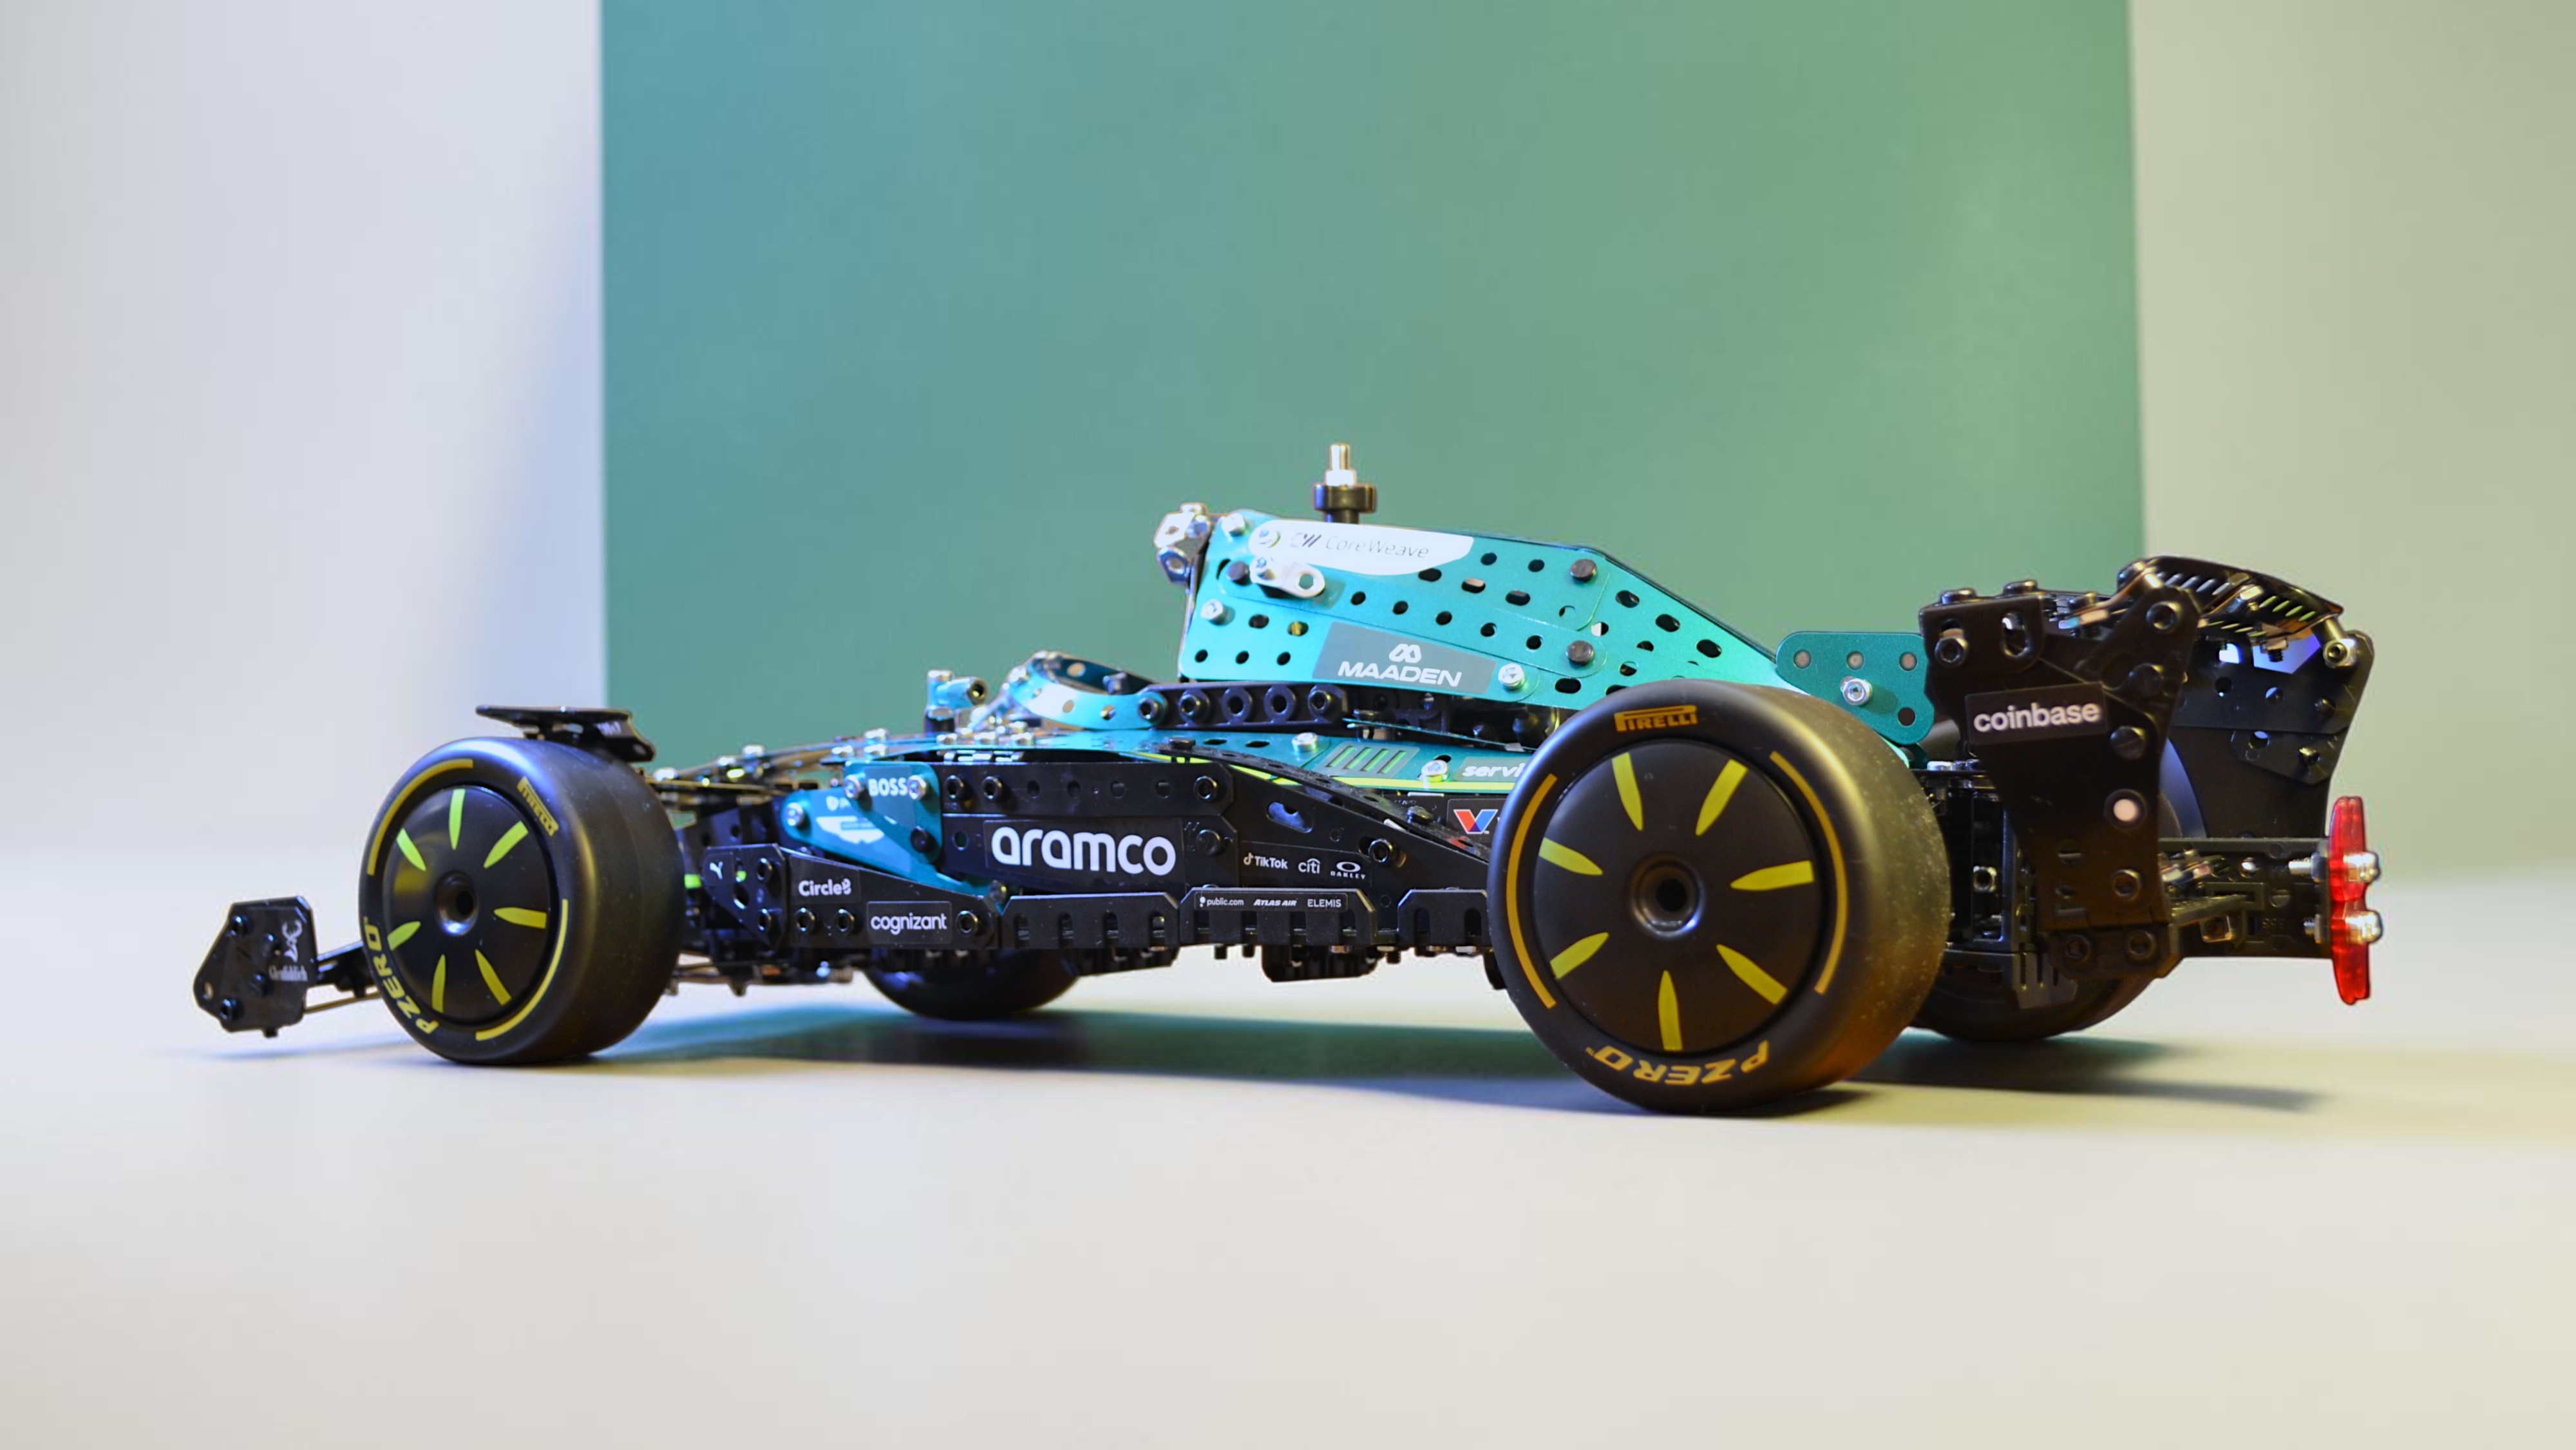
Happy Meccano building!
“You can purchase your set here from the Entertainer - Britain’s Toy Shop.”
Find out about Aston Martin in F1